
At first glance, this dessert could pass for a small log gathered from a snowy woodland. The textured bark, tiny mushrooms, and light coating of sugar all create a wintry effect.
Cut the cake, though, and the illusion gives way to a tender chocolate sponge wrapped around a light, sweet cream filling. It may look rustic on the outside, but every slice is soft and rich.
This is a Yule Log Cake, or Bûche de Noël—a traditional Christmas dessert that combines chocolate, nostalgia, and a dramatic presentation.
This guide walks you through the complete process: baking a flexible chocolate sponge, preparing an airy filling, and finishing the cake with meringue mushrooms and sugared cranberries.
When it is finished, you will have a holiday centerpiece that looks wonderfully festive and tastes just as special.
What Is a Yule Log Cake & Why You’ll Love It
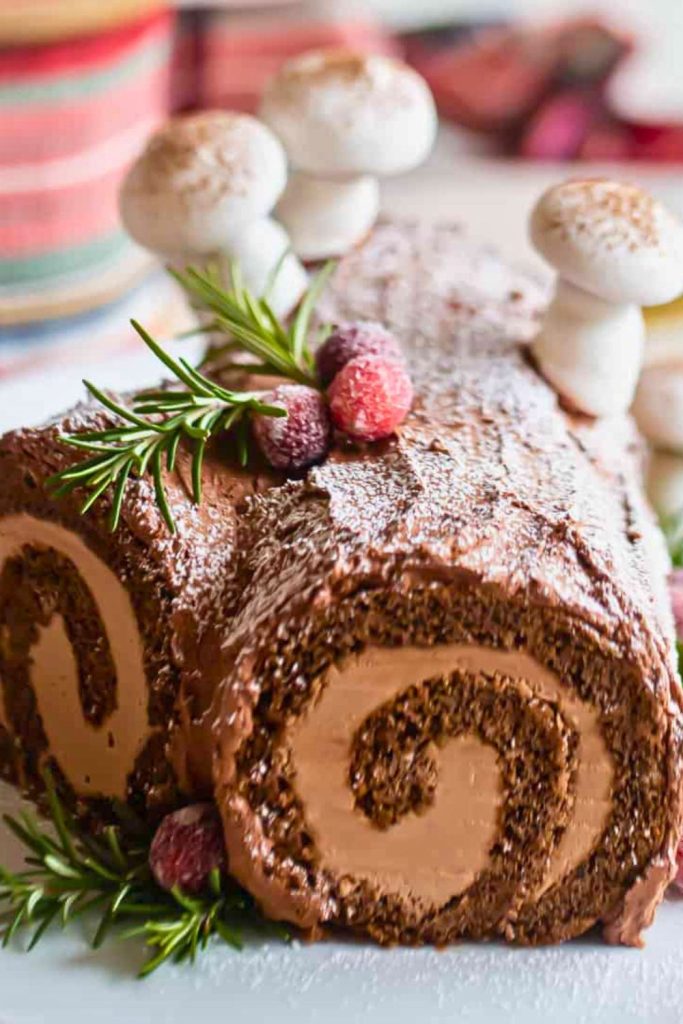
A Yule Log cake, also called Bûche de Noël, is a classic rolled holiday cake decorated to resemble a snow-covered piece of wood.
The dessert starts with a light chocolate sponge, which is rolled around a creamy filling and coated with smooth chocolate frosting.
Meringue mushrooms, sugared cranberries, and rosemary sprigs transform the frosted roll into a miniature winter-forest scene.
It feels nostalgic and cozy, yet the finished cake is elegant enough to anchor a holiday dessert table.
There are several reasons this traditional cake remains a favorite:
- The chocolate sponge is tender, airy, and not overly heavy.
- Soft whipped cream gives the cake a cool, creamy contrast.
- Its woodland decorations make the finished dessert an impressive centerpiece.
- Preparing the different components can be a fun holiday project to share with family or friends.
- The combination of chocolate, cream, and festive decoration makes every slice feel celebratory.
Yule Log Ingredients

| Component | Ingredient | Amount |
|---|---|---|
| Sponge | All-purpose flour | 2/3 cup (80g) |
| Unsweetened cocoa powder | 1/3 cup (30g) | |
| Salt | 1/2 teaspoon | |
| Large eggs, separated | 7 | |
| Granulated sugar for yolks | 3/4 cup (150g) | |
| Granulated sugar for whites | 1/4 cup (50g) | |
| Whipped Filling | Heavy whipping cream | 1 1/4 cups (300mL) |
| Powdered sugar | 1/3 cup | |
| Vanilla extract | 1/2 teaspoon | |
| Chocolate Frosting | Unsalted butter, softened | 1 1/4 cups (284g) |
| Cocoa powder | 8 tablespoons (48g) | |
| Confectioners’ sugar | 2 3/4 cups (340g) | |
| Salt | 1/4 teaspoon | |
| Cream | 2–3 tablespoons | |
| Meringue Mushrooms | Egg whites | 2 |
| Superfine sugar | 6 tablespoons | |
| Cream of tartar | 1/8 teaspoon | |
| Cocoa powder | As needed for dusting | |
| Semisweet chocolate, melted | 2 ounces (56g) | |
| Optional Garnish | Fresh rosemary, cranberries, and simple syrup | As needed |
How to Make a Yule Log Cake (Bûche de Noël)
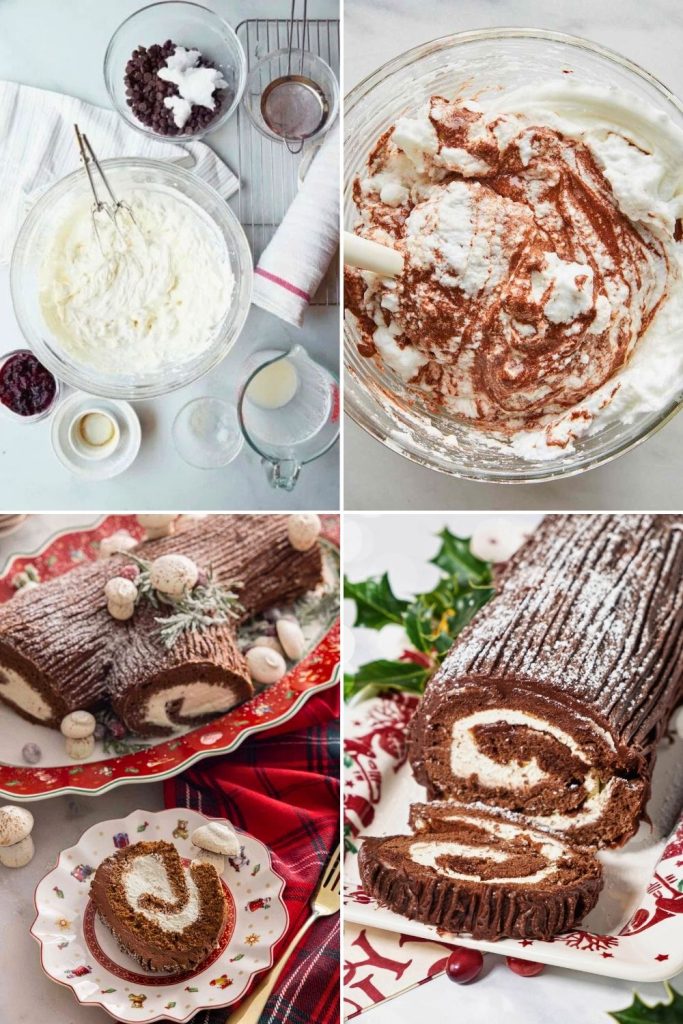
A Yule Log may look elaborate, but the work is much easier when you divide it into a series of manageable steps.
Gather the ingredients and equipment, then begin with the sponge.
Step 1: Prepare the Cake Batter
A successful Yule Log begins with a soft, flexible sponge. This traditional version does not rely on baking powder or baking soda.
Instead, properly whipped eggs provide the lift. The trapped air gives the cake a light texture that bends and rolls without feeling dense.
Begin with the oven and pan:
- Heat the oven to 350°F (175°C).
- Line a half-sheet pan with parchment paper and keep it ready.
Separate the eggs:
Separate 7 large eggs, placing the yolks and whites in different bowls. The yolks enrich the sponge, while the whipped whites supply its volume.
Sift the dry mixture:
Into a medium bowl, sift the following ingredients:
- 2/3 cup all-purpose flour (80g)
- 1/3 cup unsweetened cocoa powder (30g)
- 1/2 teaspoon salt
Whisk the sifted ingredients briefly so they are evenly combined, then set the bowl aside.
Beat the yolks:
Add all 7 yolks to a stand-mixer bowl. Beat on medium speed for several minutes, until they look thick, velvety, and roughly doubled in volume.
Pour in 3/4 cup (150g) granulated sugar and keep beating until the mixture becomes pale, creamy, and light lemon-yellow. That change shows that the sugar is dissolving and air is building into the mixture.
Whip the whites:
In a completely clean bowl, beat the 7 egg whites on medium speed until foamy. Gradually add 1/4 cup (50g) granulated sugar, then continue until the whites form stiff, glossy peaks. This meringue provides the sponge’s natural lift.
Bring the mixtures together:
Add the dry ingredients to the yolk mixture and mix on low only until no dry streaks remain. Scrape the bowl so the batter is evenly blended.
Fold in the whipped whites in three additions:
- Use the first third to loosen the chocolate batter; a few lumps at this stage are normal.
- Fold in the second third to make the mixture lighter and smoother.
- Add the final third gently, stopping when the batter has an even, mousse-like texture.
Fold by scraping underneath the batter, lifting it, and turning it over. Avoid stirring vigorously, which would knock out the air you worked into the eggs.
Step 2: Bake the Sponge
Transfer the batter to the lined baking sheet. Gently spread it into an even layer with an offset spatula, making sure the corners are filled because the batter will not level itself.
Bake at 350°F for about 20 minutes. The center should spring back after a light touch. Take care not to overbake the sponge, since a dry cake is more likely to crack when rolled.
Step 3: Roll the Cake
Shaping the sponge while it is warm helps create the signature spiral and reduces the chance of cracking later.
Prepare the rolling towel:
While the cake is in the oven, spread out a clean, lint-free kitchen towel. Coat it generously with powdered sugar so the warm sponge will not stick.
As soon as the cake is baked:
Take it from the oven and immediately invert it onto the prepared towel. Carefully peel away the parchment paper.
Form the first roll:
Starting at a long edge, roll the warm cake together with the towel. Keep the cylinder snug but not compressed; the goal is to teach the sponge its shape. Set the wrapped roll on a wire rack and cool it for 1 hour.
Step 4: Make the Meringue Mushrooms
These small meringue mushrooms give the cake its woodland character. They bake up dry and crisp and make an especially charming finishing detail.
Prepare the meringue:
- Place 2 egg whites in a clean, grease-free bowl.
- Add 1/8 teaspoon cream of tartar.
Beat on medium-high until the whites look frothy. Add 6 tablespoons superfine sugar slowly, one spoonful at a time, and continue beating until the meringue is thick, shiny, and holds stiff peaks.
Tip: A hand mixer often works best for this small quantity because a stand-mixer whisk may not reach two egg whites evenly.
Shape the caps and stems:
Spoon the meringue into a piping bag fitted with a round 1A tip.
- For stems, pipe short upright columns onto a parchment-lined tray.
- For caps, hold the tip just above the parchment and squeeze to make a rounded dome; stop squeezing, then lift with a small swirl.
Smooth, dust, and bake:
Flatten any sharp tips with a damp fingertip, then sift a little cocoa over the pieces for a natural speckled appearance.
Bake at 200°F (95°C) for 2 hours, until the meringues feel light, crisp, and dry.
Assemble the mushrooms:
After cooling, trim the tops of the stems flat with scissors. Melt 2 ounces semisweet chocolate, dab a little on each cap, and attach it to a stem.
Step 5: Whip the Filling
The whipped-cream filling lightens the rich chocolate sponge and buttercream.
For the best volume, begin with a chilled bowl, chilled whisk, and very cold cream.
Add these ingredients to the mixing bowl:
- 1 1/4 cups heavy whipping cream (300mL)
- 1/3 cup powdered sugar
- 1/2 teaspoon vanilla extract
Whip until soft peaks form. To avoid overmixing, stop the machine just before the cream is ready and finish with a hand whisk, checking the texture as you go.
Step 6: Fill and Roll the Cake
Once the sponge is cool and the cream is whipped, you can fill and shape the finished roll.
Carefully unroll the cake and remove the towel. Spread the whipped cream in an even layer, leaving about a 1-inch border along the far edge so the filling has room to move.
Roll the sponge again without the towel, working gently but keeping the cylinder secure. Place it seam-side down on a parchment-lined tray and refrigerate for 30 minutes to firm.
Step 7: Make the Chocolate Frosting
This chocolate buttercream spreads easily and delivers a deep cocoa flavor without making the cake excessively sweet.
In a large mixing bowl, add:
- 1 1/4 cups softened butter (284g)
- 8 tablespoons cocoa powder (48g)
Beat the butter and cocoa together until the mixture is creamy and uniform.
Gradually mix in:
- 2 3/4 cups confectioners’ sugar (340g)
- 1/4 teaspoon salt
Mix on low speed until incorporated. Add 2 to 3 tablespoons cream, a little at a time, until the frosting becomes smooth and easy to spread. Scrape down the bowl as needed; the finished buttercream should be silky rather than stiff.
Step 8: Decorate Like a Pro
Trim the roll and form a branch:
With a sharp knife, remove a thin slice from each end to expose the spiral. Cut a roughly 3-inch piece from one end on the diagonal; this smaller section will become the branch.
Use a little frosting to secure the angled piece against the side of the main cake roll.
Cover the cake:
Spread buttercream over the entire roll and the attached branch. A perfectly smooth coat is unnecessary because the texture will help the cake resemble wood.
Add a bark pattern:
Pull the tines of a fork through the frosting to create rough bark lines. Curve a few strokes for a more organic pattern, wiping the fork clean whenever frosting collects on it.
Finish with a light dusting of powdered sugar to give the bark a freshly snowed-on look.
Step 9: Add the Final Decorations
Now turn the chocolate roll into a small festive woodland scene.
Prepare the sugared rosemary and cranberries:
- Dip fresh rosemary sprigs and cranberries into simple syrup.
- Allow the excess syrup to drip away for a minute, then coat each piece in granulated sugar.
- Leave the garnishes on parchment until the sugar coating dries and crystallizes.
Arrange the frosted cranberries and rosemary around the log as wintry decorations.
Position the meringue mushrooms:
Press a few mushrooms gently into the frosting, lean others near the branch, and vary their sizes and placement so the arrangement looks natural.
Give the cake one last finish:
Sift a delicate layer of powdered sugar over the cake, mushrooms, and garnishes just before presenting it.
Troubleshooting Guide

Rolled sponge cakes can be finicky, even when the directions are followed closely, and a first Yule Log may come with a few small surprises.
A cracked sponge or grainy cream does not have to ruin the dessert. Most common problems can be corrected or disguised with a simple adjustment.
Timing, temperature, and technique cause most issues. Rolling a cool sponge, overwhipping the cream, or folding the egg whites too aggressively can all affect the finished texture.
Use the troubleshooting table below to identify the likely cause and choose a practical fix.
| Problem | Likely Cause | What to Do |
|---|---|---|
| The sponge cracks while rolling | The cake was overbaked or allowed to cool before the first roll | Roll it while warm; cover small cracks with buttercream during decorating |
| The whipped cream looks grainy | The cream became warm or was beaten too long | Use chilled tools and stop at soft peaks; gently fold in a little fresh cream if needed |
| The sponge is dense | The whites were underwhipped or folded too roughly | Beat to stiff glossy peaks and fold with a light lifting motion |
| The frosting is dry or stiff | There is too much sugar or too little cream | Add cream one tablespoon at a time until spreadable |
| The meringue mushrooms deflate | The sugar went in too quickly or the oven was too hot | Add sugar gradually and dry the meringues at 200°F (95°C) |
5 Serving Tips
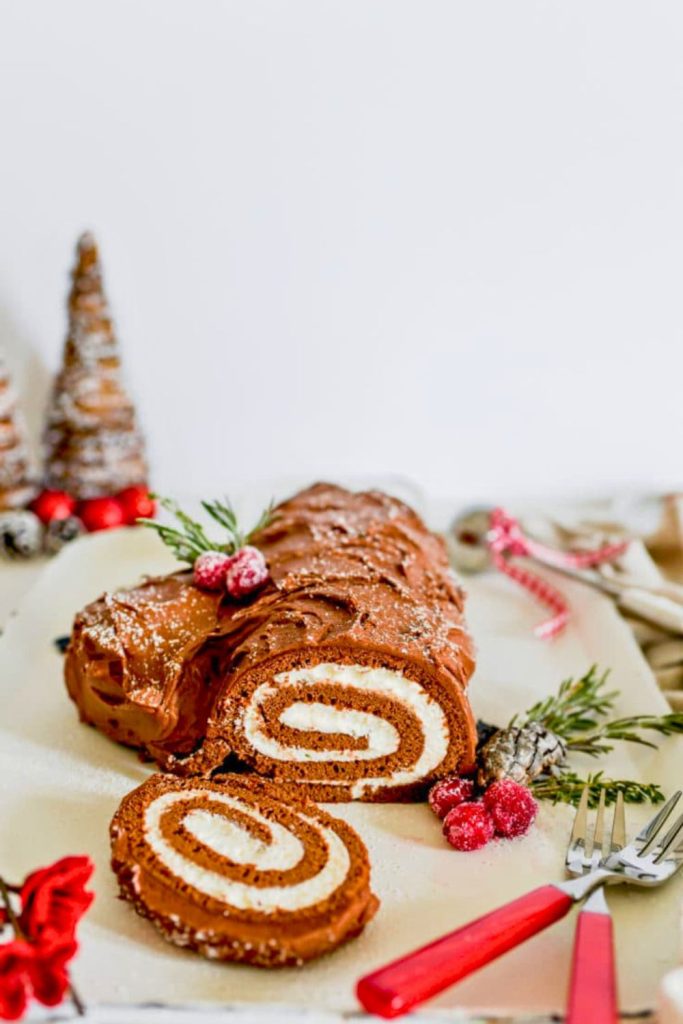
A Yule Log should taste wonderful, but a thoughtful presentation makes this holiday cake feel even more special.
These straightforward serving ideas will help the cake look polished on the table and slice neatly for guests.
- Choose a festive platter: A white, wooden, or holiday-patterned plate makes the dark chocolate bark and snowy sugar stand out.
- Cut clean slices: Use a sharp serrated knife and wipe the blade between cuts so the cream spiral stays defined.
- Serve lightly chilled: Take the cake out of the refrigerator 15 to 20 minutes before slicing so the filling and frosting soften slightly.
- Add edible details: Dust on a little fresh powdered sugar or arrange extra sugared cranberries and rosemary around the platter.
- Pick a complementary drink or topping: Offer whipped cream or chocolate sauce alongside the slices. Espresso or mulled wine also pairs nicely with the cocoa flavor.
With a few finishing touches, the cake becomes more than the last course—it becomes a memorable part of the holiday table.
Fun Variations
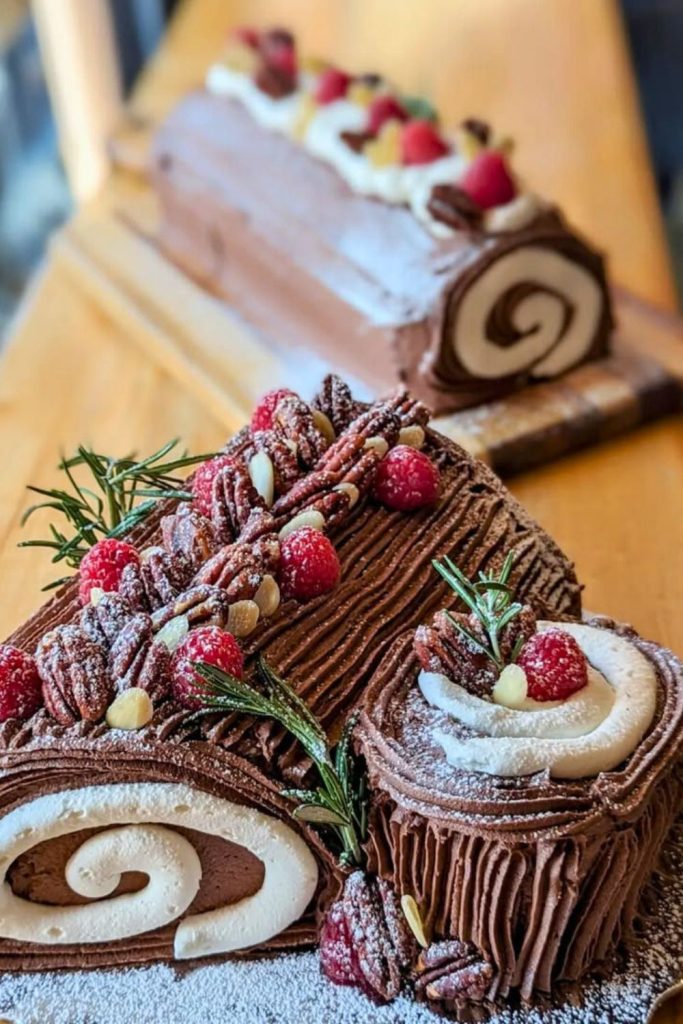
Once you are comfortable with the basic Yule Log method, the sponge, filling, and decoration can be adjusted to suit different tastes.
Try one of these variations while keeping the same rolled-cake technique:
- Peppermint Mocha Log: Stir 1 teaspoon peppermint extract into the frosting and scatter crushed candy canes over the top for a minty crunch.
- Hazelnut Log: Replace the whipped-cream filling with Nutella or another hazelnut spread for a richer, nuttier center.
- Espresso Chocolate Log: Mix 1 tablespoon instant coffee into the cake batter to give the sponge a deeper mocha flavor.
- White Chocolate Winter Log: Use white-chocolate ganache in place of the cocoa frosting and finish with coconut flakes for a snowy appearance.
- Fresh Berry Log: Roll raspberries or sliced strawberries into the whipped cream for a brighter, fruitier filling.
Each idea gives the classic cake a different character while preserving the festive log shape and dramatic spiral.
Final Thoughts: A Slice of Christmas Magic
A Yule Log is part dessert and part centerpiece. The cream spiral, chocolate bark, and dusting of sugar bring warmth and celebration to each slice.
Serving it also keeps alive a holiday tradition that families have enjoyed for generations.
Set aside an afternoon, turn on some holiday music, and make the cake from sponge to woodland finish. It may soon become a tradition in your own kitchen.
Chocolate Yule Log Cake

Recommended Holiday Treats You’ll Love Next
If you would like to add more festive sweets and drinks to the menu, these recipes complement a chocolate Yule Log especially well:
- 🎄 3-Ingredient Oreo Balls Recipe You’ll Crave: creamy no-bake chocolate treats that are easy to prepare and gift.
- ☕ Quick 15-Min Eggnog Recipe for Busy Hosts: a smooth holiday drink that comes together quickly for guests.
- 🍬 Best Peppermint Bark Recipe for Holiday Nights: crisp layers of chocolate with a refreshing peppermint finish.
Together, these simple holiday recipes give you a varied dessert spread with chocolate, mint, cream, and festive flavor.

Dana Brooks is a home-cooking writer at Feastbears, where she shares easy family recipes, cozy dinners, quick desserts, and beginner-friendly kitchen tips. Her goal is to make everyday cooking feel simple, warm, and enjoyable for busy home cooks.


