
Chocolate-cookie fans and anyone who prefers easy desserts will appreciate these no-bake Oreo balls.
Crushed sandwich cookies and cream cheese form a soft center, while melted wafers create a neat candy shell. The hands-on work fits comfortably within an hour, followed by chilling.
Prepare them for Christmas, birthdays, dessert platters, or a simple weeknight treat.
They have the polished appearance of small truffles but require only three main ingredients and basic kitchen tools.
What Are Oreo Balls?
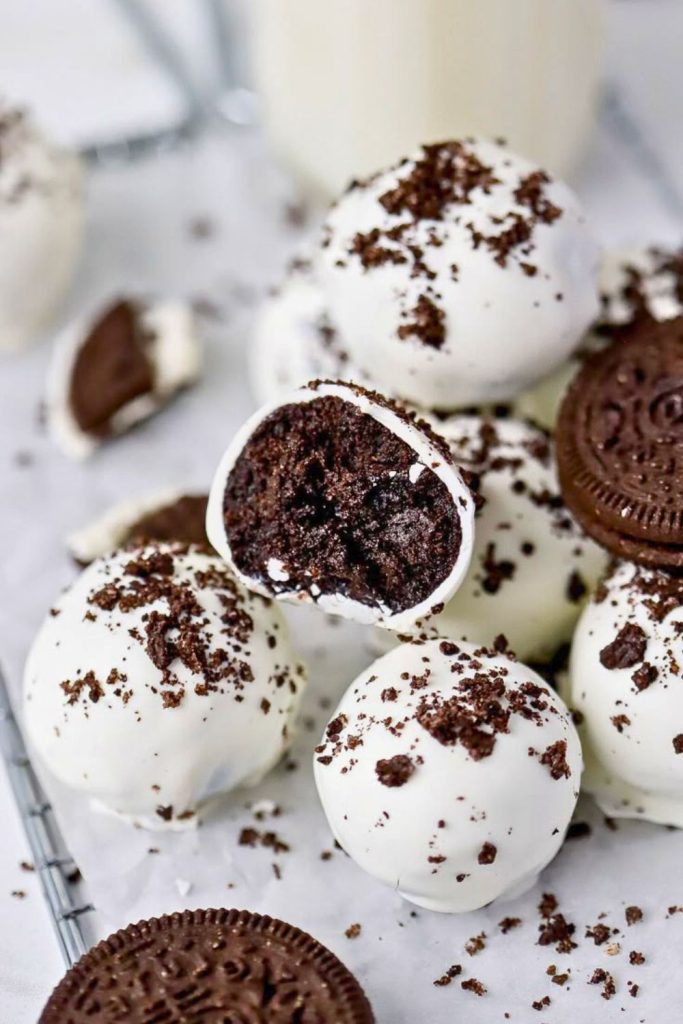
Oreo balls are no-bake truffle-style candies with a creamy cookie filling and a firm chocolate or candy coating.
The basic formula is very short: crushed Oreo cookies, softened cream cheese, and melting wafers or chocolate.
When the crumbs and cream cheese are blended, they become a dense, fudge-like dough. Rolling and dipping that dough turns it into small candies that look suitable for a bakery case.
The flavor is also easy to change. Classic chocolate, mint, peanut-butter, red-velvet, or Golden Oreos can all serve as the cookie base.
Because no oven is needed, the recipe works well for quick party desserts and edible holiday gifts.
These features explain its broad appeal:
- No-bake method: The only heat is used to melt the coating.
- Three main ingredients: Cookies, cream cheese, and a coating are enough.
- Contrasting textures: The shell is firm while the center stays soft and creamy.
- Easy customization: Change the cookie flavor, coating color, or decoration.
The recipe is a good example of how a very short ingredient list can still produce a rich dessert.
Oreo Balls Ingredients

| Ingredient | Amount | Notes |
|---|---|---|
| Oreo cookies | 38 cookies | Classic or another flavor; crush the whole cookies with their filling |
| Cream cheese | 8 ounces | Soften to room temperature so it mixes evenly |
| Melting wafers or white chocolate | 12 ounces | Use a coating designed to melt smoothly when possible |
| Optional decorations | As needed | Try cookie crumbs, contrasting drizzle, or sprinkles |
How to Make Oreo Balls (Step-by-Step Guide)

Oreo balls are useful when you want an attractive dessert without heating the oven.
A bowl, spoon or mixer, lined tray, and your hands are enough for the basic process.
The finished candies have a creamy chocolate-cookie center inside a smooth shell.
Follow the steps in order so the filling stays firm during dipping.
Step 1: Crush the Oreos
Begin with 38 Oreo cookies. Classic cookies make the familiar chocolate version, while mint, peanut-butter, or Golden Oreos change the flavor.
Using roughly 38 cookies keeps the crumb-to-cream-cheese ratio balanced.
Choose one of these crushing methods:
- Food processor: Pulse the whole cookies into fine crumbs for the smoothest filling.
- By hand: Roughly chop the cookies, then continue crushing them with a rolling pin until the crumbs are fairly even.
- Sealed bag: A sturdy freezer bag can also work, but avoid overfilling it and check for tears before rolling.
Texture tip: Fine crumbs produce a very smooth center; leaving a few small cookie pieces creates a little crunch.
Transfer the prepared crumbs to a large mixing bowl.
Step 2: Mix with Cream Cheese
Use one softened 8-ounce block of cream cheese. Room-temperature cheese blends into the crumbs without leaving lumps.
Add the cream cheese to the bowl of cookie crumbs.
Mix with whichever tool is most convenient:
- A hand mixer for speed.
- A stand mixer for a larger batch.
- A sturdy spatula or clean hands for a simple manual method.
Hand mixing is messy but effective and can be a supervised kitchen activity for children.
Continue until the crumbs and cream cheese form a thick, sticky dough with no dry pockets.
The finished mixture should be cohesive enough to hold its shape when pressed and rolled.
Step 3: Shape Into Balls
Portion the dough into bite-size balls.
Use about 1 tablespoon per piece. A cookie scoop provides consistent portions; for precise sizing, aim for roughly 25 grams each.
Roll every portion between your palms until smooth. Minor imperfections can be corrected after chilling.
Arrange the balls on a parchment-lined baking sheet so they do not stick.
At this stage, the tray should hold evenly sized dark cookie centers ready for firming.
Step 4: Chill the Oreo Balls
Chilling is essential before dipping.
Refrigerate the shaped centers for at least 1 hour so the cream cheese mixture becomes firm.
Warm, soft centers can break apart in the melted coating, while thoroughly chilled ones are easier to handle.
Make-ahead tip: Cover the tray and refrigerate the undipped centers for up to 2 days.
Step 5: Melt the Candy Coating
When the centers are cold, prepare the outer coating using one of the following options.
Candy melts or melting wafers
Melting wafers are convenient because they liquefy smoothly and harden without tempering.
Use white vanilla wafers for a light shell or dark wafers for a deeper chocolate finish.
Microwave them with this method:
- Use about 60 percent power.
- Heat in 30-second intervals.
- Stir after every interval until smooth.
Chocolate chips
Regular chips can be used with about 1/2 teaspoon coconut oil or shortening per cup to make the coating more fluid.
Untempered chocolate may stay softer at room temperature, so truffles coated with chips are best kept refrigerated.
Step 6: Dip and Coat
Begin dipping once the coating is fully smooth.
Work with a few centers at a time and leave the rest in the refrigerator so they remain firm.
Smooth one chilled center, lower it into the coating, and turn it with a fork or dipping tool until every side is covered.
Before placing it on the tray:
- Tap the fork gently against the bowl to remove excess coating.
- Allow enough coating to drip away that a thick puddle does not form underneath.
Return the coated truffle to the parchment and repeat with the remaining centers.
Step 7: Add Decorations
Add garnishes before the coating sets, when toppings can still adhere.
Decoration Ideas:
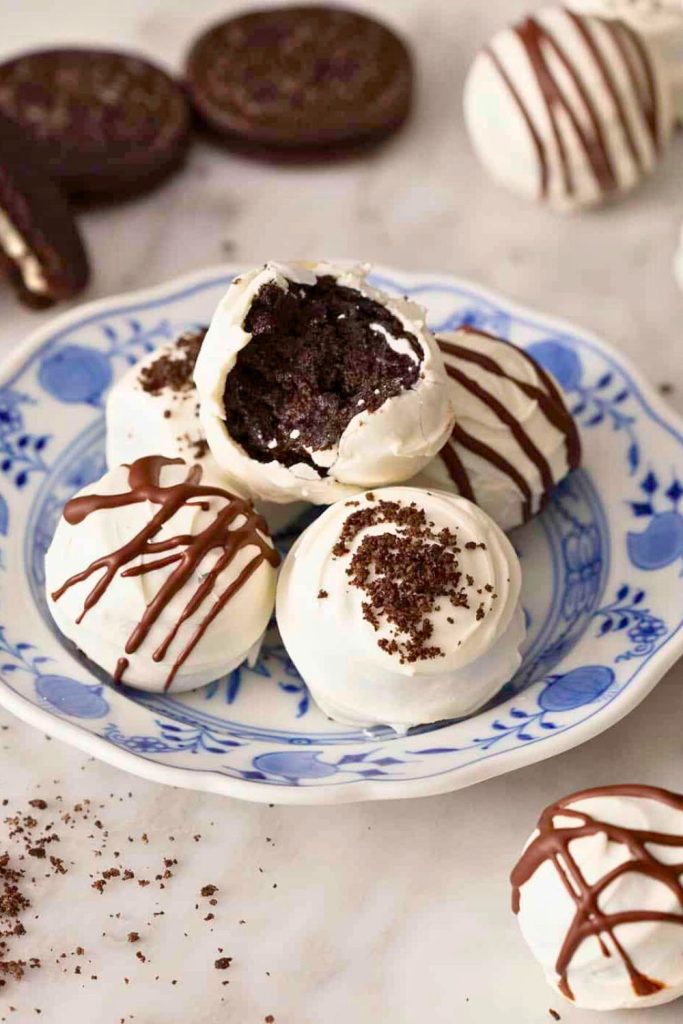
- Crushed Oreo crumbs: Sprinkle a small pinch over the top for a classic finish.
- Chocolate drizzle: Pipe contrasting melted chocolate in narrow zigzags or crossing lines.
- Sprinkles: Match the colors to Christmas, Easter, birthdays, or another occasion.
A quick drizzle gives the truffles a polished look without requiring complicated decoration.
Step 8: Chill Again and Serve
Refrigerate the decorated Oreo balls for another 15 to 30 minutes, until the shells feel dry and firm.
Transfer the set candies to a platter or covered container. Each bite should provide this contrast:
- A thin, crisp outer shell.
- A soft, creamy cookie filling.
The candies are rich and easy to portion, so make a second batch only if you are serving a large group.
5 Secret Tips for the Best Oreo Balls
These five details reduce mess and help the truffles keep their shape.
1. Choose the crumb texture intentionally
A processor creates fine crumbs for a smooth filling; hand crushing leaves small cookie pieces for more texture.
2. Soften the cream cheese
Cold cream cheese is difficult to distribute evenly. Let it reach room temperature, using a very brief microwave burst only if necessary.
3. Chill before and after dipping
The first chill firms the centers for coating, and the second sets the shell. Both rests contribute to a clean finished truffle.
4. Coat in small batches
Keep most of the centers refrigerated while dipping a few at a time; warm balls soften quickly in melted coating.
5. Remove the excess shell
Tap the dipping fork against the bowl so the coating stays thin and does not collect in a wide base.
Fun Ways to Serve Oreo Balls
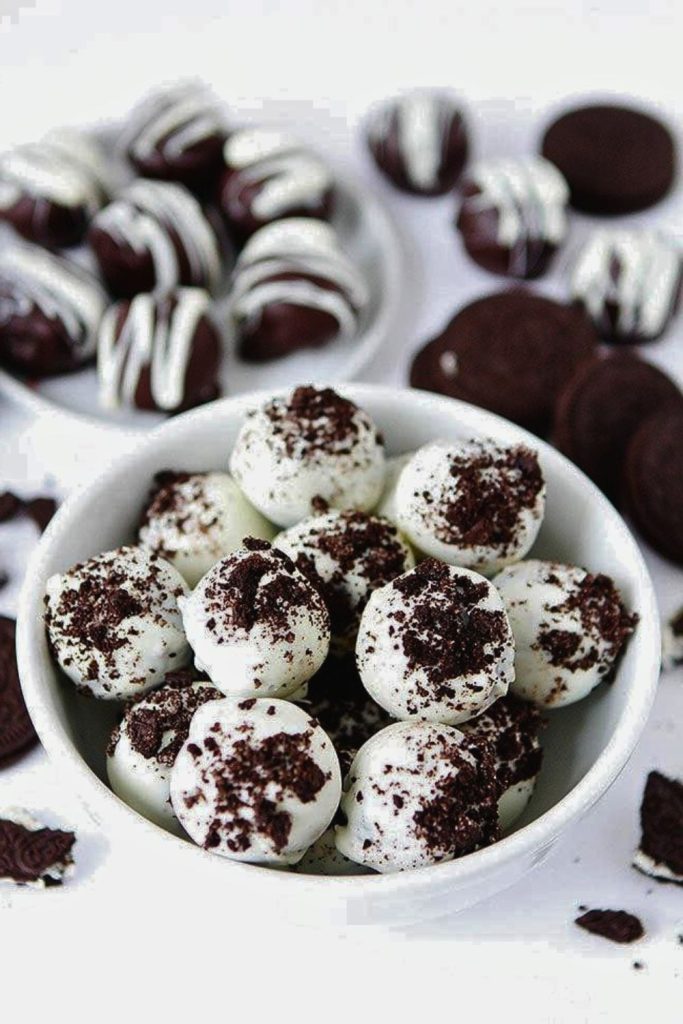
Presentation can turn these small candies into a complete dessert display. Try one of the following approaches:
- Party platter: Arrange different coatings beside cookies, brownies, and other truffles on a tiered tray.
- Mini cupcake liners: Place each ball in a decorative paper liner to keep fingers clean and make serving easier.
- Dessert board: Combine the truffles with pretzels, fruit, marshmallows, and small bowls of dip.
- Ice-cream topping: Chop one or two balls over vanilla or chocolate ice cream.
- Seasonal tray: Match sprinkles and candy decorations to the holiday or celebration.
- Oreo pops: Insert lollipop sticks before dipping to create an easy-to-hold party treat.
Whichever style you choose, keep the truffles chilled until close to serving time.
Flavor Variations to Try

| Cookie Flavor | Optional Addition | Coating | Occasion |
|---|---|---|---|
| Classic Chocolate | No addition needed | White coating with Oreo crumbs | Any occasion |
| Mint | A few drops peppermint extract, optional | Dark chocolate with green drizzle | Winter holidays |
| Golden | Pinch of cinnamon or nutmeg | White coating with gold sprinkles | Spring parties |
| Red Velvet | No extra filling needed | White coating with red drizzle | Valentine’s Day |
| Peanut Butter | 1 tablespoon peanut butter, optional | Milk chocolate with chopped peanuts | Birthdays or game day |
| Chocolate Hazelnut | 1 tablespoon hazelnut spread | Dark chocolate with chopped hazelnuts | Dinner dessert |
| Lemon | Finely grated lemon zest | White coating with yellow sugar | Easter or showers |
Different cookie flavors, coatings, extracts, and toppings can turn the same basic method into many distinct combinations.
Oreo Balls as Edible Gifts
Oreo balls are practical edible gifts because they can be made in quantity, decorated neatly, and divided into small packages.
Use one of these packaging options:
- Mini cupcake boxes: Set each candy in a liner, place them in a bakery-style box, and finish with ribbon.
- Clear gift bags: Add a few chilled truffles, tie the bag, and include flavor and refrigeration instructions.
- Holiday tins: Line a decorative tin with parchment and arrange one or more flavors inside.
- Glass jars: Layer the truffles carefully in a Mason jar and add a seasonal ribbon.
Add these useful finishing details:
- Attach a clear Keep Refrigerated note.
- Include a small printed recipe card if you want the recipient to make another batch.
- Tie on a personal message or holiday greeting.
Because the filling contains cream cheese, package the truffles cold and tell recipients to refrigerate them. For best quality, use refrigerated Oreo balls within about 1 week or freeze them in an airtight container for up to 2 months.
Conclusion: The Ultimate 3-Ingredient Dessert
With three main ingredients, mixing, and sufficient chilling, homemade Oreo balls become neat truffle-style candies with a rich, soft center.
They suit Christmas, Valentine’s Day, birthdays, and ordinary dessert cravings, making them a flexible no-bake recipe to keep on hand.
Crush the cookies, soften the cream cheese, and start rolling.
3-Ingredient Oreo Balls

Recommended Recipes You’ll Love Next
If you enjoyed making Oreo balls, these FeastBears desserts offer three different baking projects to try next:
- 🍒 Cozy 60-Min Cherry Pie Recipe for the Holidays: a flaky crust filled with warm, jammy cherries.
- ☕ Step-by-Step 80-Min Biscotti Recipe for Beginners: crisp Italian-style cookies made for coffee or tea.
- 🍮 Easy Sticky Toffee Pudding in Just 35 Minutes: a soft date pudding finished with warm toffee sauce.
Together, these recipes give a dessert menu a mix of chilled truffles, crisp cookies, fruit pie, and warm pudding.

Dana Brooks is a home-cooking writer at Feastbears, where she shares easy family recipes, cozy dinners, quick desserts, and beginner-friendly kitchen tips. Her goal is to make everyday cooking feel simple, warm, and enjoyable for busy home cooks.


