
Few baking aromas are as inviting as a pan of homemade dinner rolls turning golden in the oven.
The rolls bake up tall and soft, pull apart easily, and absorb a pat of butter while they are still warm.
This guide preserves the original nine-step process for making the dough, proofing it twice, shaping even portions, and baking from scratch.
The ingredients are familiar and the technique is approachable, making the recipe useful for holiday dinners, Sunday meals, or any occasion that deserves fresh bread.
Why You’ll Love This Dinner Rolls Recipe

Homemade bread rewards patience with flavor and texture that packaged rolls rarely match.
These rolls have a light, tender crumb and are designed to be shared around the table.
Several practical qualities make the recipe worth repeating:
- Familiar pantry ingredients. Milk, sugar, yeast, butter, salt, and flour form the complete dough, so no specialty shopping is required.
- A consistently soft crumb. Warm milk and melted butter keep the dough tender while two rises create its fluffy structure.
- A process beginners can follow. Each stage explains what the dough should look and feel like, whether you knead by hand or with a mixer.
- Suitable for many meals. The rolls fit Thanksgiving and Christmas menus just as naturally as soups, stews, roast chicken, or an ordinary weeknight dinner.
- Easy to customize. Keep the tops plain, add garlic or herbs, or serve them with honey butter for a sweeter finish.
Making bread from scratch also gives you control over every stage, from activating the yeast to shaping rolls of similar size.
When the finished pan comes out deeply golden and fragrant, that time and attention become part of the satisfaction.
Ingredients You’ll Need
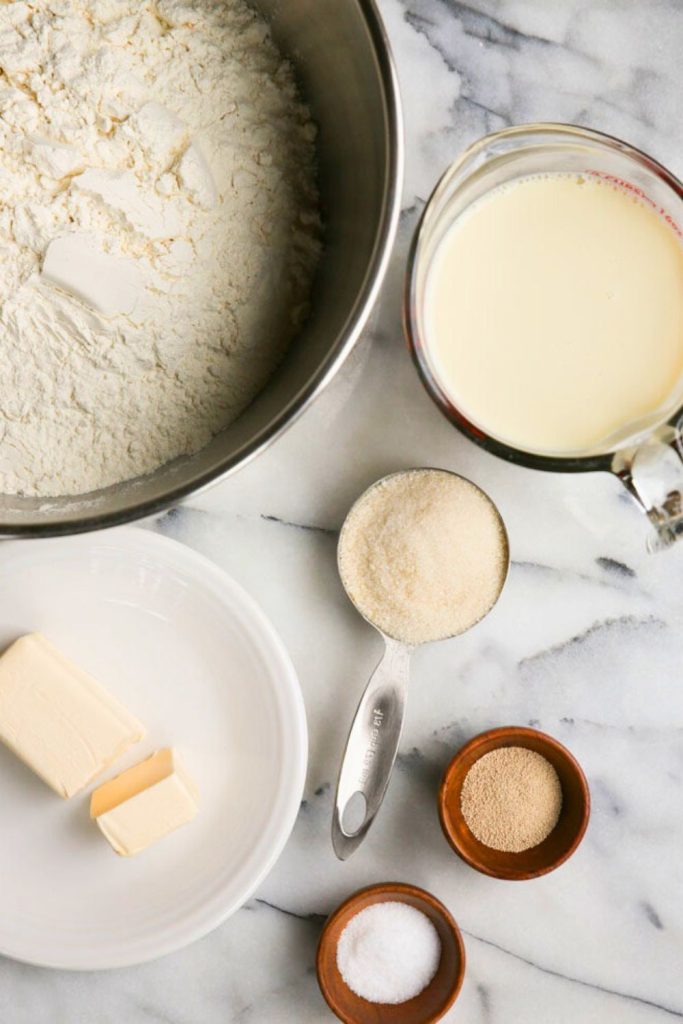
The ingredient table shows the amount and purpose of every component. Measure the flour lightly and check the milk temperature before beginning.
| Ingredient | Amount | Purpose & Notes |
|---|---|---|
| Whole Milk (warm) | 1 ½ cups (about 110°F) | Activates the yeast and makes the dough rich and tender. Warm, not hot. |
| Granulated Sugar | ⅓ cup (divided) | A little for the yeast to feed on, the rest for gentle sweetness. |
| Active Dry Yeast | 1 tablespoon | The magic ingredient that makes the rolls rise. |
| Unsalted Butter | 4 tablespoons (melted) | Contributes richness, softness, and that irresistible buttery flavor. |
| Salt | 1 ¼ teaspoons | Maintains out sweetness and enhances flavor. |
| All-Purpose Flour | Just under 4 cups | The backbone of the rolls. Be sure to measure correctly for best results. |
Ingredient notes:
- Milk temperature matters: Milk that is too hot can damage the yeast, while cold milk slows activation. Aim for approximately 110°F, comfortably warm but not hot.
- Measure flour lightly: Spoon flour into the measuring cup and level it with a knife. Scooping directly from the bag can compact too much flour and produce dense rolls.
- Butter selection:: Unsalted is best since you control the salt, but if you only have salted butter, reduce the added salt slightly.
When you gather these six ingredients, you are already halfway to creating bakery-style dinner rolls. The best part? You probably do not even need a grocery store run, they are that simple.
How to Make Dinner Rolls (Step-by-Step Guide)

Making dinner rolls from scratch becomes manageable when activation, mixing, kneading, proofing, shaping, and baking are handled as separate stages.
The work is spread across several short active stages with longer hands-off rises in between.
The payoff is a pan of tender pull-apart rolls with a light crumb and a freshly baked flavor.
Let us break it down step by step, so you can create the fluffiest dinner rolls every single time.
Step 1: Activate the Yeast
Yeast supplies the lift that keeps these rolls airy rather than dense, so the first step confirms that it is active before flour is added.
- Warm 1½ cups whole milk to about 110°F. It should feel comfortably warm, not hot; milk that is too hot can damage the yeast.
- Stir in 1 tablespoon of sugar. Yeast loves sugar; it is food that helps it activate.
- Sprinkle 1 tablespoon of active dry yeast over the top of the warm milk mixture. Do not stir yet; just let it sit for a minute.
- After a minute, whisk gently and leave it for 5 minutes. You will see the yeast bloom and get foamy, a sign it is alive and ready to do its job.
👉 Yeast check: If no foam appears after 5 to 10 minutes, discard the mixture and begin again with fresh yeast.
This stage might seem small, but it is the most important. Activated yeast is what gives your rolls that sky-high fluffiness.
Step 2: Mix the Dough Base
Now that the yeast is ready, it is time to build the dough.
- To the yeast mixture, add 4 tablespoons of melted unsalted butter, the Remaining sugar (about ¼ cup), and 1 ¼ teaspoons of salt. This combo brings flavor and softness.
- Begin adding All-purpose flour, aiming for a total of just under 4 cups. Start slow, adding ½ cup at a time, and whisk between each addition.
A whisk incorporates the first additions of flour efficiently. Switch to a sturdy spoon or dough hook when the mixture becomes too heavy to whisk.
- Stand-mixer method:: Attach the dough hook. It does the hard work of kneading for you.
- If you do not: Use a sturdy spatula to stir until it gets too thick, then turn it out and knead by hand.
👉 Pro Tip: Do not dump all the flour at once. Gradual addition keeps the dough light instead of heavy and dense.
At this point, the mixture should look like a soft, sticky dough that is beginning to pull together.
Step 3: Knead the Dough
Kneading develops the gluten structure that traps gas from the yeast and supports the rolls as they rise.
- If using a mixer, set it to Speed 2 and knead for about 2 minutes after all the flour is incorporated.
- For hand kneading, push the dough away with the heel of your hand, fold it back, and repeat for 8 to 10 minutes.
What you are looking for:
- The finished dough should feel soft and tacky but not wet or unmanageable.
- Properly kneaded dough may feel slightly tacky, but it should release from clean, dry fingers.
👉 Pro Tip: If the dough is sticking like glue, add 1–2 tablespoons of flour at a time until it is workable. Be cautious, though; too much flour makes heavy rolls.
This stage creates the elasticity that traps air bubbles during rising. And those bubbles? They are what give you cloud-like rolls.
Step 4: First Rise (Proofing)
After kneading, the dough needs a warm, protected place for its first rise.
- Lightly oil a large mixing bowl.
- Set the dough inside, turning it once to coat all sides with oil (this prevents sticking and keeps it moist).
- Cover the bowl with plastic wrap.
- Cover the bowl and let the dough rise in a warm place for about 2 hours, or until doubled.
Not sure where to put it? Try these tricks:
- Warm-oven method: Run the oven at its lowest setting for 2 minutes, switch it off, and place the covered bowl inside.
- Microwave method: Warm a damp kitchen towel for 1 minute, remove it, and proof the covered dough in the closed microwave.
👉 Pro Tip: The warmer the environment, the faster it rises. But do not rush it, good things take time.
A doubled dough shows that the yeast is active and the gluten has retained enough gas for a light texture.
Step 5: Shape the Rolls
This is where the fun begins. You are turning one big dough ball into individual rolls.
- Lightly flour a clean surface.
- Turn the risen dough onto the work surface and press it gently to release large gas pockets.
- Divide the dough into 15 even pieces for a 9-by-13-inch pan.
- First, separate the dough into 3 equal portions.
- Cut each portion into 5 smaller pieces.
- Roll each piece into a ball.
Two easy rolling methods:
- Palm roll: Cup the dough in your palm and roll until uniform.
- Countertop shaping method:: Place the surface roll on the counter, wrap your hand around it, and roll in a circular motion.
Place rolls in the greased 9×13 pan, evenly spaced.
👉 Pro Tip: Do not stress over perfect sizes. Slight variations give them a rustic, homemade charm.
Step 6: Second Rise
Now your rolls need one more nap before baking.
- Cover the pan with plastic wrap.
- Cover the shaped rolls and let them rise in a warm place for about 1 hour, until puffy and touching.
Use the warm-microwave method again if the room is cool. By the end of the second rise, the rolls should look puffy and begin touching.
The second rise creates the tall, soft shape the rolls need before they enter the oven.
Step 7: Bake to Golden Perfection
Finally, it is time to bake.
- Preheat your oven to 375°F about 15 minutes before baking.
- Place the rolls on the middle rack.
- Bake for 23–25 minutes, until deeply golden on top.
👉 Oven tip: Rotate the pan halfway through baking if your oven browns unevenly.
The rolls are ready when the tops are deeply golden and the pan smells distinctly buttery and yeasty.
Step 8: Butter Glaze and Finishing Touches
Brush the finishing butter over the rolls while the tops are still hot.
- Coat the hot roll tops with 1 tablespoon melted butter for flavor and shine.
- Sprinkle with Kosher salt if you like a savory kick.
The melted butter softens the crust slightly and gives the surface a glossy finish.
Step 9: Cool and Serve
Resting for 10 minutes lets the crumb settle so the rolls pull apart cleanly without becoming gummy.
- Let rolls cool for at least 10 minutes before digging in.
- Serve warm with butter, honey butter, or garlic spread.
These rolls are versatile, too. Use them for:
- Sliders: Well suited to mini sandwiches.
- Holiday meals: A must-have alongside turkey or ham.
- Everyday snack:: With peanut butter, jam, or just plain butter.
👉 Serving note: The crumb is at its softest while the rolls are still pleasantly warm, but a short cooling period keeps them from becoming gummy.
The Joy of Homemade Dinner Rolls

There is something special about pulling a tray of freshly baked dinner rolls out of the oven. It is not just about the food, but the feeling that comes with it.
Deeply golden tops, a tender interior, and the aroma of warm butter are the clearest signs of a successful batch.
Making your own dinner rolls isn’t just cooking. It is slowing down, taking time for yourself and your loved ones, and enjoying the process. Every step matters, from kneading the dough to watching it rise, and finally serving it warm on the table.
Homemade rolls often suit family gatherings and holiday meals, but the same dough is useful for an ordinary soup or stew dinner.
Homemade rolls require more time than packaged bread, but their fresh flavor and pull-apart texture make the process worthwhile.
And let us not forget versatility. These rolls are the kind that everyone reaches for. You can serve them alongside soups, roast chicken, or hearty stews.
They also double up as slider buns for pulled pork or even sweet little sandwiches with peanut butter and jam. Once you’ve tried homemade dinner rolls, you will never want to go back to the packaged kind.
Variations to Try
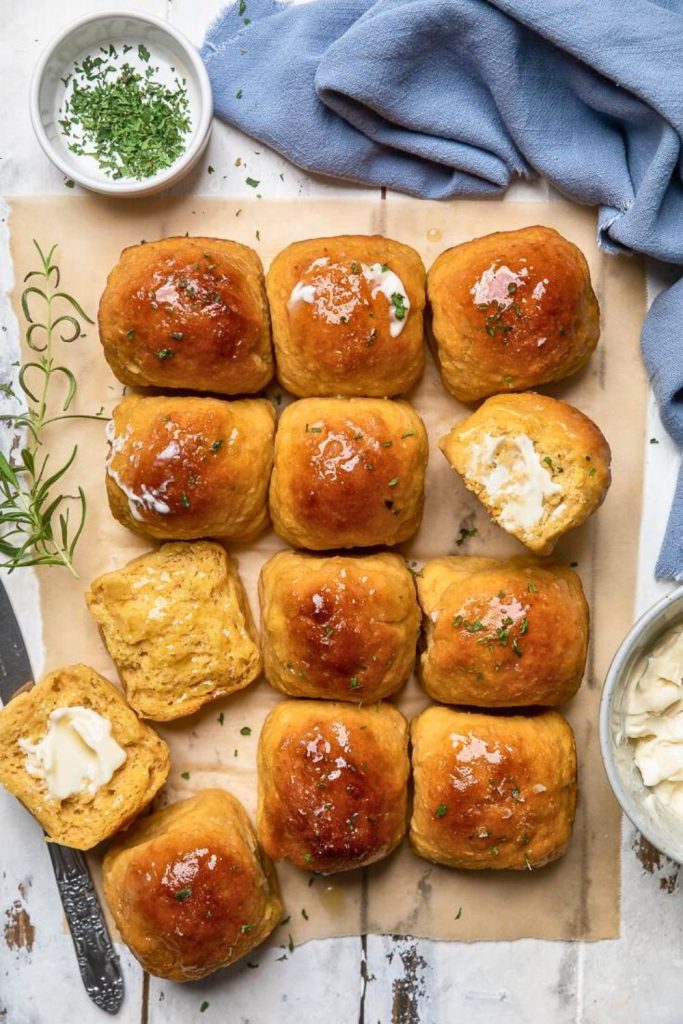
Once the base dough is familiar, use the variation table to add garlic, herbs, cheese, honey, cinnamon, or whole-wheat flour.
Here is a table of fun variations to experiment with:
| Variation | How to Make It | Flavor Profile |
|---|---|---|
| Garlic Parmesan Rolls | Blend in 1 tsp garlic powder to the dough. Brush baked rolls with garlic butter and sprinkle with parmesan. | Savory, cheesy, restaurant-style flavor. |
| Herb Butter Rolls | Mix 1 tbsp chopped fresh herbs (like rosemary, thyme, or parsley) into the dough. Finish with herb-infused butter. | Fresh, fragrant, perfect for holiday meals. |
| Honey Butter Rolls | Substitute sugar with honey in the dough. Serve warm with whipped honey butter. | Sweet, soft, and melt-in-your-mouth. |
| Cheese-Stuffed Rolls | Enclose each dough ball around a cube of mozzarella or cheddar before baking. | Gooey, cheesy center with a soft outside. |
| Cinnamon Sugar Rolls | Roll dough balls in melted butter, then cinnamon sugar before baking. | Sweet, warmly spiced rolls with a lightly crisp coating. |
| Whole Wheat Rolls | Substitute half the all-purpose flour with whole wheat flour. | Slightly nutty, hearty, and wholesome. |
| Everything Bagel Rolls | Coat tops with egg wash and sprinkle with everything bagel seasoning before baking. | Crunchy, savory, and bold. |
👉 Pro Tip: Start with the base recipe once or twice, then get creative. You will quickly find your family’s favorite twist.
Final Thoughts
Homemade dinner rolls remain a dependable addition to meals because their soft crumb and buttery flavor work with so many dishes.
The full process—from blooming the yeast through the second rise—builds both texture and flavor before the rolls reach the oven.
Bake them for a holiday spread, a Sunday supper, or any meal that benefits from warm bread at the table.
The base dough uses familiar ingredients and supports several savory or sweet variations without changing the core technique.
Once the tops are golden, brush them with butter, let them settle briefly, and serve while the centers are still tender.
Soft and Fluffy Dinner Rolls

More Recipes to Bake and Enjoy
Continue baking and planning the meal with these linked FeastBears recipes:
- 🧈 Soft Homemade Cornbread – Moist, golden cornbread that works with honey butter, soup, or chili.
- 🥦 Sweet and Spicy Roasted Brussels Sprouts – Crisp-edged sprouts finished with a smoky honey-maple glaze.
- 🍄 Cream Cheese Stuffed Mushrooms – Savory, bite-sized mushrooms for appetizers and holiday gatherings.
Each recipe uses an approachable method and adds a different texture or flavor to the table.

Dana Brooks is a home-cooking writer at Feastbears, where she shares easy family recipes, cozy dinners, quick desserts, and beginner-friendly kitchen tips. Her goal is to make everyday cooking feel simple, warm, and enjoyable for busy home cooks.


