Sloppy Joes bring to mind soft buns filled with saucy ground beef—the kind of sandwich often served at family dinners or school lunches.
The familiar version can sometimes be sweeter or thinner than you would like. Making the sauce yourself gives you more control over both qualities.
This recipe keeps the messy, comforting character while building a more savory filling. Tomato, mustard, vinegar, and spices balance the richness of the beef.
The version below is nicknamed the Sloppy Joseph: a homemade Sloppy Joe with a few extra steps devoted to texture and flavor.
Finely crumbled beef, fresh vegetables, and a thick sauce give it a juicy, well-seasoned filling. Toasted brioche completes the sandwich.
🧡 Why You’ll Love This Fancy Sloppy Joe
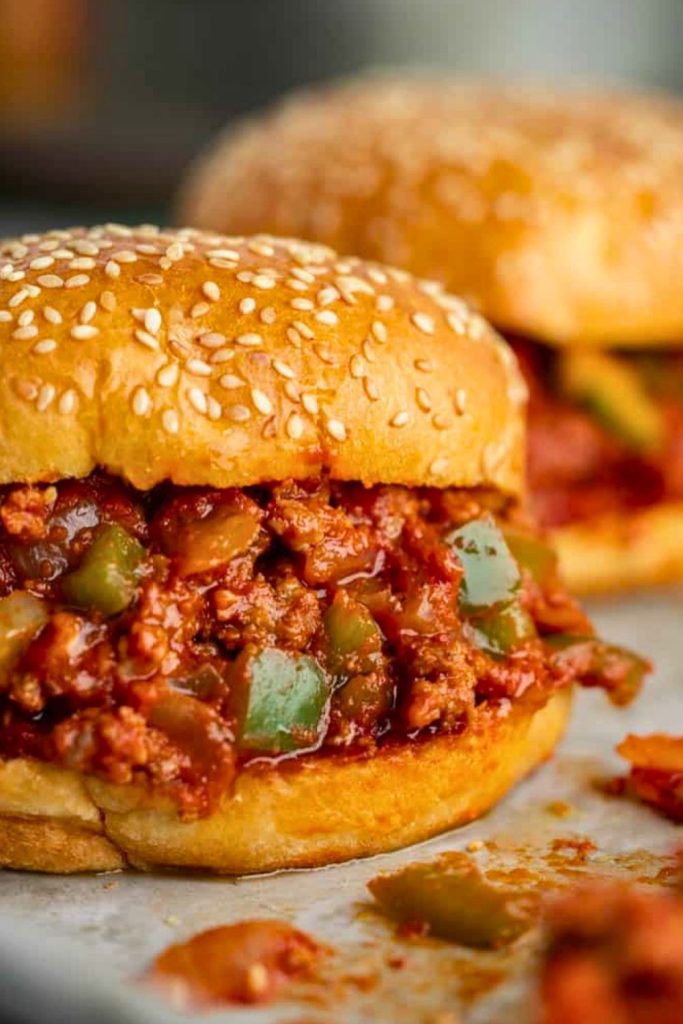
A quick canned-sauce dinner is familiar to many cooks, but it leaves little room to adjust the sauce itself. Here, the seasonings are added individually.
That lets you manage the sweetness, tomato flavor, and consistency as the filling cooks. You can taste the finished sauce before deciding whether it needs anything more.
The difference comes from a sequence of small techniques rather than one unusual ingredient.
Think of the Sloppy Joseph as a slightly more detailed take on the same comforting sandwich, not a different dish altogether.
These are the features that distinguish this version:
✅ 1. Sweetness Balanced with Tang
The beef stays at the center, supported by mustard, a little sweetness, and mild spice. The goal is a savory filling with enough acidity to keep it lively.
Tomato paste adds concentration, ketchup and brown sugar bring sweetness, and Worcestershire and vinegar provide a sharper counterpoint. Each has a separate role in the sauce.
✅ 2. A Softer Beef Texture
A measured amount of baking soda is mixed into the raw beef before cooking to help it stay tender. Breaking the meat into fine pieces also makes the filling easier to eat in a bun.
✅ 3. A Fresh Vegetable Base
Finely diced yellow onion and poblano cook before the beef. The onion brings sweetness, while the poblano adds a green-chile flavor and usually a little heat.
✅ 4. A Thick, Spoonable Sauce
A little flour thickens the cooking liquid as it simmers. Together with reduction and stirring, it helps the sauce coat the beef instead of running straight out of the sandwich.
🛒 The Ingredients You’ll Need
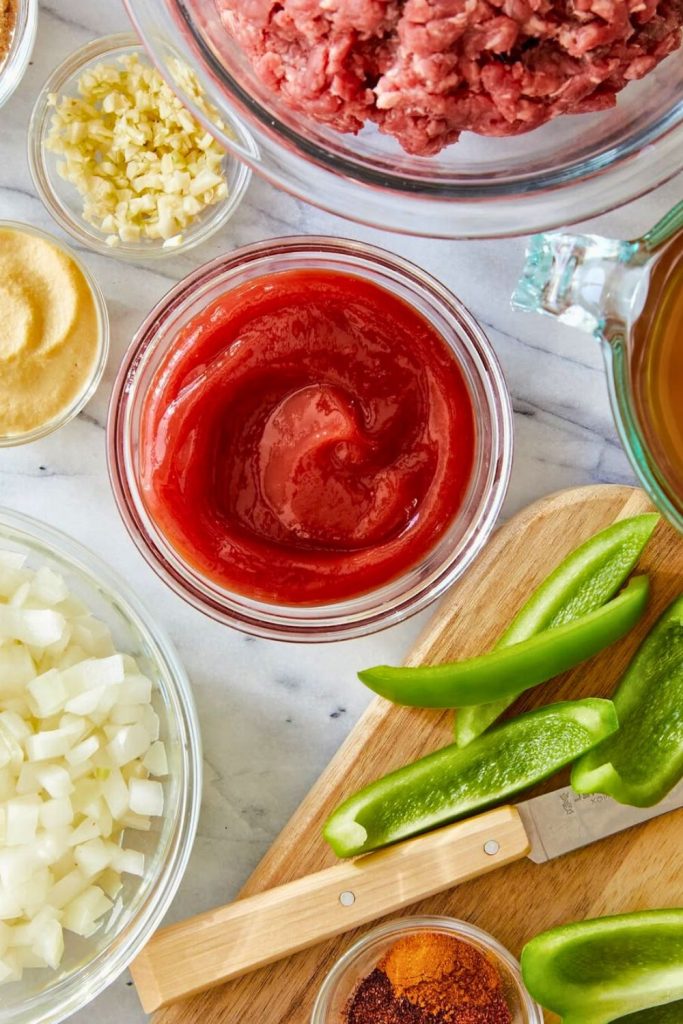
The sauce is assembled from individual pantry ingredients, with fresh onion and pepper providing its aromatic base.
The table lists the full quantities and explains what each ingredient contributes.
| Ingredient | Amount | What It Does |
|---|---|---|
| Ground Beef (80/20) | 1 pound | Its fat content gives the filling richness; leaner beef will produce a different texture. |
| Baking Soda | ¼ tsp (1g) | A small measured amount helps the beef remain tender during cooking. |
| Yellow Onion | 150g (1 medium) | Fine dice blends into the sauce and supplies a sweet aromatic base. |
| Poblano Pepper | 100g (1 medium) | Adds a green-chile flavor and generally mild heat; individual peppers vary. |
| Olive Oil | 1–2 tbsp | Used to soften and lightly brown the vegetables. |
| Salt | 5g + pinch | Season in stages and account for salt already present in the stock and condiments. |
| Black Pepper | 2g | Adds peppery warmth to balance the sweeter ingredients. |
| Onion Powder | 5g | Reinforces the savory onion flavor. |
| Garlic Powder | 5g | Adds an even garlic note throughout the filling. |
| Paprika | 5g | Contributes color and a mild pepper flavor; smoked paprika gives a smokier result. |
| Chili Flakes | Pinch | An optional small amount for extra heat. |
| All-Purpose Flour | 10g | Thickens the sauce as it simmers and helps it hold together. |
| Tomato Paste | 50g | Gives the filling a concentrated tomato base. |
| Ketchup | 50g | Supplies sweetness and acidity alongside the tomato paste. |
| Yellow Mustard | 15g | Brings a sharp, tangy contrast to the beef and sugar. |
| Brown Sugar | 15g | Rounds out the acidic ingredients with sweetness. |
| Worcestershire Sauce | 50g | Adds savory complexity and acidity; check labels for dietary needs. |
| Red Wine Vinegar | 20g | Sharpens the sauce and balances its richer components. |
| Beef Bouillon Paste (Optional) | 10g | Adds concentrated beef flavor, along with additional salt. |
| Beef Stock or Broth | 350g | Provides the liquid that reduces into the finished sauce. |
| Brioche Buns | 4 buns | A soft, slightly sweet carrier for the savory filling. |
| Melted Butter | 1–2 tbsp | Brush over the buns’ cut surfaces before toasting. |
🔥 Keep both tomato ingredients: Tomato paste supplies concentrated flavor, while ketchup adds sweetness and tang. Replacing the paste with extra ketchup changes that balance.
🧑🍳 Step-by-Step: How to Make Sloppy Josephs
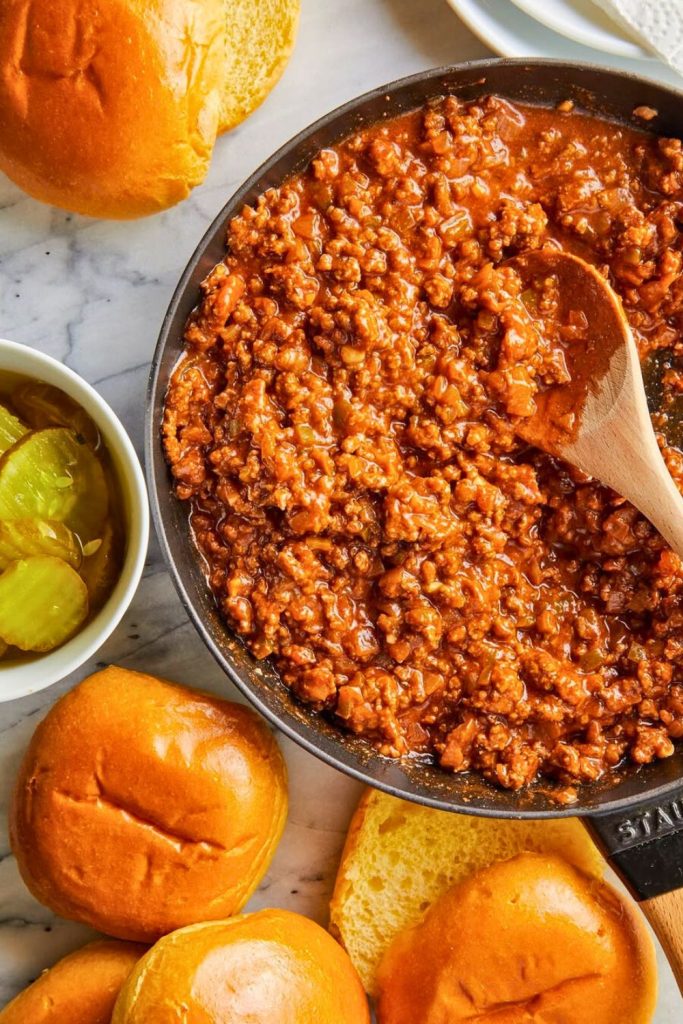
The method moves from preparing the beef to cooking the vegetables, building the sauce, and finishing the buns. Each stage has a specific purpose.
Use the following ten steps to keep the filling tender and the sauce thick enough for a sandwich.
🔧 Step 1: Tenderize the Beef
Begin by preparing the ground beef before chopping the vegetables.
Put 1 pound of 80/20 ground beef in a medium bowl. Sprinkle with ¼ teaspoon baking soda, about 1 gram, and mix gently until distributed.
What the baking soda does:
It makes the surface of the beef more alkaline, which helps limit the tightening of meat proteins during cooking. The small quantity here is intended to improve tenderness without changing the flavor noticeably.
💡 Measure carefully: Do not increase the baking soda casually. Too much can give the beef an unpleasant taste and an overly soft texture.
Cover and refrigerate the beef while you prepare the onion and pepper. Bring it back out when the pan is ready.
🔪 Step 2: Chop Your Veggies
For the vegetables, measure out:
- 1 medium yellow onion, about 150g
- 1 medium poblano pepper, about 100g
Peel the onion and cut it into a fine, even dice. Small pieces blend into the beef filling more easily than large chunks.
Remove the poblano’s stem, seeds, and inner membranes, then dice it to match the onion. Poblanos are usually mild, but individual peppers can vary in heat.
🧠 Texture tip: Keeping both vegetables small and similar in size encourages even cooking and a more cohesive filling.
Have the chopped vegetables ready beside the stove before you heat the pan.
🔥 Step 3: Sauté the Aromatics
Set a large nonstick skillet over medium-high heat, following its manufacturer’s heating guidance. Add the following to begin:
- 1–2 tablespoons olive oil
- The prepared onion and poblano
- A pinch of salt for the vegetables
Cook for approximately 3–4 minutes, stirring often, until the vegetables soften and the onion begins to color at the edges. They do not need a long caramelization.
🔥 Watch the heat:
Give the vegetables enough time to soften without scorching. Their flavor will carry through the finished sauce.
🥩 Step 4: Brown the Beef
When the vegetables have softened, add the prepared ground beef.
Use a meat chopper or wooden spatula to break it into fine crumbles among the onion and pepper. Smaller pieces make a smoother sandwich filling than large clumps.
Spend the first 2–3 minutes breaking up and turning the meat, then continue cooking as needed. Allow contact with the hot pan so it can brown.
🎯 Why crumble it finely?
Small pieces distribute evenly through the sauce and are easier to keep in each bite of the sandwich.
Browning may take about 4–5 minutes in total, depending on the pan. Ground beef must reach 160°F; color alone is not a reliable safety check.
🌶 Step 5: Spice It Up
Add the dry seasonings next and give them a brief cook in the hot mixture.
Measure the following into the skillet:
- Salt: 5g, adjusting downward if your stock or bouillon is salty
- Garlic powder: 5g
- Onion powder: 5g
- Black pepper: 2g
- Paprika: 5g
- A small pinch of chili flakes, optional
Stir for about 30 seconds so the spices mingle with the beef and warm in the pan. Do not let them scorch.
👃 Cooking cue: The spices should become fragrant quickly. Move to the next step before they darken or stick excessively.
🌾 Step 6: Add Flour (Yes, Really)
The next addition is a small amount of flour, which gives the sauce more body.
Sprinkle in 10g all-purpose flour and stir it through the meat. It serves two related purposes:
- It thickens the liquid added in the next stage.
- It helps the sauce hold together with the rendered fat rather than separating readily.
Cook while stirring for 30–60 seconds to coat the beef and vegetables. The liquid added next will hydrate the flour as the sauce simmers.
🍲 Consistency note: Flour assists thickening, but the sauce still needs its uncovered simmer to reduce.
🍅 Step 7: Stir in the Sauce
Add the sauce ingredients to the skillet in these amounts:
- Tomato paste: 50g
- Ketchup: 50g
- Yellow mustard: 15g
- Brown sugar: 15g
- Worcestershire sauce: 50g
- Red wine vinegar: 20g
- Beef bouillon paste: 10g, optional
- Beef stock or broth: 350g
Stir until the tomato paste, condiments, and stock are evenly mixed through the beef. The sauce will be loose initially and will thicken during the simmer.
💥 Tomato paste supplies a concentrated tomato base; ketchup and sugar round it out. Mustard and vinegar sharpen the flavor, while Worcestershire adds a savory note.
Taste the final reduced sauce rather than judging the balance while it is still watery.
⏱ Step 8: Simmer Low and Slow
Bring the filling to a gentle simmer, then lower the heat to medium-low.
Cook uncovered for 10–12 minutes, stirring occasionally and breaking up any remaining large pieces of beef. Continue a little longer if the sauce is still thin.
During this simmer:
- Some of the stock evaporates, concentrating the liquid.
- The seasonings become evenly distributed through the filling.
- The flour thickens the sauce as it reduces.
🧪 Check the consistency:
Draw a spatula through the filling. A channel that remains visible briefly indicates a thicker sauce; this is a texture test, not a substitute for checking the beef’s temperature.
💡 Step 9: Emulsify the Sauce
A little rendered beef fat may rise to the surface during simmering. Stirring helps incorporate it into the thickened liquid.
Stir the filling thoroughly until the sauce looks cohesive and coats the beef. The hydrated flour helps give it a smoother, more even texture.
❗ Adjust if necessary:
If there is a substantial pool of excess fat, spoon some off. If the sauce is still watery, simmer a little longer instead of expecting stirring alone to thicken it.
Taste a cooled spoonful and adjust the salt only if it needs more.
🍞 Step 10: Toast the Buns and Assemble
Finish by toasting the buns and filling them while the beef mixture is hot.
👨🍳 Prepare the Toasted Buns
Warm a nonstick pan over medium heat. Brush the cut faces of 4 brioche buns with 1–2 tablespoons melted butter.
Toast the buns cut-side down for about 1–2 minutes, until golden with lightly crisp edges. Work in batches if needed.
🥯 Why use brioche?
Its soft texture and slight sweetness complement the savory filling. Toasting gives the cut surface a little more resistance to the sauce, although the sandwich will still be pleasantly messy.
🍔 Fill and Finish
Assemble each sandwich as follows:
- Spoon approximately 4–6 ounces of filling onto the bottom half, adjusting the amount to the size of the bun.
- Gather the filling into the center rather than spreading it beyond the edges.
- Place the upper bun over the beef.
- Add a pickle or cheese if desired.
🧼 For less spillage:
Keep the filling centered and avoid overloading a small bun. Serve any extra filling alongside or save it for another meal.
🍽 Serving Tips: More Than Just a Sandwich
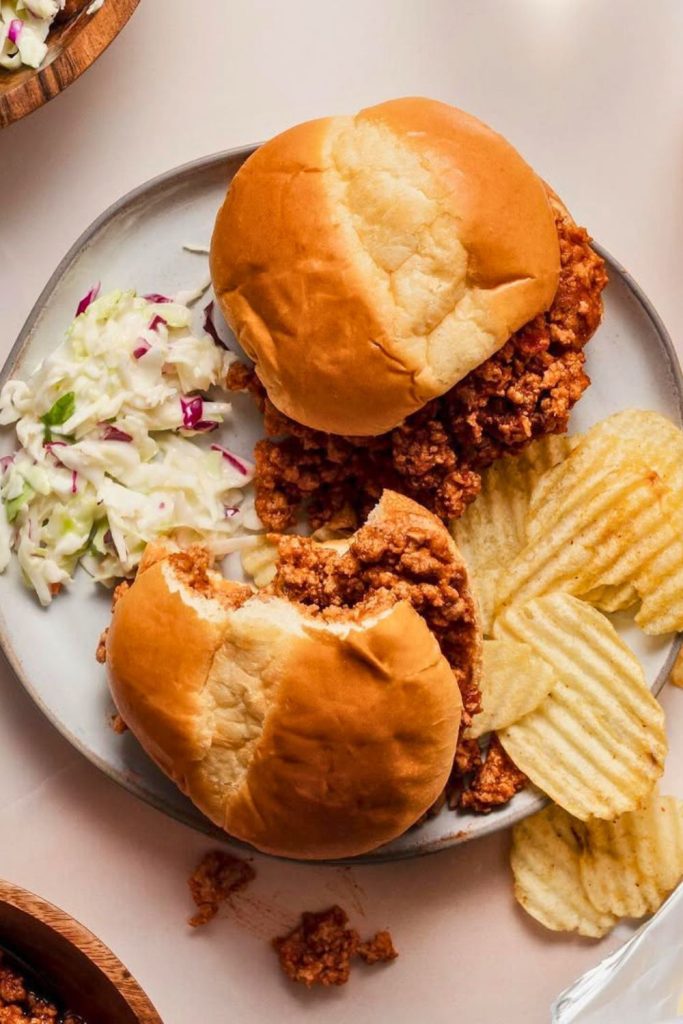
A toasted bun full of warm, saucy beef makes a satisfying main dish on its own. A contrasting side can make the meal feel more varied.
Use the ideas below for a simple dinner, a casual gathering, or a different way to serve the leftovers.
🥗 1. Add a Crisp or Refreshing Side
The sandwich is soft and rich, so something crunchy, cool, or tangy provides a useful contrast. Consider these combinations:
- Coleslaw: cool, crisp cabbage with a tangy dressing.
- Kettle chips or sweet potato fries: a firmer texture alongside the soft filling.
- Dill pickles or pickled onions: a sharp accent between rich bites.
🧠 Side-dish idea: A vinegar-dressed cucumber salad or lemon-and-olive-oil slaw is another fresh option.
🧊 2. Offer Something Cold to Drink
A chilled drink works well with the warm, strongly seasoned filling. Sparkling options include:
- Root beer or ginger ale for an alcohol-free choice
- A crisp lager or amber ale for adults who want beer
- Sparkling water with a slice of lemon or lime
🍺 Choose the drink you enjoy; its coolness and bubbles can be a pleasant contrast to the sandwich.
🧀 3. Choose a Few Extra Toppings
One or two additions are usually enough. Let the beef and sauce remain the main part of the sandwich.
- Sharp cheddar, melted onto the bun or filling
- Sliced jalapeños for additional heat
- Crisp fried onions or shallots for texture
- A little pickled slaw for a sweet-sour accent
- Mashed avocado for a creamy layer
🍔 4. Set Up a Build-Your-Own Sandwich Bar
For a gathering, arrange a Sloppy Joe station where guests can choose buns and toppings. Keep the cooked filling hot for serving.
Set out the following components:
- Prepared beef filling, held at 140°F or above if serving over time
- Brioche buns, potato rolls, or pretzel buns
- Small bowls of cheese, pickles, jalapeños, and slaw
- Mustard, hot sauce, or aioli as optional condiments
🥳 This format suits a relaxed game-day meal, birthday gathering, or dinner with friends.
🥚 5. Give the Leftovers Another Use
The filling can do more than make another sandwich. Reheat stored portions thoroughly before using them in a new meal.
- Stuffed baked potatoes: Spoon hot filling into split baked potatoes and add cheese.
- Sloppy Joe quesadillas: Combine reheated filling and cheese inside tortillas, then griddle until crisp.
- Breakfast hash: Pair hot filling with cooked diced potatoes and top with an egg cooked to your preference.
Refrigerate leftovers promptly in shallow containers and use within 3–4 days. Freeze portions for up to 2 months for best quality, and reheat to 165°F.
🔄 Sloppy Joe Variations to Try
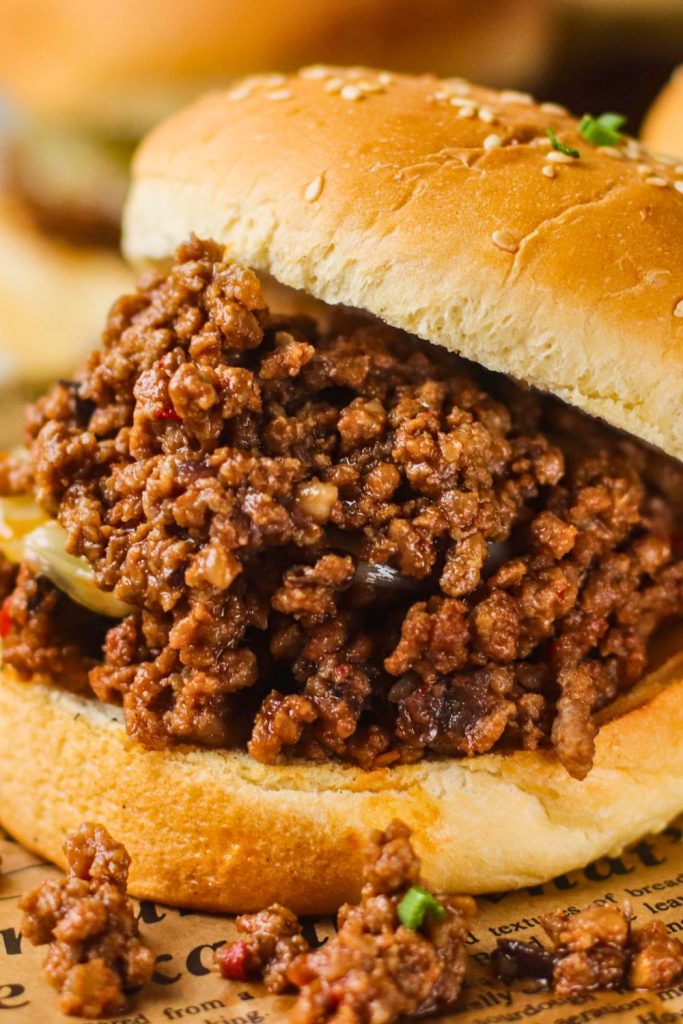
These variations change the seasoning or protein while keeping the saucy sandwich format. Treat them as ideas to adjust to taste, rather than exact copies of the main method.
| Variation Name | What to Add or Swap |
|---|---|
| BBQ Sloppy Joes | Use barbecue sauce in place of the ketchup and tomato paste, then reassess the sugar and vinegar because sauces vary. |
| Tex-Mex Joes | Include cumin, chili powder, and diced green chiles; finish the sandwiches with cheddar. |
| Buffalo Chicken Joes | Use ground chicken cooked to 165°F, add Buffalo sauce, and finish with blue cheese. |
| Korean Sloppy Joes | Add gochujang and a little sesame oil, then top with kimchi or a crisp slaw. |
| Mushroom Veggie Joes | Replace beef with sautéed mushrooms and cooked lentils. Use vegetable stock, omit beef bouillon, and choose vegetarian Worcestershire or a suitable soy sauce. |
| Turkey Apple Joes | Use ground turkey cooked to 165°F, with diced apple, Dijon, and a little maple syrup. |
| Breakfast Sloppy Joes | Spoon hot filling over toasted English muffins and add a cooked egg. |
| Spicy Chipotle Joes | Stir in chopped chipotle in adobo and smoked paprika, adding gradually to control the heat. |
| Sweet & Tangy Pineapple Joes | Add drained crushed pineapple, chili flakes, and vinegar to taste; simmer off excess liquid. |
| Cheeseburger Joes | Mix in grated cheddar and chopped pickles, then serve on sesame buns. |
🌱 For dietary changes: Vegetarian versions also need suitable stock, bouillon, and Worcestershire. Gluten-free versions need appropriate flour, buns, and labeled gluten-free condiments; replacing the beef alone is not enough.
📝 Final Thoughts
A good homemade Sloppy Joe comes down to a filling that is tender, well-seasoned, and thick enough to stay mostly inside the bun.
This version uses finely diced vegetables, a measured baking-soda treatment, and a reduced sauce to build those qualities one stage at a time.
The Sloppy Joseph name is simply a playful label for a more detailed take on a familiar comfort-food sandwich.
Make it for a family meal or a casual dinner, then choose your favorite crisp side and toppings. Keep any extra filling for another sandwich or one of the leftover ideas above.
Homemade Sloppy Joes

🔗 You’ll Also Love:
🥪 5-Minute Grilled Cheese Sandwich Recipe for Fall »
Golden toast and melted cheese make a simple sandwich to serve with soup or enjoy for lunch.
🍲 Hearty Chicken Noodle Soup for Fall Nights »
Chicken, noodles, and vegetables simmer together in a comforting broth for a familiar one-bowl meal.
🍖 Easy Braised Beef Short Ribs for Sunday Dinner »
A slow braise gives these beef short ribs a tender texture and a rich sauce for a leisurely dinner.


Dana Brooks is a home-cooking writer at Feastbears, where she shares easy family recipes, cozy dinners, quick desserts, and beginner-friendly kitchen tips. Her goal is to make everyday cooking feel simple, warm, and enjoyable for busy home cooks.


