A grilled cheese sandwich brings together crisp, buttery bread and a warm, melted center. With a short ingredient list and a little attention at the stove, it makes an easy comfort-food meal.
This version uses thick bread and three cheeses to give the sandwich more texture and flavor. The aim is an evenly golden exterior with cheese that melts all the way through.
Below, you will find the bread and cheese choices, the full cooking method, and tips for controlling the heat. There are also serving ideas and substitutions for working with what you have.
Get the bread, butter, and cheese ready, then follow the steps for a well-browned sandwich with a soft center.
🧡 Why You’ll Love This Grilled Cheese Sandwich

The difference in this grilled cheese comes from a few small choices: softened butter, sturdy bread, and a combination of melting cheeses.
The method is approachable whether you cook often or are making your first grilled cheese. Watch the bread as it browns and give the cheese enough time to soften.
Here is what this version offers:
- A buttery, crisp surface: An even layer of softened butter covers the outside of each bread slice, helping it develop a golden finish in the skillet.
- A melted, stretchy center: The three-cheese filling softens together as the sandwich cooks gently. The precise stretch depends on the cheeses and how warm they are when served.
- More than one cheese flavor: Medium cheddar brings a tangy note, Havarti contributes creaminess, and Gouda adds a mellow, slightly sweet richness. Use smoked Gouda only if you want a smoky flavor.
- An easy lunch or dinner: Serve the sandwich on its own for a simple meal, or add tomato soup and a side for something more substantial.
- A short, manageable method: The sandwich needs only a few ingredients and roughly 6–8 minutes in the skillet, plus preparation and a brief rest. Judge the finish by the bread and cheese rather than a five-minute promise.
Once you understand the heat and timing, this three-cheese sandwich becomes an easy recipe to repeat or adapt.
🧀 Ingredients You’ll Need
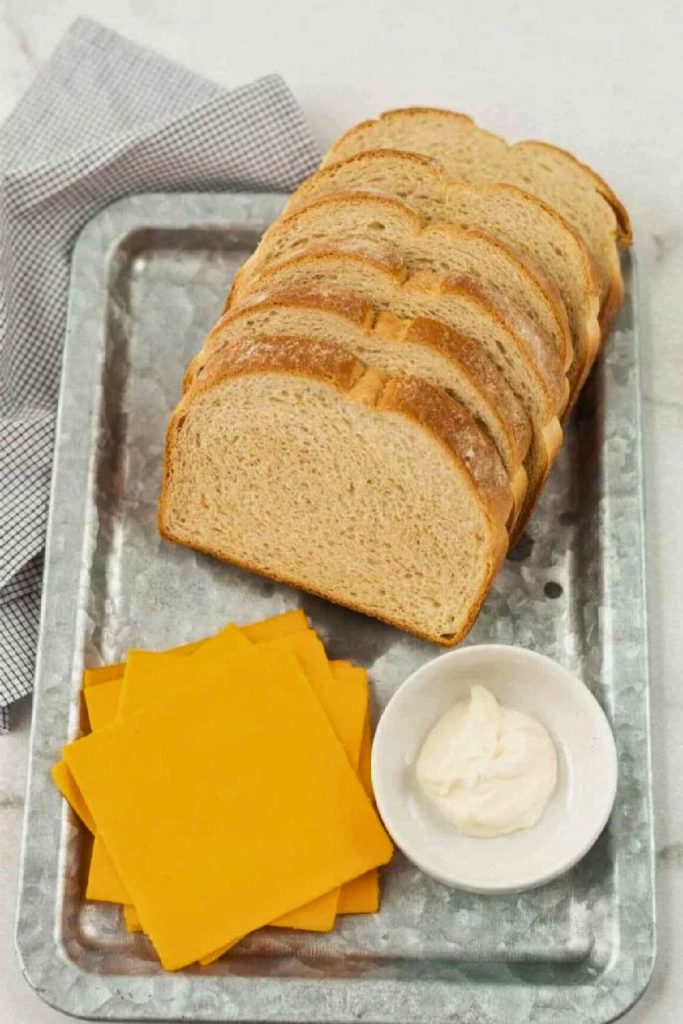
Choose two sturdy slices of bread, softened butter, and cheeses that melt readily. The main recipe uses medium cheddar, Havarti, and Gouda in equal slice counts.
The basic ingredients are listed below:
| Ingredient | Amount | Notes |
|---|---|---|
| Texas Toast | 2 slices | Use plain, thick-cut slices that can support the melted filling. |
| Softened Butter | 1 tablespoon total (½ tbsp per slice) | Coat one outer face of each slice evenly, including the edges. |
| Medium Cheddar | 1 slice | Adds a tangy, familiar cheese flavor. |
| Havarti Cheese | 1 slice | Contributes a mild, creamy melting texture. |
| Gouda Cheese | 1 slice | Adds mellow, slightly sweet richness; use smoked Gouda only for a smoky note. |
Optional additions for the filling:
| Extra Ingredient | Why Use It |
|---|---|
| Thin tomato slices | Add tang and freshness; blot excess moisture before using. |
| Crispy bacon | Use fully cooked bacon for a salty, crisp addition. |
| Caramelized onions | Adds a soft, sweet onion layer; use a modest amount. |
| Avocado slices | Provides a mild, creamy filling. |
| Jalapeños | Adds heat; use according to your spice preference. |
💡 Bread swap: Thick sourdough or French bread can stand in for plain Texas Toast-style bread. Choose slices that hold the filling without being so thick that the center warms too slowly.
Together, these ingredients provide a crisp outside, a creamy middle, and a balance of mild and tangy cheese flavors.
🥪 Step-by-Step: How to Make the Perfect Grilled Cheese Sandwich
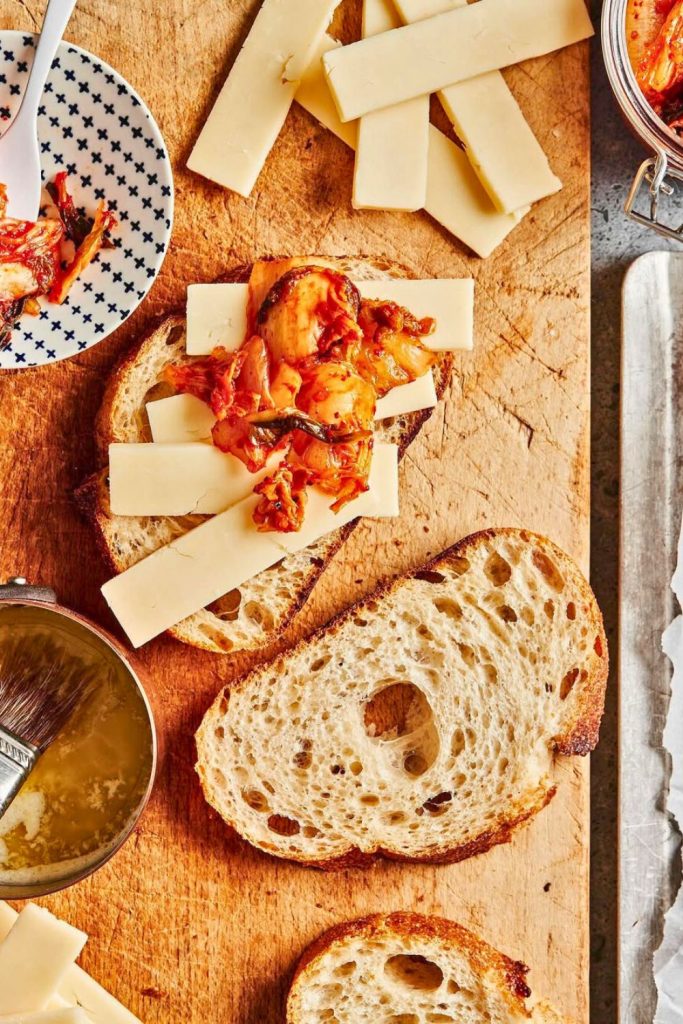
A good grilled cheese is less about complicated preparation than matching the heat to the thickness of the bread and filling. The cheese needs time to melt while the outside turns golden.
The detailed method below explains how to build the sandwich and avoid bread that browns before its center is ready.
Start with the buttered bread, prepare the cheese, then cook and rest the sandwich before slicing.
🧈 Step 1: Butter That Bread (Generously)
An even coating of butter is the first step toward a consistently browned exterior. Soft butter spreads more easily without tearing the bread.
Set out 2 slices of thick-cut bread. Plain Texas Toast-style slices are a good option because they give the filling a sturdy, soft base.
Spread ½ tablespoon softened butter on one side of each slice, using 1 tablespoon in total. These buttered faces will be the outside of the sandwich, touching the skillet.
Cover the edges too: A thin, even coating gives better contact than a lump of butter in the middle. It also supplies the familiar buttery flavor.
Optional flavor: Mix a little garlic powder or finely grated Parmesan into the butter before spreading it.
🧀 Step 2: Choose Your Cheese Wisely
Next, prepare the three-cheese filling.
This version combines sliced cheddar, Havarti, and Gouda rather than relying on one cheese. Choose reasonably thin slices so the center can melt before the bread overbrowns.
Use this combination for one sandwich:
- 1 slice medium cheddar: a tangy, familiar cheese flavor.
- 1 slice Havarti: a mild, buttery layer that melts smoothly.
- 1 slice Gouda: mellow richness with a slightly sweet, nutty character; smoked Gouda gives a different finish.
Stack the slices so they fit within the bread’s edges. Other combinations, such as pepper jack with mozzarella or Swiss with Brie, can be tried using the same general method.
Grating option: Freshly grate the cheeses instead of slicing them if preferred, then distribute them evenly. Smaller pieces can melt more readily than a thick slab.
The three cheeses merge as they warm, giving the filling both creaminess and a more varied flavor than any one of them alone.
🍳 Step 3: Heat the Skillet (Cast Iron Preferred)
Put the skillet over medium-low heat. A gentle cook gives you more control over the bread’s color and the temperature of the center.
A cast-iron skillet retains heat well, but a suitable nonstick or stainless-steel skillet also works. Adjust the burner to suit your pan rather than assuming every skillet behaves the same way.
Why keep the heat moderate? A very hot pan can brown the bread before the cheese softens. Slower cooking lets the inside and outside finish closer together.
Set the first slice buttered-side down in a cold or only lightly warmed skillet. This recipe does not require a fully preheated pan.
🧀 Step 4: Add the Cheese Stack and Close the Sandwich
With the first bread slice in the skillet, add the filling.
Lay the cheddar, Havarti, and Gouda over the unbuttered face in any order. Keep the slices within the edges and press lightly to settle them.
Place the second slice on top with its buttered face pointing upward.
The sandwich is assembled and ready to cook through.
Optional lid: Loosely cover the pan for the first 2–3 minutes to help warm the cheese. Remove the lid as needed so the bread can finish crisping.
⏱️ Step 5: Slow Cook to Golden Perfection
Keep the sandwich over medium-low heat and watch its progress. Lower the burner if the underside darkens too quickly.
Cook the first side for approximately 3–4 minutes. Lift a corner with a spatula to check that the bread is golden rather than relying only on the timer.
Slide a wide spatula underneath and turn the sandwich carefully. Press lightly after turning to improve contact without squeezing out the filling.
Cook the second side for another 3–4 minutes, adjusting the heat until the bread is evenly golden and the cheese has melted.
Look for both signs: The bread should be crisp and browned, and the center should be soft and melted rather than cool or firm.
If necessary, turn the sandwich again briefly over lower heat. Stop once both sides are ready instead of repeatedly pressing or flattening it.
🔪 Step 6: Check That Cheese Pull
Check the finished sandwich before taking it to the cutting board.
Transfer it to a board and rest for 30–60 seconds. This gives the hot filling a moment to settle before you cut it.
Slice it diagonally into two halves, or use whichever shape is easiest to serve. The cut is a presentation choice rather than a change in flavor.
Gently separate the halves while the cheese is still warm.
✨ The. Cheese. Pull. ✨
The filling should look soft and glossy, with some stretch between the pieces depending on the cheeses used.
No dramatic cheese pull? That alone does not mean the sandwich failed. Fully melted cheese and well-toasted bread are the more useful checks.
The finished sandwich should hold together with a crisp exterior and a yielding center. Serve it soon after resting, while the contrast is at its best.
🍽 Pro Tips for Next-Level Grilled Cheese
These extra pointers help when making one sandwich or cooking several in a row:
- Use softened butter for this version. It spreads evenly and provides the intended flavor; other spreads can cook differently.
- Prepare the cheese as you get organized. Taking it out 10–15 minutes before cooking can help it warm slightly; there is no need to leave it out for a long period.
- Place extras between cheese layers. Use cooked bacon and well-drained tomato or other moist fillings, keeping the amount modest.
- Clear away scorched crumbs between batches. Take the pan off the heat and wipe it carefully with heat-safe handling before continuing.
- Serve tomato soup alongside. Its tangy broth is a familiar contrast to the buttery bread and cheese.
🍅 Pair It With: Creamy Homemade Tomato Soup

A bowl of tomato soup is a natural accompaniment to the sandwich.
The pairing works because the soup and sandwich offer different textures and flavors. One is smooth and tangy; the other is crisp and rich.
If you have time, prepare a creamy homemade tomato soup before cooking the sandwich so both can be served warm.
🌿 What Makes the Pairing Work
- Tomato acidity contrasts with the richness of the melted cheese.
- A smooth soup provides a softer texture beside the toasted bread.
- Dipping lets a little tomato broth soak into each bite.
It is an especially familiar combination for a cool day or a simple lunch. The sandwich can also be eaten separately between spoonfuls of soup.
🥣 Features to Look for in Tomato Soup
When choosing or making a soup to serve alongside, consider these elements:
- Whole canned tomatoes can provide a useful, consistent tomato base.
- Onion and garlic softened in butter or olive oil add savory flavor.
- A little cream or milk can give the finished soup a softer texture.
- Blend the soup smooth or leave some texture according to your preference.
- Season with salt, pepper, and basil; add a small pinch of sugar only if the tomatoes need balancing.
For an optional finish, try a little pesto or grated Parmesan on each bowl.
🧄 Serve, Dip, and Enjoy
Ladle the hot soup into a bowl and serve the sliced sandwich beside it. Dip a corner at a time if you want to keep most of the crust crisp.
This turns a small sandwich into a more leisurely, comforting meal.
The tomato flavor offsets the cheese, while the toasted bread gives each spoonful of soup a crisp companion.
Keep the presentation simple: warm soup, freshly cooked grilled cheese, and enough time for both to cool comfortably before eating.
🔥 5 Tips for the Best Grilled Cheese Every Time

A few details have an outsized effect on a grilled cheese sandwich. Pay attention to the butter, bread, heat, filling, and brief resting time.
These five tips bring the main techniques together so you can repeat the result with confidence.
✅ 1. Spread the Butter Evenly
Use softened unsalted butter so you can coat the bread without tearing it. The goal is a light, complete layer rather than an excessive amount.
Allow ½ tablespoon for the outside of each slice, spreading it to the edges. Only one face of each bread slice is buttered in this recipe.
Flavor variation: Add a little garlic powder, Parmesan, or dried Italian herbs to the butter if you want another savory note.
🥖 2. Choose Bread That Holds the Filling
Bread should be sturdy enough for the cheese but not so thick that the middle struggles to warm. Slice size also affects how much filling fits comfortably.
Suitable thicker-cut choices include:
- Plain Texas Toast-style bread
- A sturdy sourdough loaf
- Country-style white bread
- Brioche, for a slightly sweeter sandwich
Match the heat and cooking time to the bread you choose. Very thick slices may need a gentler, longer cook.
🔥 3. Give the Center Time to Melt
Start on medium-low heat and adjust as needed. Fast browning is not helpful if the cheese in the middle is still firm.
The guide here is 3–4 minutes per side, with the bread’s color and the melted center determining the finish.
If the outside gets ahead: Reduce the heat and use the optional brief lid coverage rather than turning the burner higher.
🧀 4. Combine Cheeses with Different Qualities
A cheese blend lets you combine a stronger flavor with a creamier melting texture. It is a useful option, though a single good melting cheese can also make a satisfying sandwich.
The main trio contributes these qualities:
- Medium cheddar: tang and a familiar savory flavor.
- Havarti: a mild, creamy melt.
- Gouda: mellow, slightly sweet richness; smokiness only if using a smoked variety.
Use the substitutions below to adapt the filling, and keep the slices thin enough to melt during the bread’s cooking time.
🍴 5. Rest Briefly Before Cutting
Leave the cooked sandwich on the cutting board for 30–60 seconds before slicing.
That short pause lets the filling settle slightly and makes it easier to handle. Do not leave it so long that the cheese cools and firms completely.
Cut into halves and serve while warm. Separate the pieces gently if you want to show the melted center.
🧀 Cheese Substitutes You Can Try
If the main cheeses are unavailable, the following table suggests alternatives. Their flavors vary, so choose a combination that suits your preference.
| Original Cheese | Best Substitutes | Flavor Profile |
|---|---|---|
| Medium Cheddar | Colby, Monterey Jack, Sharp White Cheddar | Cheddar is tangy; Colby and Monterey Jack give a milder result. |
| Havarti | Fontina, Mozzarella, Muenster | These choices are generally mild and creamy, with different degrees of stretch. |
| Gouda | Smoked Mozzarella, Provolone, Gruyère | Gouda is mellow and slightly sweet; smoked mozzarella adds smoke, while Gruyère is nuttier. |
| Mozzarella | Fontina, Havarti, Monterey Jack | Mozzarella is mild and stretchy; the alternatives add varying degrees of richness. |
| Provolone | Gouda, Mozzarella, Swiss | Provolone ranges from mild to sharper with age; choose a melting variety. |
| Swiss | Jarlsberg, Emmental, Gruyère | These cheeses contribute nutty, savory flavors that suit a warm sandwich. |
💡 About hard aged cheeses: Parmesan and Pecorino are better used in small amounts alongside a melting cheese here, rather than as the entire filling.
🧡 Final Thoughts
A well-made grilled cheese needs only a few ingredients and careful heat control. Good bread, an even butter coating, and a fully melted center provide most of its appeal.
This version gives you crisp bread and a creamy three-cheese filling without an elaborate preparation routine. Once you know the method, it is easy to adapt.
Keep it in mind for a quick lunch or an evening when you want a familiar meal with little preparation.
Serve it plain, add a small amount of your favorite filling, or pair it with tomato soup. Each option keeps the same basic sandwich at the center.
Rest briefly, slice, and enjoy it while the bread is crisp and the cheese is warm.
Three-Cheese Grilled Cheese Sandwich

🧑🍳 More Cozy Recipes You’ll Love
For more comforting meals to serve on a cool evening, explore these recipes:
- Best 45-Min Beef Chili Recipe for Fall Nights – A hearty beef chili with a savory sauce, suitable for serving with cornbread or sour cream.
- Easy & Tasty Potato Soup Recipe for Fall – Creamy potato soup with vegetables and optional toppings for a warming bowl.
- Easy 10-Min Prep Broccoli Cheddar Soup Recipe – Broccoli and cheddar combine in a creamy soup to serve alongside a toasted sandwich.

Dana Brooks is a home-cooking writer at Feastbears, where she shares easy family recipes, cozy dinners, quick desserts, and beginner-friendly kitchen tips. Her goal is to make everyday cooking feel simple, warm, and enjoyable for busy home cooks.


