A pot of beef chili is an inviting way to warm up a cool evening. With tender crumbles of beef, plenty of beans, and a tomato-rich sauce, it makes a satisfying dinner you can serve straight from the stove.
This version combines familiar pantry ingredients with a few small flavor-building steps. Chili powder, cumin, and oregano season the beef, while a little cocoa and brown sugar can round out the finished sauce. The leftovers are just as useful for another day’s meal.
Everything cooks in one pot, so there is no complicated assembly or stack of pans to clean. Set out toppings at the table and let everyone finish their bowl the way they like.
The guide below follows the recipe from chopping the vegetables to the final simmer. You will also find ways to adjust the heat, change the beans, and make the most of a pot cooked ahead.
Gather your ingredients, choose a roomy pot, and work through each stage. A few minutes spent browning and seasoning the base make a noticeable difference to the chili.
💡 Why This Beef Chili Recipe Works
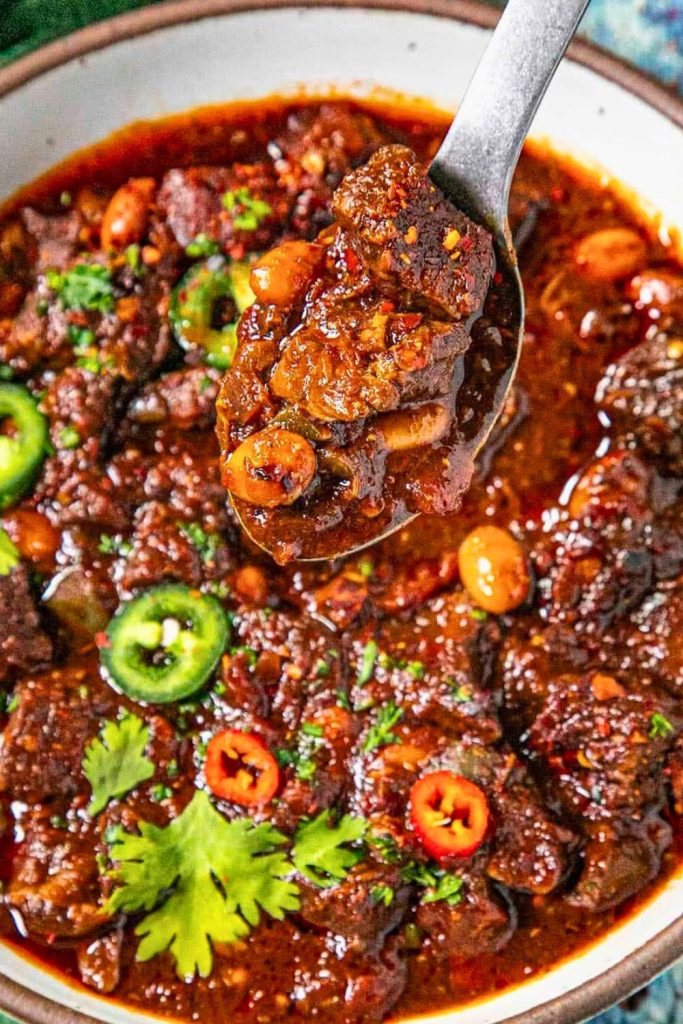
Several practical details give this beef chili its balanced flavor and make it easy to fit into everyday cooking.
1. A Well-Rounded Flavor Base
Beef and tomatoes provide the savory foundation, while cumin and oregano add earthy, aromatic notes. Optional cocoa contributes depth, and brown sugar softens the impression of sharpness without turning the chili into a sweet dish.
2. Familiar, Easy-to-Find Ingredients
Canned tomatoes, canned beans, broth, and dried spices do most of the work. Fresh onion, bell pepper, and garlic add another layer of flavor without requiring a long shopping list.
3. One Pot from Start to Finish
The vegetables, beef, seasonings, and sauce all cook in the same pot. That keeps cleanup manageable and lets the browned bits from the early steps become part of the sauce.
4. Useful for Cooking Ahead
Chili is a convenient make-ahead meal because the seasonings continue to mingle during storage. Refrigerate it promptly in shallow containers, then keep portions ready for lunches or freeze some for a later dinner.
5. Room for Personal Preferences
The base recipe leaves plenty of room for adjustments:
- Use ground turkey, chicken, or venison in place of the beef, adjusting cooking and handling for the protein you choose.
- Leave out the cayenne for a gentler bowl, or increase the heat gradually if you enjoy a spicier chili.
- Choose your favorite canned beans or combine two varieties for different textures.
- Keep the vegetables simple, add another favorite, or leave out an ingredient that does not suit your table.
Start with the recipe as written, then use those small changes to make subsequent pots your own.
🛒 Ingredients You’ll Need

Have the following ingredients measured and ready before cooking. The notes explain the role of each one and where you can make a simple adjustment.
| Category | Ingredient | Notes |
|---|---|---|
| Fresh Produce | 1 large onion | Dice evenly so the onion softens into the base. |
| 1 bell pepper | Choose any color; remove the seeds and inner ribs before dicing. | |
| 4–5 cloves garlic | Mince finely and add after the onion and pepper have softened. | |
| Meat | 1 lb ground beef | A relatively lean grind; remove excess rendered fat if needed. |
| Pantry Staples | 2 tbsp olive oil | For softening the onion and bell pepper. |
| 1 tbsp tomato paste | Cook briefly with the beef to deepen the tomato base. | |
| 3 tbsp chili powder | Use an American-style chili powder blend, not pure hot ground chile. | |
| 1 tbsp ground cumin | Adds earthy flavor to the spice mixture. | |
| 1½ tsp dried oregano | A dried herb that complements the cumin and tomatoes. | |
| ¼ tsp cayenne pepper | Optional; omit for a milder pot. | |
| 1 tbsp cocoa powder | Optional depth of flavor; choose unsweetened cocoa. | |
| 1 tbsp brown sugar | Optional; rounds out sharp tomato flavor without making a sweet sauce. | |
| 1 tsp salt | Start with this amount, then taste after simmering. | |
| ¼ tsp black pepper | Adds gentle warmth; adjust at the end if needed. | |
| Canned Goods | 1 (15 oz) can diced tomatoes | Include the can’s juices in the sauce. |
| 1 (8 oz) can tomato sauce | Provides a smooth tomato component. | |
| 2 (15 oz) cans beans | Drain and rinse; use one variety or a mixture. | |
| Liquid | 2 cups beef broth | Forms the simmering liquid; add a little more if the chili becomes too thick. |
For a no-bean version, omit the beans and adjust the liquid to suit the smaller volume of ingredients. Vegetable broth is an option when changing the protein, and corn or a little jalapeño can add a different texture or a touch more heat.
How to Make Beef Chili: Step-by-Step
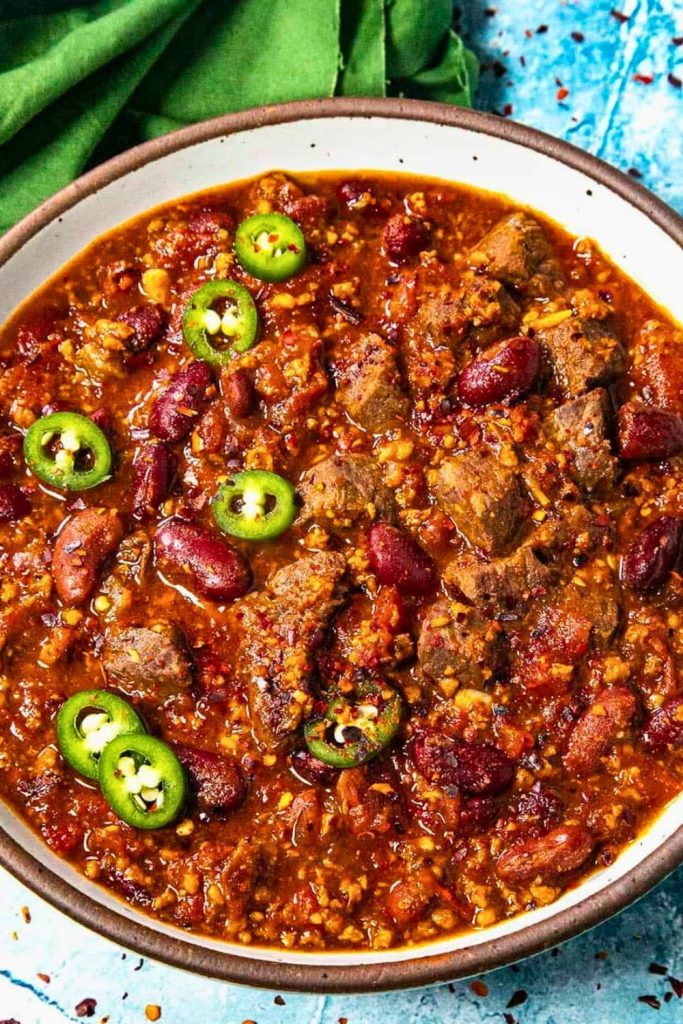
Follow these steps in order so the vegetables soften, the beef browns, and the spices have a chance to develop before you add the liquid.
🔪 Step 1: Prep the Vegetables
Prepare the vegetables first. Once the pot is hot, having everything chopped keeps the early stages moving without leaving garlic or spices unattended.
Start with a Stable Cutting Setup
Use a sharp knife on a steady cutting board, keeping your fingertips tucked back as you cut. A controlled, even dice is more useful here than rushing through the prep.
Chop the Onion
Peel one large onion and cut it into small, fairly even pieces. These will soften into the sauce and help build the chili’s savory base.
If cutting onions bothers your eyes, work in a ventilated spot and pause when needed. Finish the chopping before you turn on the stove.
Dice the Bell Pepper
Remove the stem, seeds, and inner white ribs from one bell pepper. Cut it into strips, then into small pieces. Red pepper brings a sweeter note; green pepper gives the base a more grassy flavor.
For a different pepper flavor, try poblano or add a small amount of jalapeño. Their heat can vary, so do not assume that a whole hot pepper will be an equally mild substitute for a bell pepper.
Mince the Garlic
Peel and finely mince four to five garlic cloves, or put them through a garlic press. Keep the garlic separate from the onion and pepper because it goes into the pot later.
Fresh garlic gives the base a fragrant finish. Use the smaller amount if you prefer a gentler garlic flavor, then adjust in a future batch to suit your taste.
With the vegetables prepared, you can give the pot your attention instead of stopping to chop between steps.
🔥 Step 2: Sauté the Veggies
Cook the onion and pepper before adding the beef. This gives them time to soften and creates the foundation for the rest of the recipe.
Choose a Roomy, Heavy Pot
A Dutch oven or another large, heavy-bottomed pot works well. Leave enough space to stir the beef and, later, the beans without pushing ingredients over the rim.
Warm the Oil
Add two tablespoons of olive oil and heat over medium-high heat until it shimmers. If the oil begins smoking, lower the heat before adding the vegetables.
Soften the Onion and Pepper
Add the diced onion and bell pepper. Cook for about five minutes, stirring regularly, until the onion looks translucent and the pepper begins to soften.
This initial cooking takes the raw edge off the vegetables and brings their flavor into the oil.
Stir in the Garlic
Add the minced garlic and cook for about one minute, stirring so it does not sit against a hot spot on the bottom of the pot.
Garlic can become bitter if it burns. Lower the heat if necessary and move on as soon as it smells fragrant.
The softened vegetables are now ready for the beef.
🍖 Step 3: Brown the Beef
Browning the beef adds more flavor than simply letting it cook in the tomato sauce. Break it up as it cooks so every bowl has evenly distributed pieces.
Add the Ground Beef
Put one pound of 90/10 ground beef into the pot. If you choose a fattier grind, plan to remove excess rendered fat after browning.
Separate the Meat into Crumbles
Use a sturdy spoon or spatula to break up the beef, then stir and turn it as it cooks. Aim for small crumbles rather than a few large clumps.
A 90/10 blend keeps the base relatively lean while still contributing flavor. Ground poultry is another option, but it must reach 165°F (74°C), rather than the 160°F (71°C) minimum for ground beef.
Cook the Beef Thoroughly
Allow roughly seven to ten minutes for the beef to cook and brown, adjusting the heat as needed. Check that ground beef reaches 160°F (71°C); color alone is not a reliable safety test.
Some browned bits on the bottom of the pot are useful for flavor. Avoid letting them turn black, and carefully spoon off any excess fat before continuing.
🍅 Step 4: Build the Flavor Base
Now add the concentrated tomato flavor and dry seasonings. This short stage helps distribute them through the meat before the broth goes in.
Cook the Tomato Paste
Stir in one tablespoon of tomato paste and cook for one to two minutes. Keep it moving so it coats the beef and vegetables without scorching.
Measure in the Spices
Add the following seasonings:
- 3 tablespoons chili powder — use an American-style chili powder blend, not an equal amount of pure hot ground chile.
- 1 tablespoon ground cumin for an earthy, aromatic note.
- 1½ teaspoons dried oregano to round out the spice mixture.
- ¼ teaspoon cayenne pepper, optional for additional heat.
Coat the Beef Evenly
Stir the spices through the pot, along with one teaspoon of salt and ¼ teaspoon of black pepper. Cook briefly, about a minute, stirring continuously before adding the remaining ingredients.
For milder chili, select a mild chili powder blend and omit the cayenne. You can offer hot sauce at the table for anyone who wants extra heat.
🍫 Step 5: Add a Flavor Boost (Optional, but Delicious)
Cocoa and brown sugar are optional additions that change the background flavor without needing another major ingredient.
Add Unsweetened Cocoa, If Using
Stir in one tablespoon of unsweetened cocoa powder for a deeper, slightly earthy note. Use unsweetened cocoa, not a sweetened drinking-chocolate mix.
Include a Little Brown Sugar, If Desired
One tablespoon of brown sugar can make the tomato flavor taste less sharp and soften the impression of the spices. Stir it in thoroughly so it dissolves into the sauce.
The aim is balance rather than sweetness. If you prefer a chili with no added sugar, leave this addition out.
These flavor boosters are useful options, not requirements. The beef, vegetables, and spice blend still form the core of the recipe.
🫘 Step 6: Add Tomatoes, Beans & Broth
The next additions turn the seasoned beef into chili. Open the cans, drain the beans, and keep the tomato juices.
Add Both Tomato Ingredients
- Pour in one 15-ounce can of diced tomatoes, including the juices.
- Add one 8-ounce can of tomato sauce.
The liquid from the diced tomatoes belongs in the pot; it contributes to the sauce as the chili simmers.
Stir in the Beans
Drain and rinse two 15-ounce cans of beans, then add them to the beef and tomatoes. Suitable options include:
- Pinto beans for a soft, creamy texture.
- Kidney beans for larger beans that hold their shape well.
- Black beans for smaller bites and a slightly firmer texture.
- Cannellini beans for a mild-flavored alternative.
Use two cans of one type or mix varieties. Since the canned beans are already cooked, they only need to heat through and take on the sauce’s flavor.
Pour in the Broth
Add two cups of beef broth and stir everything together. The mixture will thicken during the uncovered simmer.
If you prefer a particularly thick chili, hold back a little broth at first. Add more later if the sauce reduces more than you want.
Loosen the Browned Bits
Scrape the bottom gently with your spoon to lift any flavorful browned bits into the liquid. Stir until the tomato paste and seasonings are evenly dispersed.
⏱️ Step 7: Simmer and Let the Flavors Marry
A steady simmer gives the ingredients time to come together. Keep the heat gentle enough that the chili bubbles without splashing vigorously.
Bring the Pot to a Gentle Simmer
Let the mixture begin bubbling, then reduce the heat to low. Adjust it as needed to maintain a slow, even simmer.
Leave the Pot Uncovered
Simmer for about 25 to 30 minutes, stirring occasionally and checking the bottom of the pot.
Leaving the lid off allows some liquid to evaporate, concentrating the sauce. If the chili becomes too thick before the simmer is finished, stir in a splash of broth.
Use this time to grate cheese, chop toppings, or prepare something to serve alongside. Stay close enough to stir the chili and monitor its consistency.
🥄 Step 8: Taste and Adjust
Taste the finished chili before serving. A small final adjustment can make the flavors feel more complete.
Adjust the Seasoning Gradually
Depending on your ingredients and preferences, consider a little more:
- Salt, added in small pinches after tasting.
- Hot sauce for a sharper, spicier finish.
- Lime juice or vinegar, a few drops at a time, to brighten a heavy-tasting sauce.
Broths, canned tomatoes, and spice blends differ, so use your taste as the guide rather than adding all the extras automatically.
🧀 Step 9: Top It Like a Pro
Ladle the chili into bowls and finish with your chosen toppings. A mix of creamy, crisp, and fresh additions makes each bowl feel a little different.
Toppings to Set Out
- Shredded cheddar to melt over the warm chili.
- Sour cream for a cool, tangy contrast.
- Sliced green onion or diced red onion for a fresh bite.
- Diced avocado for a creamy topping.
- Tortilla chips or cornbread croutons for crunch.
- Chopped cilantro for a fresh herbal finish.
Serve the toppings in small bowls so everyone can choose their own combination.
✅ 5 Game-Changing Tips for the Best Beef Chili

These five pointers help you manage the texture, heat, and make-ahead steps without changing the basic recipe.
1. Choose Beef with the Fat Level You Prefer
The recipe uses 90/10 ground beef for a relatively lean base. Check the pot after browning and remove excess fat if needed rather than assuming a leaner label means there will be none.
If you use 80/20 beef, carefully spoon the extra rendered fat into a heat-safe container. Do not pour it down the sink.
2. Give the Vegetables Their Own Cooking Time
Softening the onion and pepper before the beef goes in helps them become part of the sauce. Adding everything at once makes it harder to give the vegetables that early attention.
To shorten prep on cooking day, chop the vegetables ahead and refrigerate them in covered containers. Keep the minced garlic separate so you can add it at the right stage.
3. Warm the Spices Before Adding Liquid
Stir the seasonings into the meat and cook for about a minute before pouring in the tomatoes and broth. Lower the heat if the bottom of the pot begins to dry out.
This brief warming brings out the spices’ aroma. It is a short step, not a reason to let the spice mixture darken or burn.
4. Build Heat in Small Increments
A mild pot is easier to share with people who have different spice preferences. You can leave out cayenne and let heat lovers add their own hot sauce.
Offer a favorite hot sauce alongside the other toppings instead of committing the entire batch to a high heat level.
5. Store Make-Ahead Chili Promptly
For tomorrow’s meal, divide the chili into shallow containers and refrigerate within two hours of cooking, or within one hour when the temperature is above 90°F (32°C). Refrigerated leftovers should be used within three to four days.
Freeze extra portions for longer storage. Reheat leftovers to 165°F (74°C), stirring to eliminate cold spots and adding a little broth if the chili has thickened.
🔄 Variations to Try: Make It Your Own
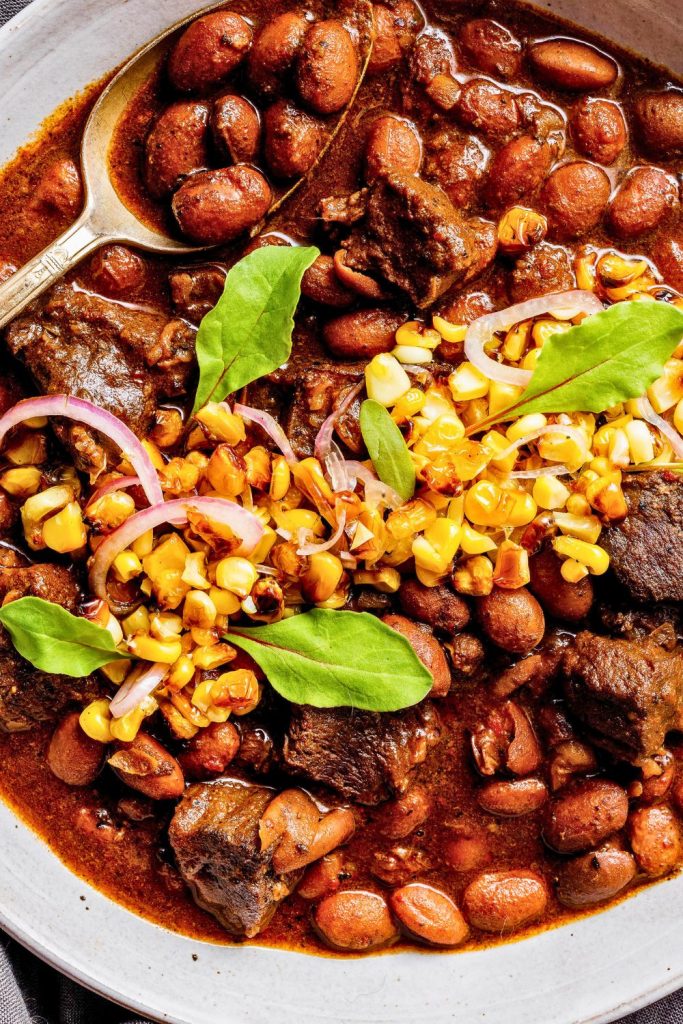
Use these variations as starting points. Each changes part of the original recipe, so adjust the liquid, seasoning, and cooking needs to match the ingredients you choose.
| Variation Type | What to Switch or Add | Flavor Profile / Why Try It |
|---|---|---|
| No-Bean Chili | Omit beans and double the meat or add diced mushrooms | A beef-forward, no-bean variation; mushrooms are another option, but this change alone does not make it a traditional Texas chili. |
| Vegetarian | Replace beef with lentils, mushrooms, or plant-based meat | Use vegetable broth as well as a meat-free replacement. If choosing lentils, use cooked lentils and adjust the liquid; check toppings too. |
| Turkey or Chicken | Use ground turkey or chicken thighs | A poultry variation; cook ground turkey or chicken to 165°F (74°C). |
| Spicy Chili | Add diced jalapeños, chipotle in adobo, or more cayenne | Add heat gradually and taste before including more hot peppers or cayenne. |
| Sweet & Smoky | Add a splash of BBQ sauce, smoked paprika, or maple syrup | Sweetness and smokiness vary by sauce, so add a little at a time and reconsider the brown sugar. |
| Tex-Mex Style | Add corn, green chilies, taco seasoning, or black beans | Corn, green chiles, and black beans change the texture; watch the salt if adding taco seasoning. |
| Chili Mac | Stir in cooked macaroni at the end | Fold in cooked macaroni near serving, adding broth if the pasta makes the mixture too thick. |
| Low-Carb/Keto | Skip beans and use ground beef with cauliflower rice | Omitting beans reduces one source of carbohydrates, but the recipe is not carb-free. Omit or adjust brown sugar and check other ingredients for your needs. |
| Beer Chili | Replace ½ cup broth with dark beer (like stout or ale) | Replace only ½ cup of the broth with beer. It changes the flavor, and simmering does not guarantee removal of all alcohol. |
Taste as you make changes, especially when adding salty sauces or extra spice. Keeping the sauce, protein, and beans in balance is more helpful than adding every variation at once.
🏁 Final Thoughts: A Bowl Full of Comfort
Beef chili is a practical, comforting meal that rewards a few straightforward steps: soften the vegetables, brown the meat, warm the spices, and let the sauce simmer.
Serve it in bowls with toppings, spoon it over rice, or pair leftovers with cooked pasta. That flexibility makes one pot useful for more than one meal.
With canned beans and tomatoes in the pantry, the remaining preparation is simple. Take the time to taste the finished sauce and adjust it to the ingredients in your kitchen.
Keep this recipe handy for a cool evening or a cook-ahead dinner, and make a note of the bean and topping combination you enjoy most.
Hearty Beef Chili with Beans

🍽️ You Might Also Like:
For more comforting dinner ideas, explore these recipes next:
🥣 Easy Butternut Squash Soup for Fall Vibes
A smooth squash soup is another cozy option when you want a different style of warming bowl.
🍗 Healthy Balsamic Chicken Recipe for Families
Try this balsamic chicken when you want to switch from a spoonable meal to a chicken-centered dinner.
🍛 Creamy Chicken Wild Rice Soup Recipe
Chicken, wild rice, and a creamy broth offer another hearty soup to add to your dinner rotation.

Dana Brooks is a home-cooking writer at Feastbears, where she shares easy family recipes, cozy dinners, quick desserts, and beginner-friendly kitchen tips. Her goal is to make everyday cooking feel simple, warm, and enjoyable for busy home cooks.


