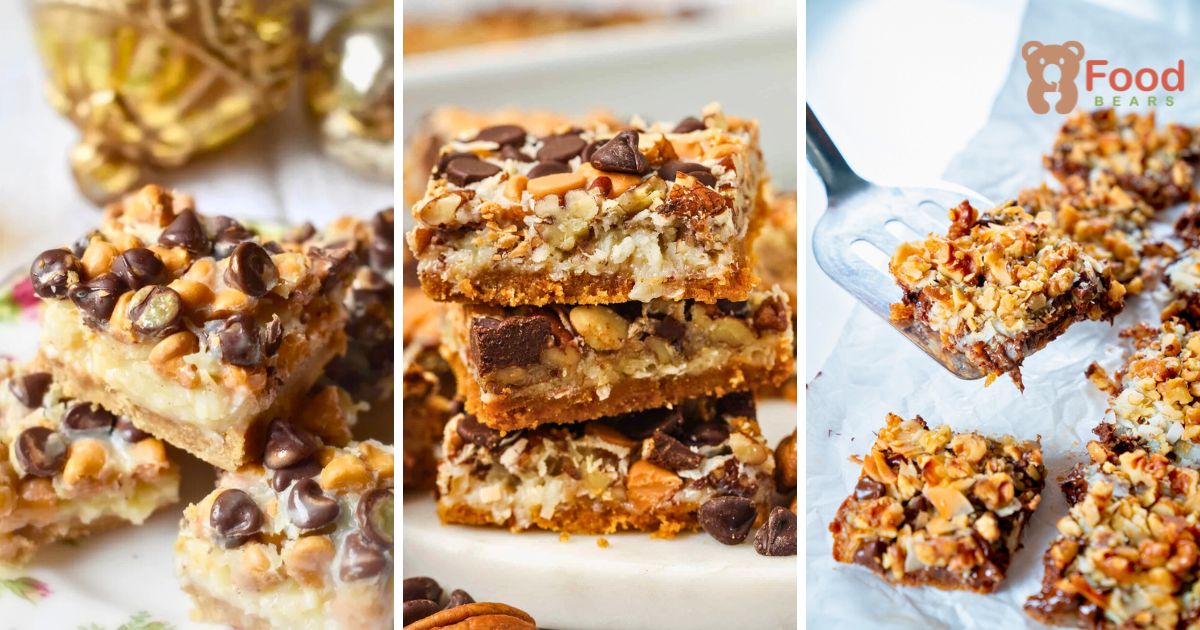
These Magic Cookie Bars turn everyday baking staples into a gooey, chewy dessert with layers of contrasting texture.
Often called seven-layer bars or Hello Dolly bars, they start with a crisp graham base and finish with coconut, chocolate, nuts, and sweetened condensed milk.
Here, chocolate and peanut-butter chips pair with pecans, while a restrained sprinkle of flaky salt keeps the sweetness balanced.
Instead of mixing and shaping cookie dough, you simply press, scatter, pour, and bake everything in one pan.
The bars travel well once cooled, so they are an easy choice for holiday trays, potlucks, bake sales, and casual gatherings.
What Are Magic Cookie Bars, and Why Are They So Popular?
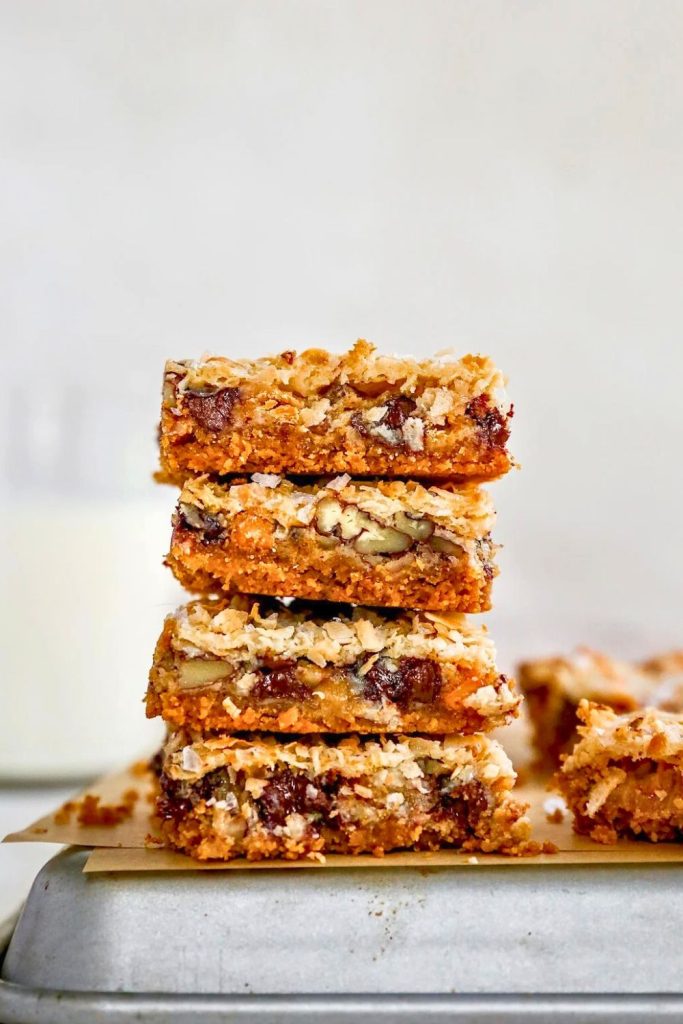
Magic Cookie Bars, Hello Dolly Bars, and 7-Layer Bars are different names for the same beloved layered bake.
The appeal lies in the method: firmly press a buttery crumb crust, distribute the toppings, cover them with condensed milk, and let the oven bring the layers together.
This combination piles chocolate chips, peanut-butter chips, toasted pecans, and coconut onto a simple graham-cracker foundation.
During baking, the condensed milk settles between the toppings and creates a chewy top over a crisp, sturdy base.
Home bakers return to these bars for a few practical reasons:
- Easy assembly: There is no mixer or separate cookie dough.
- Flexible layers: Different chips, nuts, and cookie crumbs can be substituted.
- Familiar appeal: The bars are a longstanding bake-sale and family-gathering favorite.
Ingredients You’ll Need
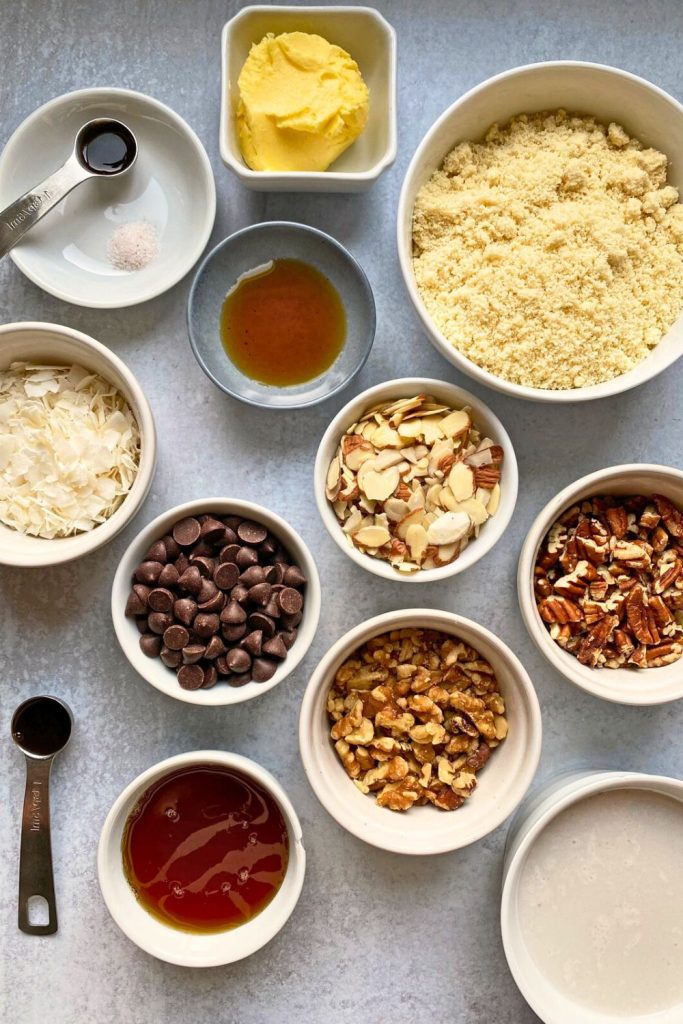
| Category | Ingredient | Amount / Notes |
|---|---|---|
| Crust | Graham crackers | About 12 full sheets, or 1¼ cups crumbs |
| Melted butter | ½ cup (113 g) | |
| Finely chopped pecans or walnuts | ½ cup | |
| Sea salt | Pinch | |
| Layers | Chocolate chips | ¾ cup |
| Peanut-butter chips | ¾ cup | |
| Toasted pecans | ¾ to 1 cup, chopped | |
| Sweetened shredded coconut | 1⅓ cups | |
| Sweetened condensed milk | 1 can (14 ounces / 400 g) | |
| Finish | Flaky sea salt | Light sprinkle before baking |
How to Make Magic Cookie Bars (Step-by-Step)
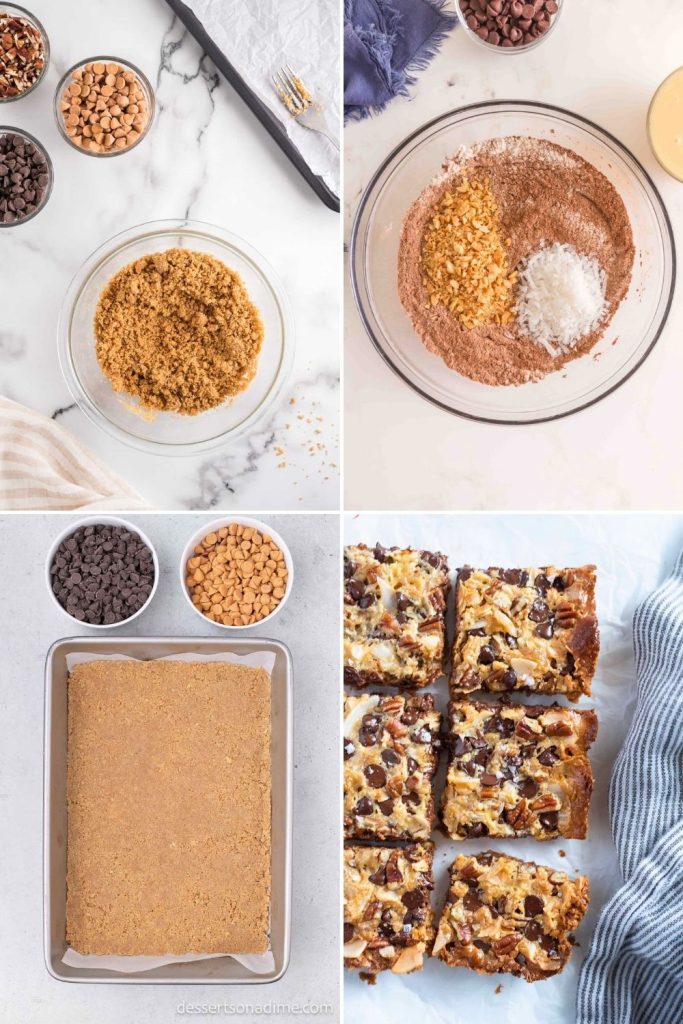
You will assemble the entire dessert in a parchment-lined square pan, one layer at a time.
Keep the layers in the stated order and spread them to the corners so every slice has a compact crust and an even amount of filling.
Start by preparing the graham-cracker crust.
Step 1: Make the Buttery Graham Cracker Crust
A well-packed crust gives the rich toppings a crisp, buttery platform and helps the cut bars hold together.
Process about 12 full graham-cracker sheets into roughly 1¼ cups of fine crumbs, or crush them in a sealed bag with a rolling pin.
Stir in ½ cup finely chopped pecans or walnuts for extra texture.
Add ½ cup (113 g) melted butter and mix until the crumbs resemble damp sand and hold together when pressed.
Pro Tip: Do not add extra sugar to the crust. A pinch of sea salt is more useful for balancing the condensed milk and chips.
Packing the lightly salted crumbs firmly is what gives the finished bars clean edges and keeps their sweetness from becoming overwhelming.
Step 2: Prep the Pan (No Sticky Surprises!)
Line the pan well so the sticky baked layers lift out without tearing.
Use parchment rather than foil, leaving enough overhang on two sides to create handles.
For a neat fit:
- Set an 8-by-8- or 9-by-9-inch pan over the parchment as a guide.
- Cut small slits at the corners so the paper folds against the sides.
- Press the parchment into the pan and crease the edges.
Bonus Tip: A small dab of butter beneath the paper can hold it in place.
Spread the crumb mixture across the lined pan and press it firmly with a flat-bottomed glass or measuring cup.
Press with firm, even strokes rather than patting lightly; a compact base is far less likely to break apart during slicing.
Compact the corners and edges as carefully as the center.
Step 3: Add the Sweet Layers of Magic
The toppings can now be distributed over the prepared crust.
Add them in this order:
- Chocolate chips (¾ cup): Use semisweet, milk, or dark chocolate and scatter them evenly.
- Peanut-butter chips (¾ cup): Substitute white chocolate, butterscotch chips, or toffee pieces if preferred.
- Toasted pecans (¾ to 1 cup): Roughly chop and spread them over the chips.
- Sweetened shredded coconut (1⅓ cups): Separate any clumps so the coconut covers the pan evenly.
Substitutions:
Use Biscoff crumbs or digestive biscuits instead of graham crackers.
Replace chips with chopped chocolate.
Reduce or omit coconut if necessary, understanding that the texture will change.
The measurements allow some flexibility, but keep the overall volume balanced so the condensed milk can reach and bind the layers.
Step 4: Pour the Magic (Condensed Milk)
Sweetened condensed milk does more than add sweetness—it flows around the toppings and binds every layer as it bakes.
Drizzle one 14-ounce (400 g) can slowly over the pan in a zigzag pattern.
Cover the edges and corners so exposed coconut does not toast too quickly.
Use a flexible spatula to scrape out the can and spread the last of the milk over any dry-looking spots.
As it heats, the condensed milk thickens and lightly caramelizes around the chips, nuts, and coconut.
Step 5: Sprinkle Sea Salt (The Secret Weapon)
A little salt keeps the many sweet layers in balance.
Finish with a small, even pinch of flaky sea salt rather than concentrating it in one area.
The salt highlights the chocolate and peanut butter while adding a delicate crunch.
Do not overdo it: A light, even sprinkle is enough.
Once salted, the pan is ready to bake.
Step 6: Bake Until Golden
Place the pan in the oven.
Bake at 350°F (175°C) for 30 to 35 minutes.
Look for:
- Golden, lightly bubbling edges
- Toasted coconut across the top
Remove the pan once it is golden; condensed milk can move from caramelized to scorched quickly near the end.
A soft-looking center will firm as the bars cool.
Optional: Add a few extra chocolate chips as soon as the pan leaves the oven; the residual heat will soften and secure them.
Step 7: Cool Completely Before Cutting
Cooling is necessary for the layers to set.
Leave the bars at room temperature for at least 2 hours.
Cutting too soon makes the warm layers slide apart, whereas complete cooling lets the condensed milk set into neat, stable bars.
To shorten the wait, refrigerate the pan for about one hour after it has stopped steaming.
Use the parchment overhang to lift the cooled slab from the pan, then peel the paper away.
Step 8: Taste the Magic
Cut only after the bars are firm.
Use a sharp knife to make 16 smaller party pieces or 9 larger dessert bars.
Tip: Wipe the blade between cuts and press straight down for neater edges.
Once firm and sliced, the bars are ready for the serving plate.
Each bite should include crisp graham crumbs, chewy coconut, melted chocolate and peanut butter, toasted nuts, and a light touch of salt.
The result is rich and layered without requiring a bowl of traditional cookie batter.
That effortless transformation from loose layers to one cohesive dessert is exactly why the bars earned their “magic” name.
Flavor Variations to Try

The basic layers can be adjusted for seasons, dietary needs, or ingredients already in the pantry.
Use the table below for ideas that retain the chewy, layered format while changing the flavor.
| Variation | Change | Flavor |
|---|---|---|
| Triple Chocolate | Use milk, dark, and semisweet chocolate chips | Deep and chocolate-forward |
| White Chocolate Cranberry | Replace peanut-butter chips with white chocolate and add ½ cup dried cranberries | Sweet, creamy, and tart |
| Salted Caramel | Drizzle ¼ cup caramel over the layers and finish with flaky salt | Gooey sweet-salty flavor |
| S’mores | Add mini marshmallows and extra graham crumbs near the end of baking | Campfire-style sweetness |
| Nut-Free Coconut | Omit nuts and use pretzel pieces or sunflower seeds if suitable | Chewy with extra crunch |
| Mocha | Stir 1 teaspoon espresso powder into the condensed milk | Coffee and chocolate |
| Tropical | Add dried pineapple and macadamia nuts | Fruity and coconut-rich |
| Mint Chocolate | Add a little peppermint extract and crushed candy cane | Cool winter flavor |
| Extra Peanut Butter | Use more peanut-butter chips and swirl in 2 tablespoons peanut butter | Rich and nutty |
| Dark Chocolate Cherry | Use dark chocolate, dried cherries, and almonds | Bold and slightly tart |
Tips for Perfect Magic Cookie Bars

The recipe is forgiving, but a handful of details makes the crust sturdier, the top more evenly golden, and the slices cleaner:
- Pack the crust firmly: Use a flat-bottomed cup to apply even pressure, especially in the corners.
- Toast the nuts: About 10 minutes at 350°F deepens the flavor of pecans or walnuts; cool them before layering.
- Line with parchment: Overhanging paper makes the sticky slab easier to lift and cut.
- Balance the sweetness: Add only a light sprinkle of flaky salt before baking.
- Cool completely: The condensed milk needs time to set before the slab is cut.
- Avoid overbaking: Remove the pan when the edges are golden and bubbling; the center continues firming as it cools.
Together, these techniques create a crisp base, chewy middle, toasted surface, and a satisfying sweet-salty finish.
Serving Ideas

Offer the bars on their own, or work them into a larger dessert spread with contrasting flavors and textures.
- Dessert squares: Cut small pieces and arrange them on a bake-sale, holiday, or afternoon-tea platter.
- Warm à la mode: Warm a bar for about 10 seconds and add vanilla or coconut ice cream.
- Parfait: Crumble pieces and layer them with whipped cream, yogurt, or pudding.
- Gift packages: Wrap individual squares in parchment and tie them for holiday sharing.
- Dessert board: Combine the bars with brownies, cookies, and fresh fruit.
- Coffee pairing: Serve a small bar with a latte or espresso.
Final Thoughts
Magic Cookie Bars live up to their name by turning familiar pantry ingredients into a single pan of rich, textured squares.
From the salty graham base to the creamy chips, chewy coconut, toasted nuts, and caramelized milk, every layer has a distinct job.
They are equally at home at a weekend gathering, a holiday table, a cookie exchange, or a neighborhood potluck.
Because the method is simple and the cooled slab cuts and travels neatly, this is an especially practical sharing dessert.
Keep the key ingredients stocked for those moments when you want an impressive treat without preparing conventional cookie dough.
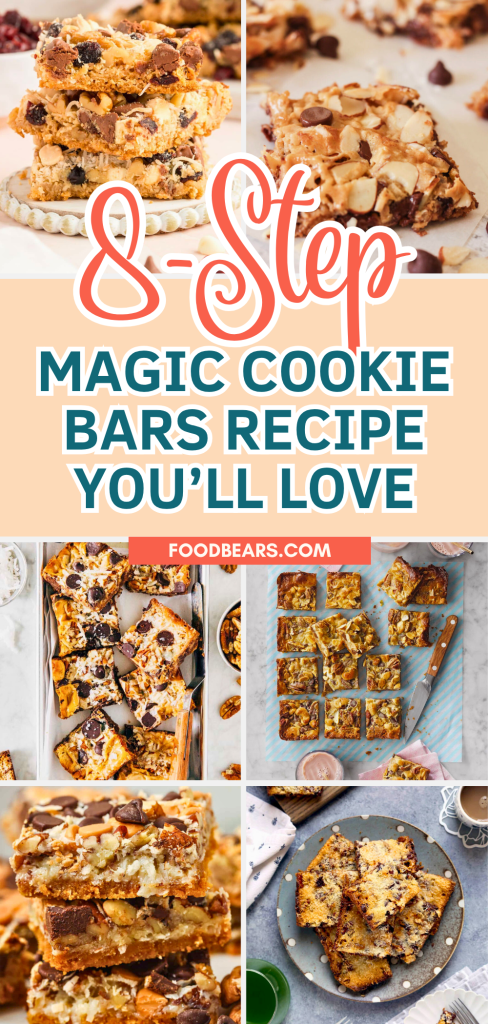
Magic Cookie Bars
More Cozy Cookie Recipes You’ll Love
If these bars hit the spot, the linked FeastBears cookie recipes below are excellent choices for your next bake.
- 🍓 Quick & Easy Thumbprint Cookies Recipe in 40-Min — Fill tender butter cookies with bright raspberry jam.
- 🍫 Chewy Brownie Cookies Recipe for Cozy Weekends — Bake rich cocoa cookies with soft, fudgy centers.
- ❄️ Best Chocolate Crinkle Cookies Recipe for Winter — Coat chocolate dough in powdered sugar for a snowy crackled surface.
The three options add jam-filled, deeply chocolate, and crisp-chewy variety to your dessert lineup.
Choose one recipe for another day, or serve all three beside the bars on a generous holiday platter.

Dana Brooks is a home-cooking writer at Feastbears, where she shares easy family recipes, cozy dinners, quick desserts, and beginner-friendly kitchen tips. Her goal is to make everyday cooking feel simple, warm, and enjoyable for busy home cooks.


