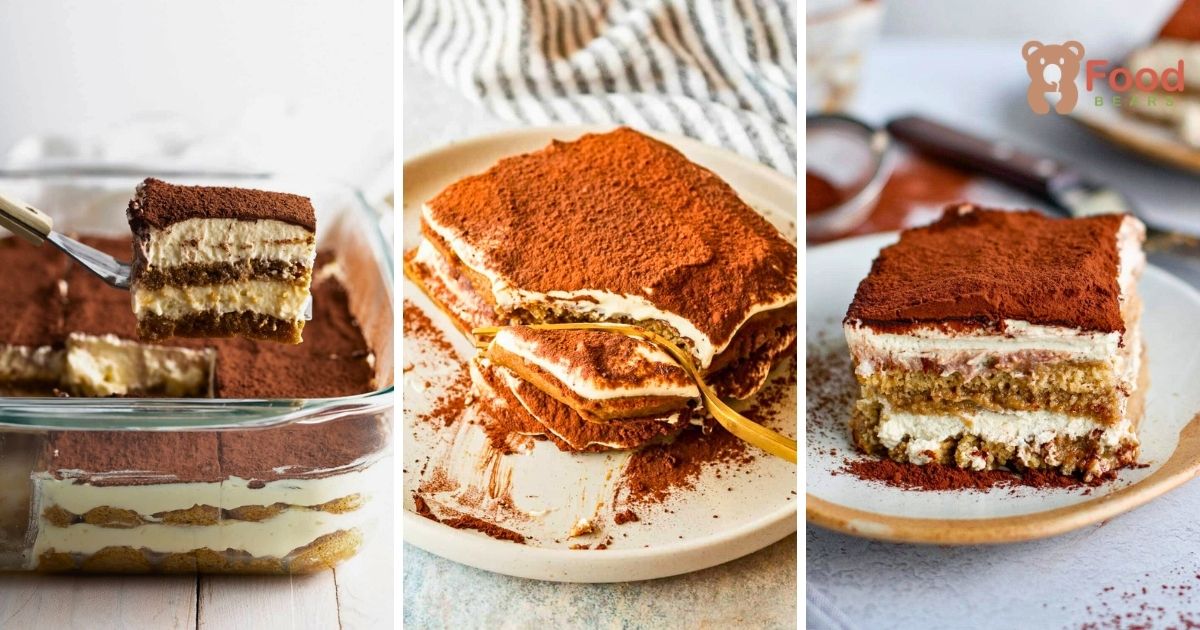
Classic tiramisu layers espresso-soaked ladyfingers with a smooth mascarpone cream and a generous dusting of cocoa.
Dark rum adds warmth to both the coffee and cream in this version, supporting the dessert’s deep, rounded flavor beneath the cocoa.
Because tiramisu sets in the refrigerator, it is an excellent make-ahead choice for dinner parties, holidays, or an unhurried weekend dessert.
The method below keeps the original sequence: prepare the coffee, cook the yolk custard, build the filling, assemble the layers, and chill until set.
What Is Tiramisu?

Tiramisu is a chilled Italian dessert built around coffee, mascarpone, ladyfingers, and cocoa.
Its name is commonly translated as “pick me up,” an appropriate description for a sweet containing strong espresso and a light, energizing character.
The dessert is relatively modern and is generally associated with northern Italy during the second half of the twentieth century.
Its popularity spread quickly because the classic ingredients produce a refined dessert without baking.
What makes tiramisu memorable is the way soft cookies, airy cream, and bitter cocoa meet in one spoonful.
The ladyfingers absorb the coffee while retaining enough structure to support the mascarpone layers.
These are the defining parts of the classic style:
- Strong coffee: Espresso provides the deep roasted flavor at the base of the dessert.
- Optional alcohol: Dark rum, coffee liqueur, or amaretto adds warmth and complexity.
- Mascarpone filling: The mild Italian cheese gives the cream richness without the sharpness of standard cream cheese.
- Savoiardi ladyfingers: Their dry, airy texture absorbs the coffee mixture quickly.
- Cocoa finish: Unsweetened cocoa adds color and a gentle bitterness that balances the filling.
Ingredients for This Recipe
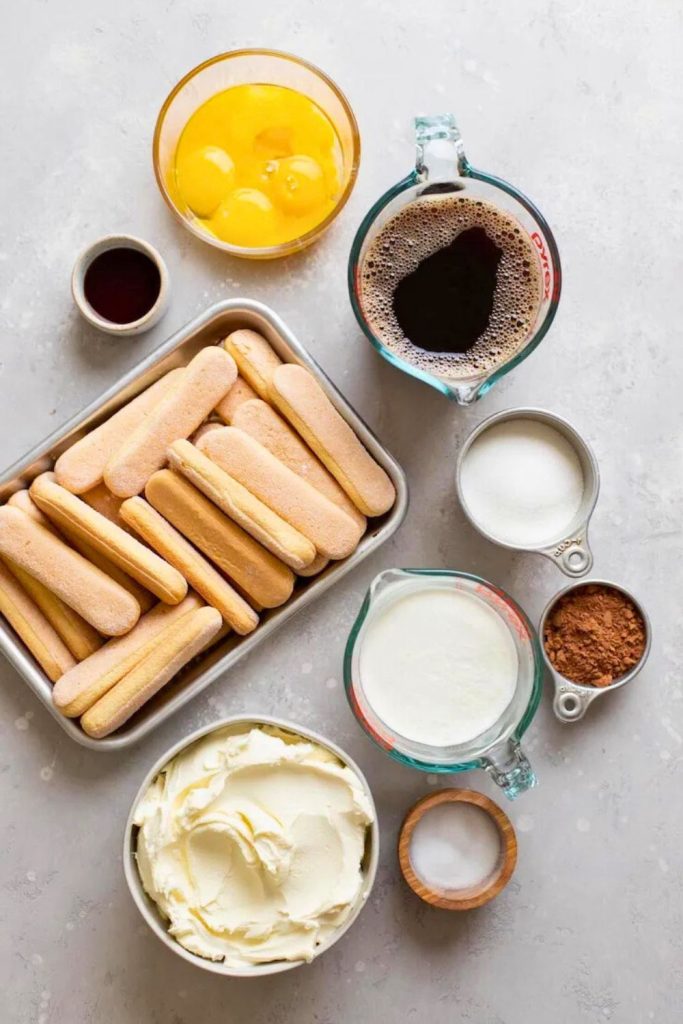
| Ingredient | Amount | Use |
|---|---|---|
| Strong coffee or espresso | 1½ cups, cooled | Moistens and flavors the ladyfingers |
| Dark rum | ½ cup | For the coffee soak; optional |
| Mascarpone | 16 ounces | Forms the rich cream base |
| Dark rum | ¼ cup | Blended with the mascarpone; optional |
| Large egg yolks | 6 | Used in the cooked zabaglione |
| Granulated sugar | ⅔ cup (133 g) | Sweetens the yolk mixture |
| Cold heavy cream | 2 cups | Whipped for a lighter filling |
| Vanilla extract | 2 teaspoons | Flavors the whipped cream |
| Savoiardi ladyfingers | About 40 | Creates the two cookie layers |
| Unsweetened cocoa | Up to ⅓ cup | For dusting the top |
| Alternative liqueur | As needed | Amaretto or coffee liqueur may replace rum |
| Chocolate shavings | Optional | For garnish |
How to Prepare Tiramisu (Step-by-Step Method)

Homemade tiramisu becomes much easier when the coffee, custard, whipped cream, and layers are handled one at a time.
You need only basic bowls, a mixer or whisk, and a 9-by-13-inch dish, followed by several hours of chilling.
Start by preparing the coffee soak.
Step 1: Brew and Flavor the Coffee
The coffee mixture supplies much of tiramisu’s signature flavor, so brew it strong and allow it to cool fully.
- Prepare 1½ cups espresso or robust coffee. If using drip coffee or a French press, increase its strength. Cool it to room temperature so it does not make the ladyfingers disintegrate.
- Pour the cooled coffee into a medium, shallow bowl.
- Stir in ½ cup dark rum for the traditional boozy note used in this version.
Customization Tip:
Reset the rum with coffee liqueur or amaretto, or omit alcohol entirely and use extra coffee.
For a citrus variation, add a small amount of orange liqueur, keeping the total liquid similar so the cookies are not oversaturated.
Set the coffee mixture aside until assembly.
Step 2: Prepare the Mascarpone Mixture
Next, prepare the mascarpone portion of the filling.
- Place 16 ounces mascarpone in a large bowl. It should be cool but soft enough to blend without lumps.
- Add ¼ cup dark rum to the cheese.
Whisk or mix briefly until the mascarpone and rum form a smooth mixture.
Why use mascarpone?
Mascarpone supplies a rich, mellow dairy flavor and a smooth texture. It is now available in the specialty-cheese section of many supermarkets.
Step 3: Make the Zabaglione (Egg Yolk Custard)
The cooked yolk mixture, or zabaglione, sweetens the filling and helps give it body.
- Create a double boiler by simmering about 2 inches of water in a saucepan. Set a heat-safe bowl over it, making sure the bowl does not touch the water.
- Stir in these ingredients to the bowl:
- 6 large egg yolks
- ⅔ cup (133 g) granulated sugar
Whisk constantly over the simmering water for 5 to 8 minutes, until the custard becomes pale, slightly thick, and smooth.
Look for these signs:
- The yolk mixture has lightened noticeably.
- The sugar crystals have dissolved.
- The custard lightly coats the back of a spoon.
Lift the bowl away from the saucepan and let the zabaglione cool for a few minutes.
Food-Safety Note: Use an instant-read thermometer and cook the yolk mixture to 160°F (71°C).
Step 4: Combine Mascarpone and Zabaglione
Pour the warm—not hot—zabaglione into the mascarpone and rum.
Blend with a whisk or mixer just until the filling base is fully smooth.
At this stage, it should look creamy and smell lightly of coffee’s traditional companions: vanilla and rum.
Pro Tip: A slightly loose texture is normal. Refrigerate the mixture briefly while preparing the whipped cream if your kitchen is warm.
Step 5: Whip the Cream
Whipped cream lightens the mascarpone mixture and helps it set into a soft but sliceable filling.
Set the following in a chilled bowl:
- 2 cups cold heavy cream
- 2 teaspoons vanilla extract
Begin beating on low, then gradually raise the speed. Stop when the cream reaches soft peaks that bend lightly but still hold their shape.
Avoid overwhipping: Grainy or very stiff cream is harder to fold smoothly. Finish the last few strokes by hand if necessary.
Step 6: Fold the Cream into the Mascarpone Mix
Now add the airy cream with the mascarpone base.
- Add a portion of whipped cream to the mascarpone mixture and fold lightly.
- Sweep the spatula along the bottom and lift the mixture over itself, turning the bowl as you work.
Continue only until no distinct white streaks remain and the filling looks smooth and pillowy.
Why lightly incorporatestead of beat?
Folding preserves the air captured in the cream, which keeps the tiramisu filling light rather than dense.
Step 7: Soak the Ladyfingers
Ladyfingers absorb liquid rapidly, so use a very brief dip.
- Return to the bowl of cooled coffee and rum.
- Dip one ladyfinger at a time for about 2 seconds total, turning it once so both sides are moistened.
- Remove each cookie promptly. A long soak will make the dessert watery and difficult to slice.
Arrange the dipped ladyfingers in a single layer across the bottom of a 9-by-13-inch dish.
Need a better fit? Trim a few cookies to fill gaps rather than overlapping them heavily.
Step 8: Layer It All Together
Once the first cookie layer is complete, stir in the filling in two stages.
- Spread half of the mascarpone cream uniformly over the soaked ladyfingers.
- Add a second layer of quickly dipped ladyfingers.
- Cover them with the remaining mascarpone mixture and smooth the surface.
The filling may still look soft, but the refrigerator will firm it and allow the cookies and cream to settle together.
Individual option: Build the same layers in glasses or ramekins for ready-to-serve portions.
Step 9: Dust with Cocoa Powder
Finish the assembled tiramisu with its characteristic cocoa layer.
- Use a fine sieve to dust the top uniformly with up to ⅓ cup unsweetened cocoa powder.
- Dutch-process cocoa gives a particularly dark color and mellow chocolate flavor, although natural cocoa also works.
Optional garnishes include:
- Finely shaved dark chocolate
- Chocolate curls
- Small edible flowers intended for food use
- A stencil pattern prepared with cocoa
Step 10: Chill Overnight (The Secret to Perfect Texture)
The final essential step is giving the dessert time to set.
Cover the dish and refrigerate for at least 6 to 8 hours, preferably overnight.
During this rest:
- The coffee, rum, cocoa, and cream flavors blend.
- The mascarpone filling becomes firmer.
- The ladyfingers soften throughout without losing all structure.
Hosting Tip: Tiramisu is ideal for preparing a day ahead, and its flavor is often better after an overnight rest.
Step 11: Slice, Serve, and Enjoy!
Once thoroughly chilled, the tiramisu is ready to portion.
- Cut squares with a sharp knife.
- Clean the blade between cuts to keep the cream layers neat.
- Transfer each piece to a plate, add a fresh dusting of cocoa if desired, and serve cold.
Each portion should be creamy and coffee-forward, with soft ladyfingers and enough cocoa bitterness to keep the sweetness balanced.
Simple serving options:
- Pair it with espresso or cappuccino.
- Add fresh berries or a few chocolate shavings.
- Serve it in individual glasses at parties or outdoor gatherings where chilled storage is available.
Ways to Serve

Tiramisu can feel formal or casual depending on how it is plated.
After chilling, the soft but stable layers pair especially well with coffee, fruit, and lightly sweet drinks.
Try one of these presentations:
- Classic squares: Cut portions from the main dish and dust them with fresh cocoa or grated chocolate right away ahead of serving.
- Individual glasses: Build the layers in clear cups or ramekins for a café-style presentation and easy portioning.
- Fresh berries: Strawberries, raspberries, or blueberries add color and tartness that contrasts with the mascarpone.
- Coffee pairing: Serve with espresso, cappuccino, or iced coffee to reinforce the roasted flavor.
- Dessert wine: Vin Santo, Marsala, or a light Moscato can complement the sweet, creamy layers.
However you present it, serve tiramisu well chilled so the filling remains smooth and the slices hold together.
Tips for Consistent Tiramisu Every Time

- Dip briefly: Keep each ladyfinger in the coffee for no more than about one second per side. It should be damp, not saturated.
- Choose flavorful ingredients: Fresh mascarpone, strong coffee, and good unsweetened cocoa are especially noticeable in a no-bake dessert.
- Keep the whipping setup cold: Chilled cream, bowl, and beaters produce a more stable foam.
- Allow a full rest: Six hours is the practical minimum, but an overnight chill gives the filling more time to set and the flavors more time to blend.
- Consider a final cocoa dusting: Cocoa darkens as it absorbs moisture, so add a light fresh layer ahead of serving for the neatest finish.
These habits create tiramisu with defined layers, uniformly softened cookies, and a light mascarpone filling.
Variations Worth Trying

| Variation | Change | Result |
|---|---|---|
| Classic Coffee | Use espresso and dark rum | Deep, roasted, lightly boozy flavor |
| Fruit Tiramisu | Replace coffee with berry purée, orange juice, or lemon syrup | Bright and refreshing |
| Chocolate | Add cocoa or cooled dark chocolate to the mascarpone | Richer chocolate layers |
| Nutty | Add pistachios, almonds, or hazelnuts between layers | Extra crunch and aroma |
| Alcohol-Free | Use decaf coffee or chocolate milk and omit liqueur | A gentler family-friendly version |
| Amaretto | Reset the dark rum with amaretto | A sweet almond note |
| Citrus | Add orange or lemon zest and a compatible soak | Light, aromatic flavor |
| Plant-Based | Follow a tested dairy-free, egg-free formula | A fully plant-based alternative |
| Pumpkin Spice | Blend pumpkin and warming spices into the cream | A cozy autumn dessert |
| Matcha | Use green tea in the soak and matcha on top | Earthy flavor and green color |
The basic tiramisu method adapts easily to fruit, chocolate, nuts, citrus, matcha, or an alcohol-free coffee soak.
A Few Final Notes: Your Turn to Make It Happen
Tiramisu earns its reputation through a careful balance of strong coffee, mellow mascarpone, soft ladyfingers, and unsweetened cocoa.
Prepare it for a holiday meal, dinner with friends, or any occasion that benefits from a make-ahead chilled dessert.
Give the layers enough refrigerator time, then serve each square cold for the cleanest texture and fullest flavor.
Classic Tiramisu
More Recipes to Try Next
If this Italian classic suits your dessert table, try these FeastBears recipes next:
- 🍪 Easy 10-Min Royal Icing Recipe for Cookies
Make a smooth, pipeable icing that dries firm for decorated holiday cookies. - 💚 The Best Grinch Cookies Recipe for Kids & Families
Bake soft green cookies and add a playful red-heart finish for Christmas. - 🤍 Best White Chocolate Cranberry Cookies for Christmas
Combine creamy white chocolate with tart cranberries in a chewy holiday cookie.
These recipes add different colors, textures, and flavors to a festive dessert menu.

Dana Brooks is a home-cooking writer at Feastbears, where she shares easy family recipes, cozy dinners, quick desserts, and beginner-friendly kitchen tips. Her goal is to make everyday cooking feel simple, warm, and enjoyable for busy home cooks.


