Craving a cheesecake that feels indulgent without being overly heavy? This strawberry version delivers a creamy, delicate center instead of a dense filling.
It pairs a crisp graham cracker base with smooth cheesecake and a fresh strawberry topping that brings a bright, summery finish to every slice.
There is no complicated technique involved. The best texture comes from a few careful habits: bring the ingredients to room temperature, mix gently, and bake in stages so the surface stays smooth.
Follow the method below and you will have a centerpiece dessert that earns a quiet moment at the table after the first bite.
Strawberry Cheesecake Ingredients
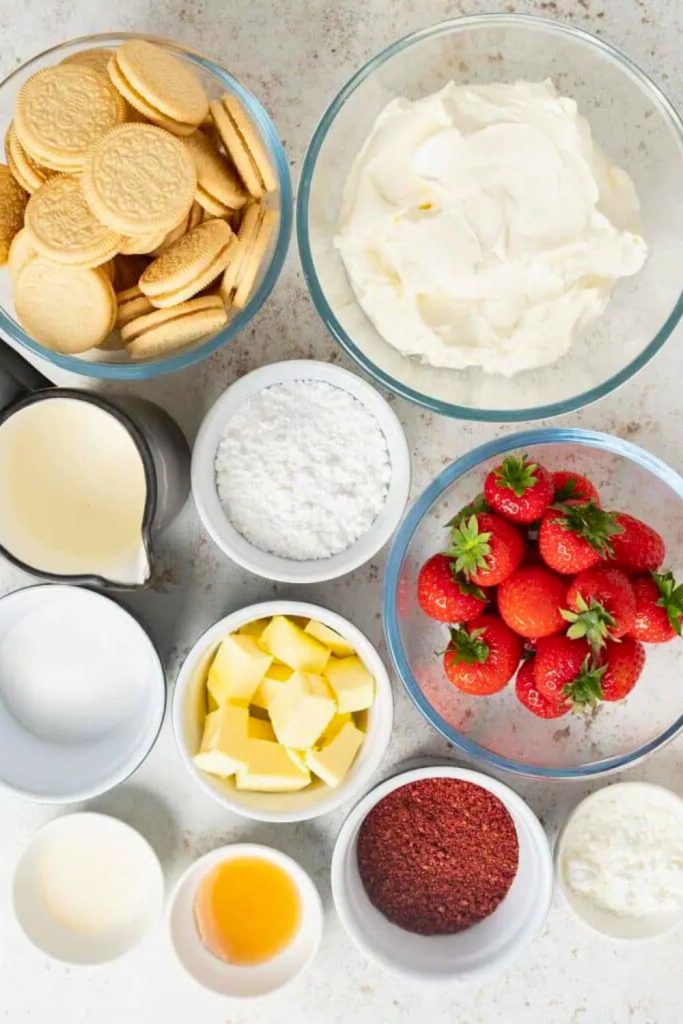
| Component | Ingredient | Amount | Notes & Tips |
|---|---|---|---|
| Crust | Graham crackers | 270g (approx. 2 sleeves) | Crush them in a food processor for fine crumbs or by hand if you prefer a slightly coarser, crunchier crust. |
| Granulated sugar | 3 tablespoons | Provides mild sweetness. Brown sugar also works, although it can form small clumps. | |
| Unsalted butter (melted) | 70g (5 tablespoons) | Binds the crumbs. If the mixture seems unusually dry, add only a small extra spoonful. | |
| Filling | Cream cheese | 3 blocks (8 oz each), room temp | Choose full-fat block-style cream cheese and soften it completely for a lump-free filling. |
| Granulated sugar | 250g (1¼ cups) | Gives the filling a balanced sweetness; reduce by up to 50g if you prefer a less-sweet cheesecake. | |
| Eggs | 3 large | Whisk them briefly before adding so the whites blend into the batter without streaks. | |
| Sour cream | 120g (½ cup) | Adds a gentle tang and softens the texture; room-temperature sour cream blends most evenly. | |
| Lemon zest | 2 teaspoons | Finely grate the zest of about one lemon to lift the rich filling. | |
| Vanilla extract | 2 teaspoons | Pure vanilla gives the cleanest, most rounded flavor. | |
| Salt | ¼ teaspoon | Sharpens the vanilla and lemon while keeping the sweetness in balance. | |
| Optional: Strawberry jam | ¼–⅓ cup (strained) | Strain out seeds and fruit pieces before mixing it in. A tiny drop of pink coloring can deepen the shade. | |
| Topping | Fresh strawberries | 2 pounds | Reserve the neatest berries for the finished topping and cook the remaining fruit into the sauce. |
| Water | 100 mL (~6 tablespoons) | Gives the berries enough liquid to soften without catching on the pan. | |
| Granulated sugar | ¼ cup | Taste the fruit first and add a little more only when the berries are tart or out of season. | |
| Cornstarch | 1 teaspoon | Thickens the topping; mix it thoroughly with the liquid before the sauce becomes hot. | |
| Vanilla extract | 1 teaspoon | Stir it in off the heat so its aroma remains noticeable. | |
| Optional: Red food coloring | Few drops | Use only if the fruit is pale. Beet powder or raspberry juice can provide a natural color boost. |
Helpful Equipment
A professional setup is not necessary, but these basic tools make the process smoother:
- 9-inch springform pan
- Hand mixer or stand mixer
- Microplane or rasp (for lemon zest)
- Glass measuring cup (for pressing crust)
- Large skillet or saucepan
- Potato masher (for the topping)
Step-by-Step Strawberry Cheesecake Recipe

Step 1: Prep the Oven and Pan
Begin by heating the oven to 350°F (177°C).
Lightly coat the inside of a 9-inch springform pan with nonstick spray. The removable side makes it much easier to lift out the chilled cheesecake cleanly.
A thin, even coating is enough to help protect the crust and filling from sticking to the pan.
Step 2: Make the Graham Cracker Crust
Crush 270g, or about two sleeves, of graham crackers. A food processor produces uniform crumbs, while hand-crushing leaves a few larger pieces for extra texture.
Place the crumbs in a large bowl, then add:
- 3 tablespoons of granulated sugar
- 70g (5 tablespoons) melted unsalted butter
Stir with a spatula until the mixture resembles damp sand. A squeezed handful should hold together but should not feel greasy.
Resist pouring in extra butter unless the crumbs truly will not bind; too much can make the base heavy and soft.
Step 3: Bake the Crust
Tip the prepared crumb mixture into the springform pan.
Press it firmly and evenly with the flat bottom of a measuring cup. Build the crumb layer about 1 inch up the sides before compacting the base.
Bake for 10–15 minutes at 350°F, until the crust smells toasted and the edges show a light golden color.
Set the pan aside to cool while you mix the cheesecake filling.
Step 4: Beat the Cream Cheese
Add three softened 8-ounce blocks of cream cheese to a large mixing bowl. Beat with a hand mixer or a paddle attachment for roughly 3 minutes.
Smooth the cream cheese completely before any other ingredient goes in. This first mixing step is what prevents small cheese lumps in the finished batter.
Keep the mixer at a moderate speed. Whipping in excess air can make the filling rise too much in the oven and crack as it cools.
Step 5: Add Sugar Slowly
Gradually add 1¼ cups (250g) granulated sugar. Continue mixing on medium-low for about 2 minutes, stopping when the sugar has disappeared into the cream cheese.
At this stage the mixture should be silky and lightly sweet, but not whipped or airy.
Step 6: Add Sour Cream, Zest, Vanilla
Add the following ingredients to build flavor and soften the filling:
- ½ cup (120g) sour cream
- 2 teaspoons lemon zest
- 2 teaspoons vanilla extract
- ¼ teaspoon salt
Mix on low just until the sour cream, zest, vanilla, and salt are evenly incorporated.
Sour cream brings tang and a lighter mouthfeel, lemon zest cuts through the richness, vanilla rounds out the flavor, and salt keeps the sweetness from tasting flat.
For a pale strawberry swirl, blend in ¼–⅓ cup strained strawberry jam now. Add a very small amount of pink or red food coloring only if you want a stronger color.
Step 7: Add Eggs Last
Crack three large eggs into a separate bowl and whisk them lightly. Pre-mixing helps the whites disappear into the batter quickly.
Pour in the eggs and mix at low speed only until you no longer see streaks.
Scrape the bowl so no thick cream cheese remains around the sides or base. Use a clean spatula to avoid dragging unmixed lumps back into the smooth batter.
Step 8: Pour and Tap
Pour the completed filling over the cooled graham cracker crust.
Tap the pan softly against the counter a few times to bring hidden bubbles to the surface, then move it gently from side to side to level the top.
Before baking, the surface should appear even, glossy, and mostly free of bubbles.
Step 9: Bake at Two Temperatures
Put the pan in the 350°F oven and use this two-stage schedule:
- Bake at 350°F for 15 minutes
- Then reduce the temperature to 300°F and continue baking for about 1 hour
The cheesecake is ready when these signs appear:
- The center still has a slight jiggle
- The edges are puffed and set
Beginning hot and finishing at the lower temperature allows the outer edge and center to set more evenly.
Step 10: Add a Ramekin of Water
Instead of placing the springform pan in a water bath, set a heatproof ramekin half-filled with hot water beside it in the oven.
The extra steam reduces surface drying. It cannot guarantee a crack-free cake, but it makes the oven environment gentler without risking water leaking into the crust.
Step 11: Prep the Strawberries
Prepare the fruit topping while the baked cheesecake cools.
Rinse 2 pounds of strawberries, remove the hulls, and cut the berries in half.
Divide the prepared fruit into two portions:
- The most attractive, evenly shaped berries, reserved for the top
- The remaining berries, which will be cooked down for the sauce
Smaller, tidy berries make an especially polished final arrangement, so set those aside before cooking.
Step 12: Cook Half Into a Thick Strawberry Sauce
Add the less-perfect half of the berries to a wide skillet along with:
- 100 mL water (about 6 tablespoons)
- ¼ cup sugar
- 1 teaspoon cornstarch
Set the skillet over medium heat and stir regularly as the mixture warms.
Within about 5–10 minutes, the berries should soften and release plenty of juice.
Step 13: Mash and Reduce
When the fruit is tender, press it gently with a potato masher to create a textured, spoonable sauce.
Keep the mixture at a steady simmer for about 10 more minutes, stirring often so the bottom does not scorch.
Look for both of these signs before taking it off the heat:
- The mixture looks glossy and has visibly thickened
- Drawing a spoon across the skillet briefly exposes the bottom
Pale strawberries can be brightened with a drop or two of food coloring. For a naturally deeper shade, try a little beet powder or raspberry juice.
Step 14: Add Fresh Strawberries + Vanilla
Take the thickened strawberry sauce off the burner.
Immediately spoon it over the reserved fresh berries. The remaining heat will soften their edges without cooking them completely.
Stir in 1 teaspoon vanilla, then leave the topping until it has cooled to lukewarm.
Combining cooked and fresh fruit gives the topping both a jam-like sauce and recognizable pieces of strawberry.
Step 15: Release the cheesecake.
After the cheesecake has cooled completely and chilled for several hours—overnight is ideal—it can be removed from the pan.
Slide a thin knife around the inside edge before releasing the springform latch.
Carefully loosen the crust from the pan base as well if you plan to transfer the cake to a serving plate.
Working only after a full chill gives the sides a neater finish and helps the crust stay intact.
Step 16: Add the Strawberry Crown
Spoon the cooled strawberry mixture into the center of the cheesecake.
Arrange the berries with the back of a spoon or a small spatula, spreading the sauce while keeping the fruit looking abundant.
Leave several of the reserved fresh berries visible above the sauce for a clean bakery-style presentation.
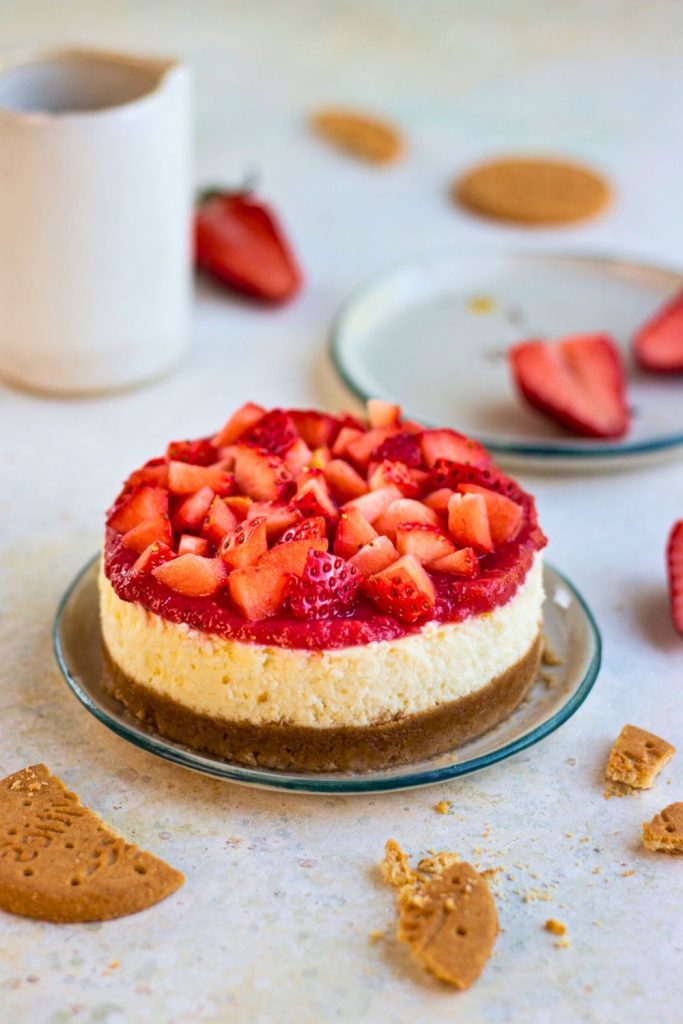
The bright, juicy topping balances the creamy filling and makes the finished cheesecake look ready for a celebration.
Pro Tips for the Best Strawberry Cheesecake
1. Soften the Cream Cheese Fully
Cold cream cheese is difficult to smooth and often leaves small lumps. Let the sealed blocks stand at room temperature for about an hour, or until they yield easily when pressed.
2. Mix Gently After the Eggs Go In
Extra air makes cheesecake puff in the oven and sink as it cools. Once the eggs are added, keep the mixer low and stop as soon as the batter is uniform.
3. Add Steam With a Ramekin
A ramekin of hot water supplies moisture without putting the springform pan directly in water. The steam helps limit surface drying while keeping the crust protected.
4. Scrape With a Clean Spatula
Before scraping the bowl, wipe away any thick, unmixed cream cheese clinging to the spatula. This keeps those pieces from being folded back into the batter.
5. Cool Gradually, Then Chill Overnight
When baking is complete, turn off the oven and leave the cheesecake inside with the door slightly open. After it cools, refrigerate it overnight for the firmest, cleanest slices.
Flavor Variations You Can Try
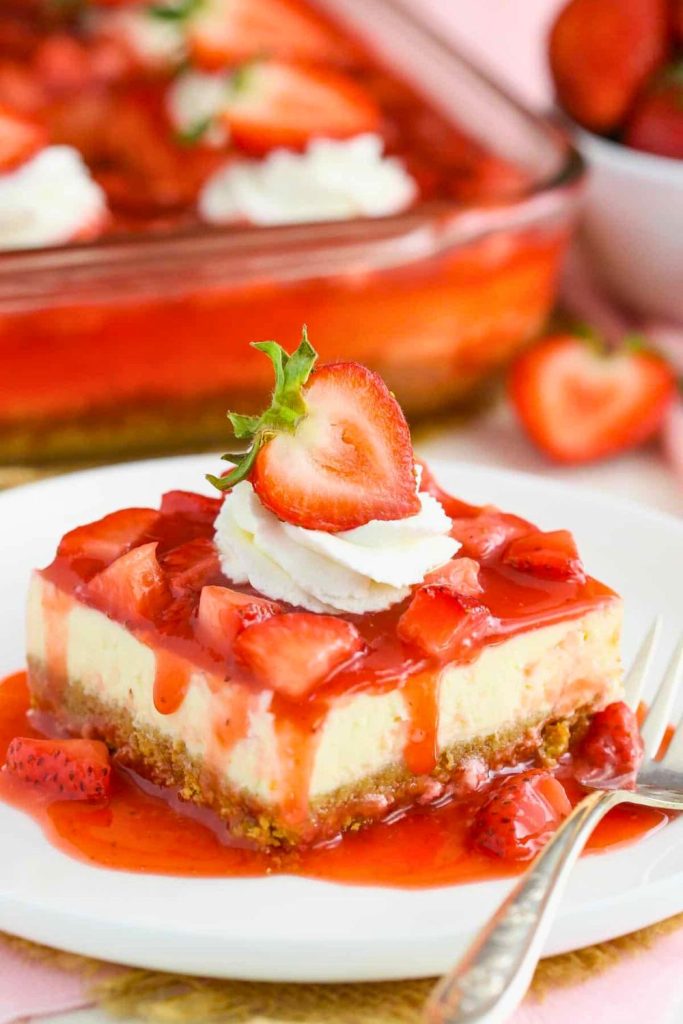
| Variation | What to Add/Change |
|---|---|
| Lemon Strawberry | Add extra lemon zest to the filling and finish the topping with a small squeeze of lemon juice. |
| Strawberry Swirl | Spoon small amounts of strained strawberry sauce over the filling and swirl gently before baking. |
| Berry Medley Topping | Combine strawberries, raspberries, and blueberries for a colorful mixed-berry topping. |
| Strawberry Chocolate | Spread a thin chocolate ganache layer over the cooled crust before adding the filling, then garnish with chocolate shavings. |
| No-Bake Version | Use a recipe specifically formulated with gelatin and chill it to set instead of adapting the egg-based baked filling. |
How to Prevent Cheesecake From Cracking
A crack does not change the flavor, but these steps give the top the best chance of staying smooth:
- Mix at low speed and stop when combined so the batter does not become overly aerated.
- Bring the dairy and eggs to room temperature so they blend without prolonged mixing.
- Use the two-stage bake: 15 minutes at 350°F, followed by the remaining time at 300°F.
- Place a ramekin of hot water beside the cake to add gentle moisture to the oven.
- Cool slowly in the switched-off oven with the door ajar before transferring the cake to the refrigerator.
If a small crack still forms, simply cover it with the strawberry topping; the taste and texture are unaffected.
Can You Freeze Strawberry Cheesecake?
Yes. For the best texture, freeze the cheesecake before adding the fresh-fruit topping:
- Freeze the plain cheesecake; fresh strawberries soften and release liquid after thawing.
- Wrap the cold cake snugly in plastic wrap, followed by foil, to limit air exposure and freezer burn.
- For individual portions, place wrapped slices in a freezer-safe box or airtight freezer bag.
- Write the date on the package and use the frozen cheesecake within 2 months.
To thaw:
- Move the wrapped cake or slices to the refrigerator about 24 hours before serving.
- Once fully thawed, add a freshly made strawberry topping and serve cold.
For convenient single servings, separate wrapped slices with parchment so you can remove only what you need.
Why This Strawberry Cheesecake Works So Well

There are countless strawberry cheesecakes, but this version stands out for several practical reasons:
- The filling is smooth and creamy without feeling excessively dense.
- Carefully measured butter and a short pre-bake keep the graham crust crisp rather than greasy.
- Cooked sauce and uncooked berries create a topping that tastes fresh instead of candy-sweet.
- A separate water bath is unnecessary; gentle mixing, staged heat, and a ramekin of water support an even top.
- The cake can be completed ahead of time, leaving serving day free of last-minute baking.
It has the appearance of a celebration dessert, yet every step is manageable for an ordinary weekend bake.
Final Thoughts on This Strawberry Cheesecake
This strawberry cheesecake brings together a crisp base, a silky filling, and a bright fruit topping. The contrasting textures keep each slice interesting from the first bite to the last.
Serve it for guests or make it as a weekend project. Because it chills well overnight, it is an especially convenient dessert when you want an impressive result without same-day pressure.
More Strawberry Dessert Recipes You’ll Love
If you are planning another strawberry dessert, these reader favorites use the fruit in three very different ways:
The Only Strawberry Jam Recipe You’ll Ever Need
This three-ingredient, no-pectin jam captures the flavor of ripe berries in a small batch. Use it on toast, biscuits, or as an easy cheesecake accent.
Quick & Easy Strawberry Fluff Salad for Busy Moms
A cool, creamy strawberry fluff is a low-effort option for picnics, potlucks, and last-minute gatherings.
Best Strawberry Pretzel Salad Recipe for Parties
This nostalgic dessert layers a salty pretzel crust, creamy filling, and strawberry topping for a reliable party favorite.
Easy Strawberry Cheesecake

Dana Brooks is a home-cooking writer at Feastbears, where she shares easy family recipes, cozy dinners, quick desserts, and beginner-friendly kitchen tips. Her goal is to make everyday cooking feel simple, warm, and enjoyable for busy home cooks.


