Homemade strawberry jam does not require specialist equipment or a long list of ingredients.
If recipes involving thermometers, canning pots, and oversized batches have put you off, this small-batch method is a much friendlier place to begin.
This version keeps the process straightforward from the first chopped berry to the filled jar.
You need only strawberries, granulated sugar, and lemon juice—there is no added pectin and no complicated set of steps.
The modest yield suits beginners and smaller households, while still giving you enough jam for breakfasts, desserts, and sharing.
The guide below explains each stage so you know what to look for as the fruit thickens.
Why You’ll Love This Easy Strawberry Jam

A few practical features make this recipe worth returning to:
- Only three ingredients: fresh strawberries, sugar, and lemon juice.
- No specialized setting ingredients: there is no added pectin or gelatin, and the cold-plate test replaces a thermometer.
- Small yield: the batch makes a little more than one pint, which is easy to store and use.
- Adaptable method: the same general approach can work with other berries, although cooking time and texture may change.
- Refrigerator or freezer storage: this is not a shelf-stable canned preserve.
With those expectations clear, here is everything you need to make the batch successfully.
Ingredients You’ll Need

The base recipe uses the following three ingredients:
| Ingredient | Amount | Notes |
|---|---|---|
| Fresh Strawberries | 2 pounds (about 4 cups chopped) | Rinse, hull, and cut the berries into rough pieces. |
| Granulated Sugar | 2 cups | Plain white sugar draws out the fruit juice and supports the final set. |
| Lemon Juice | 1 tablespoon | Squeeze fresh lemon or measure bottled lemon juice. |
Tip: You can adjust the yield, but avoid crowding one pot with a very large batch. A wide, manageable quantity reduces more evenly.
Tools You Need
This method relies on ordinary kitchen equipment, and most of it is probably already in your cupboards.
Gather these items before you begin:
| Tool | Purpose |
|---|---|
| Large Mixing Bowl | Holds the chopped berries while they sit with the lemon and sugar. |
| Melon Baller or Paring Knife | Removes the leafy hull and firm white core. |
| Spatula or Wooden Spoon | Combines the ingredients and keeps the fruit moving during cooking. |
| 4-Quart Saucepan or Pot | Provides enough headroom for the hot jam to foam without overflowing. |
| Stove | Supplies medium to medium-high heat for reducing the fruit. |
| Canning Funnel | Guides hot jam into jars with fewer drips; useful but not essential. |
| Ladle or Spoon | Transfers the cooked mixture safely from the pot. |
| Glass Jars with Lids | Use clean, heat-safe jars; half-pint or 8-ounce sizes are convenient. |
| Freezer-Safe Plate | Lets you check how the jam will behave once cooled. |
| Tongs (optional) | Can make warm jars easier to handle. |
| Marker or Labels | Records the preparation date for refrigerator or freezer storage. |
You will not need powdered pectin, a candy thermometer, or water-bath canning equipment.
A bowl, roomy saucepan, stirring utensil, clean jars, and a cold plate cover the essential work.
How to Make Strawberry Jam (Step-by-Step Tutorial)

Strawberry jam becomes much less intimidating when the job is divided into simple stages. This version uses no added pectin, gelatin, thermometer, or canning process.
With a mixing bowl, a wide saucepan, and time for the berries to release their juice, you can manage the entire batch at home.
The following walkthrough covers the process from preparing the fruit through testing, filling, and safe cold storage.
Step 1: Prep the Strawberries Like a Pro
Begin with 2 pounds of ripe strawberries. That quantity makes a useful batch without overwhelming the pan or filling the refrigerator with jars.
Rinse the berries well, drain them, and pat away excess water with a clean towel before removing the tops.
Use a paring knife, melon baller, or small spoon to remove the leafy cap and pale core. Once hulled, chop each berry into rough pieces.
The pieces do not need to match. Different sizes soften at slightly different rates and give the finished jam a pleasant homemade texture.
There is no food processor or precision knife work here—just simple preparation that keeps some fruit character in the jar.
Step 2: Add Lemon Juice
Lemon adds brightness and helps create the acidic environment that supports the fruit’s natural pectin.
Squeeze about 1 tablespoon of juice from half a large lemon over the berries. Measured bottled lemon juice is also suitable for this refrigerator recipe.
Remove any seeds that fall into the bowl before adding the sugar.
The lemon keeps the sweetness balanced and supports the color and consistency of the cooked fruit.
Step 3: Sweeten Things Up
Now add the sugar.
Pour 2 cups granulated sugar over the chopped strawberries and lemon juice, then stir until every piece is coated.
As the fruit rests, the sugar draws liquid from its cells. This process is called maceration and creates the syrup that will become the base of the jam.
Leave the covered bowl at room temperature for about 1 hour. The sugar should begin dissolving and the berries will sit in a pool of red juice.
For advance preparation, refrigerate the covered mixture overnight instead. Return it to the pan the next day and begin cooking from there.
Step 4: Let the Juices Flow
After maceration, the bowl should contain softening fruit and plenty of strawberry syrup—exactly the liquid needed for cooking.
Scrape the berries and every drop of juice into a saucepan that holds at least 4 quarts. Jam rises and foams as it boils, so generous headroom matters.
Place the pan on the stove and get ready to stir as the mixture comes to temperature.
Step 5: Time to Cook Your Jam
Set the burner to medium-high and bring the fruit to a steady boil, stirring often from the start.
Stay close to the stove throughout this stage.
The high sugar content makes the mixture prone to sticking and scorching, particularly as water evaporates and the jam thickens.
A pale layer of foam may gather on the surface. This is normal and usually settles as the batch reduces.
If the foam climbs toward the rim, lift the pan briefly from the burner and continue stirring until it drops, then lower the heat slightly.
If you notice sticking or a caramelized smell, reduce the heat immediately and scrape the base continuously to prevent scorching.
Step 6: Reduce and Thicken
Continue boiling and stirring for roughly 30–40 minutes. The exact time depends on the width of the pan, the heat level, and the water in the berries.
Watch for these three changes as the jam approaches its final consistency:
1. The foam begins to settle
The surface looks very foamy at first. Near the end, that foam can be stirred into the fruit and does not quickly build again.
2. The bubbles become slower
As water cooks away, the sound and movement change from a quick watery boil to slower, heavier bubbles. The mixture should also look glossier.
3. The chilled-plate test holds
Put a small freezer-safe plate in the freezer before you begin cooking.
Spoon a little jam onto the cold surface, wait about 10–15 seconds, and push a finger through it. The track should remain visible instead of immediately flowing closed.
Because the cold plate cools a sample at once, it gives you a useful preview of the texture after the jar is chilled.
Step 7: Jar It While It’s Hot
Once the jam has passed the cold-plate test, fill the jars while the mixture is still hot.
This is a refrigerator/freezer recipe rather than a canning recipe. Warm clean, heat-safe jars first so the sudden temperature change is less likely to crack the glass.
Prepare the jars as follows:
- Fill clean heat-safe jars with hot water.
- Leave them for about 10 minutes so the glass warms gradually.
- Empty and dry the jars, then ladle in the hot jam right away.
A funnel helps keep the rims clean. Leave about ¼ inch of space at the top of each jar instead of filling to the edge.
The batch makes a little more than 1 pint, which is enough for:
- Two 8-oz jars, or
- Three 6-oz jars
Wipe away any drips from the rims, then attach the lids.
Do not place these jars in the pantry. Cool them briefly, then refrigerate or freeze.
Step 8: Store in the Fridge
Because the filled jars are not processed with a tested water-bath method, the jam is not shelf-stable. Refrigerate it and use it within about 3 weeks, or freeze it for longer storage.
Mark each container with the date. Masking tape and a permanent marker work well if you do not have jar labels.
Keep the jar cold and use a clean utensil every time. Discard the jam if you notice mold, bubbling, fermentation, or an off odor.
Tips for Strawberry Jam Success

The method is beginner-friendly, but the following habits improve both flavor and texture.
1. Start With Ripe, Flavorful Berries
Look for fragrant strawberries that are red through the center and free from mold or deep bruising. In-season local fruit often needs less flavor adjustment.
2. Stir More Often as the Jam Thickens
The pot needs close attention once it boils. Stir frequently at first and almost continuously near the end, when the concentrated fruit can catch on the base.
3. Choose a Roomy Pan
A saucepan of at least 4 quarts gives the foam space to rise. A smaller pan can boil over quickly and may slow evaporation.
4. Give the Fruit Time to Macerate
Resting the strawberries with sugar for at least an hour draws out juice before cooking, helping the fruit reduce evenly and develop a consistent texture.
5. Confirm the Set on a Cold Plate
The chilled sample shows how the jam will move after cooling, which helps you avoid stopping too early or cooking until it becomes overly stiff.
These checks make the recipe approachable even if this is your first batch of jam.
How to Know When Strawberry Jam is Done
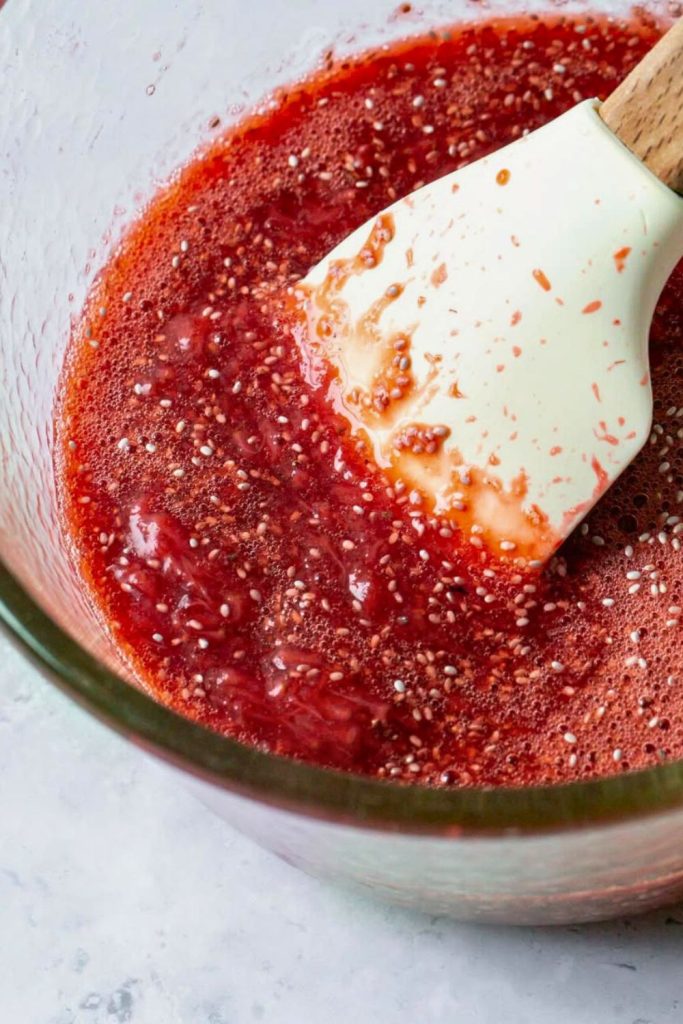
You do not need added pectin or a thermometer to judge this batch.
Use a combination of visual, audible, and texture cues rather than relying on the clock alone:
1. Surface Foam Subsides
Early foam is plentiful, but near the finish it stirs back into the mixture and does not quickly return.
2. Bubbles Look Thick and Glossy
The boil starts with fast, watery bubbles. As the jam concentrates, the bubbles rise more slowly and the surface takes on a glossy appearance.
3. The Mixture Clings to the Spoon
The jam should coat the stirring utensil and gather slightly instead of dripping like thin juice.
4. It Passes the Frozen-Plate Test
For the clearest result, follow these steps:
- Keep a small plate in the freezer while the jam cooks.
- Place a teaspoon of hot jam on the chilled plate.
- Wait 10–15 seconds, then draw a finger through the center.
- The jam is ready when the line stays open and the two sides do not immediately run together.
This simple test is reliable and removes the need for a candy thermometer.
How to Use Your Homemade Strawberry Jam
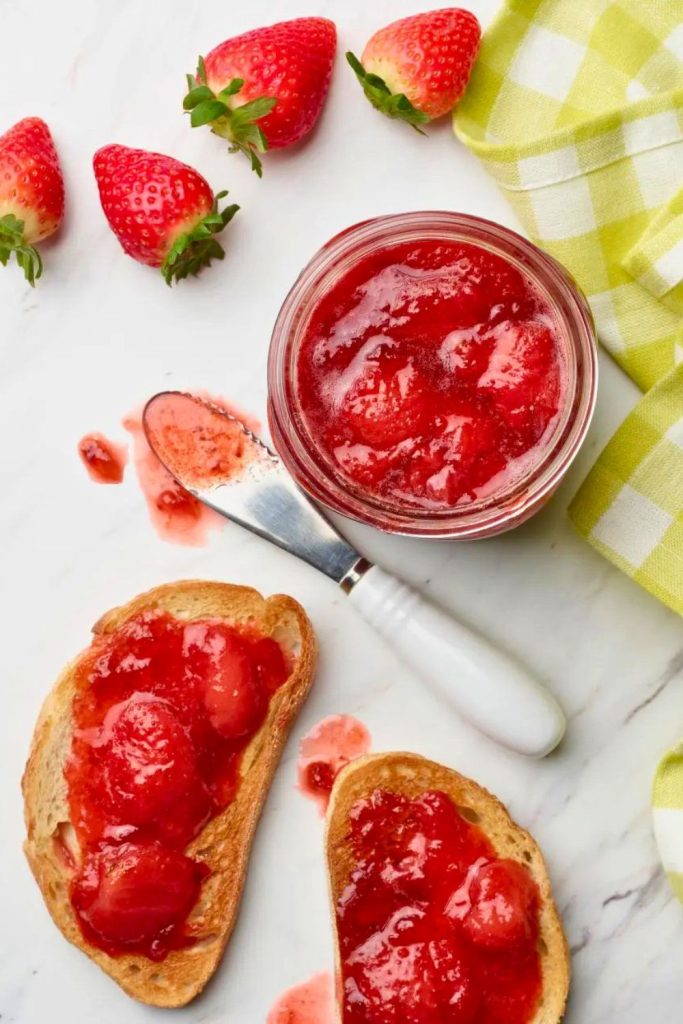
Once the jars are chilled, there are plenty of ways to use the finished jam beyond plain toast.
Try it in any of the following combinations:
🥐 Breakfast Ideas
- Spread it over warm, buttered toast.
- Spoon it onto biscuits or English muffins.
- Swirl a small amount through oatmeal or Greek yogurt.
- Use it as a topping for pancakes, waffles, or crepes.
🥪 Sandwiches and Snacks
- Use it in a classic peanut-butter-and-jam sandwich.
- Pair it with Brie in a toasted cheese sandwich.
- Spread a thin layer inside delicate tea sandwiches.
🍰 Baking and Desserts
- Use it to fill thumbprint or sandwich cookies.
- Layer it into crumble bars or jam bars.
- Add it between cake layers, into parfaits, or over cheesecake.
- Spoon it over ice cream or softly whipped cream.
🍹 Other Uses
- Stir a spoonful into lemonade or a cocktail.
- Brush it onto chicken or pork as the base of a sweet glaze.
Its balance of fruit and sweetness makes it useful in both simple breakfasts and more elaborate desserts.
Easy Variations of Strawberry Jam
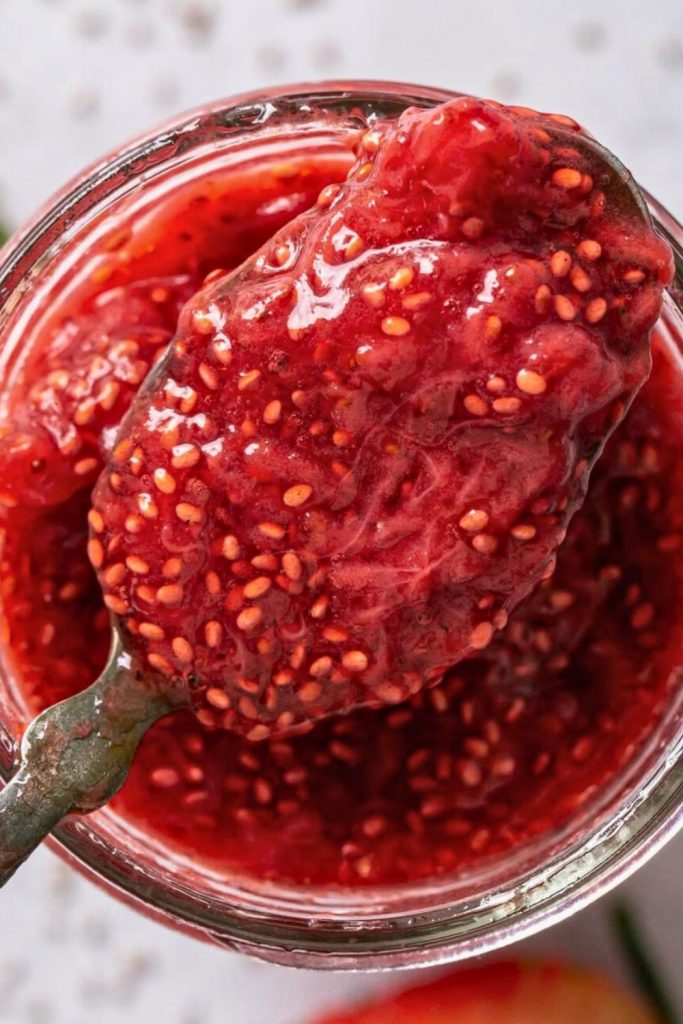
The base method can support several flavor changes. Keep the batch size manageable and try one of these additions:
| Variation | What to Add | When to Add |
|---|---|---|
| Strawberry-Vanilla Jam | ½ tsp vanilla extract or ½ vanilla bean | Stir it in during the last 5 minutes of cooking. |
| Strawberry-Basil Jam | 1–2 tbsp finely chopped fresh basil | Add the chopped basil during the last 5 minutes so its flavor stays fresh. |
| Strawberry-Lemon Zest Jam | Zest from 1 lemon | Add the zest with the lemon juice before the fruit macerates. |
| Strawberry-Blueberry Jam | Replace 1 cup of the prepared strawberries with blueberries. | Combine both berries during the initial preparation. |
| Spiced Strawberry Jam | ¼ tsp cinnamon + pinch of nutmeg or cardamom | Add the spices while the fruit is cooking. |
| Strawberry-Mint Jam | 1 tbsp finely chopped mint | Stir in the mint after removing the pan from the heat. |
| Low-Sugar Version | Use 1–1½ cups sugar, understanding that the set will be softer and storage may be shorter. | Add with the berries before maceration; refrigerate and monitor texture closely. |
| Maple-Sweetened Jam | Replace the sugar with ¾ cup maple syrup only if you are comfortable with a much softer, less predictable set. | Add before maceration and treat the result strictly as a short-term refrigerator spread. |
The cooking method remains similar for each option, while the added ingredient changes the aroma, color, or final firmness.
Final Thoughts
This strawberry jam shows how three everyday ingredients can become a flavorful homemade spread without specialized equipment.
A short rest with sugar and careful stovetop reduction produce a glossy jam that holds onto the taste of ripe summer fruit.
Use it on biscuits, stir it into yogurt, or add a spoonful to cheesecake and other desserts.
There is no added pectin, but the recipe still requires clean handling and refrigerator or freezer storage because it is not a canned preserve.
Choose a good batch of berries, keep an eye on the saucepan, and the first jar may quickly lead to a second batch.
You Might Crave These Next…
For more seasonal cooking and baking ideas, continue with one of these reader-favorite collections:
🎄 50 Cozy Christmas Recipes for Every Cook
Explore warming mains, comforting sides, and familiar holiday dishes for cold-weather meals and festive gatherings.
🍪 30 Best Christmas Baking Ideas to Save
This collection brings together cookies, bars, cakes, and easy treats for family baking or holiday parties.
🍗 25 Chicken Crockpot Recipes for Easy, Cozy Dinners
These hands-off chicken dinners are designed for busy weeknights and relaxed weekends when comfort food sounds right.
Easy Strawberry Jam with 3 Ingredients

Easy Strawberry Jam with 3 Ingredients

Dana Brooks is a home-cooking writer at Feastbears, where she shares easy family recipes, cozy dinners, quick desserts, and beginner-friendly kitchen tips. Her goal is to make everyday cooking feel simple, warm, and enjoyable for busy home cooks.


