These pumpkin waffles bring real pumpkin and a cinnamon-led spice blend to a crisp-edged breakfast made for cool mornings.
A properly heated waffle iron browns the outside while the pumpkin keeps the middle soft, making them equally suited to brunch or an easy family breakfast.
Cinnamon, ginger, nutmeg, and allspice deepen the fall flavor without overpowering the mild pumpkin in the batter.
Below you will find the one-bowl mixing method, waffle-iron guidance, topping ideas, and storage tips that help the cooked waffles stay crisp.
What Makes These Pumpkin Waffles So Special?

Plain pumpkin purée turns a basic waffle batter into a moist, warmly spiced seasonal breakfast that can take sweet or nutty toppings.
Here are the features that make these waffles useful for a fall breakfast:
✨ Crisp Edges and a Soft Middle
A fully heated waffle iron helps brown the outside while the pumpkin keeps the center moist. Cook each waffle through and avoid stacking it while steaming.
🍂 A Warm Spice Blend
Pumpkin pie spice adds a cinnamon-led mix of warming flavors. Use a prepared blend or the small homemade mixture below.
🧡 Pumpkin in the Batter
The recipe contains plain pumpkin purée, not just pumpkin-flavored spice. It supplies color, moisture, and a mild pumpkin taste.
🍴 Practical Preparation
This waffle recipe offers:
- A short ingredient list built from common baking staples.
- Some ingredient options, with texture changes possible when making dietary substitutions.
- A way to cook ahead and freeze individual waffles.
- A breakfast you can serve with different toppings for different preferences.
The method is straightforward, but timing depends on your waffle maker. Give each batch enough time to cook through rather than expecting the whole recipe in a fixed ten minutes.
Ingredients You’ll Need for Pumpkin Waffles
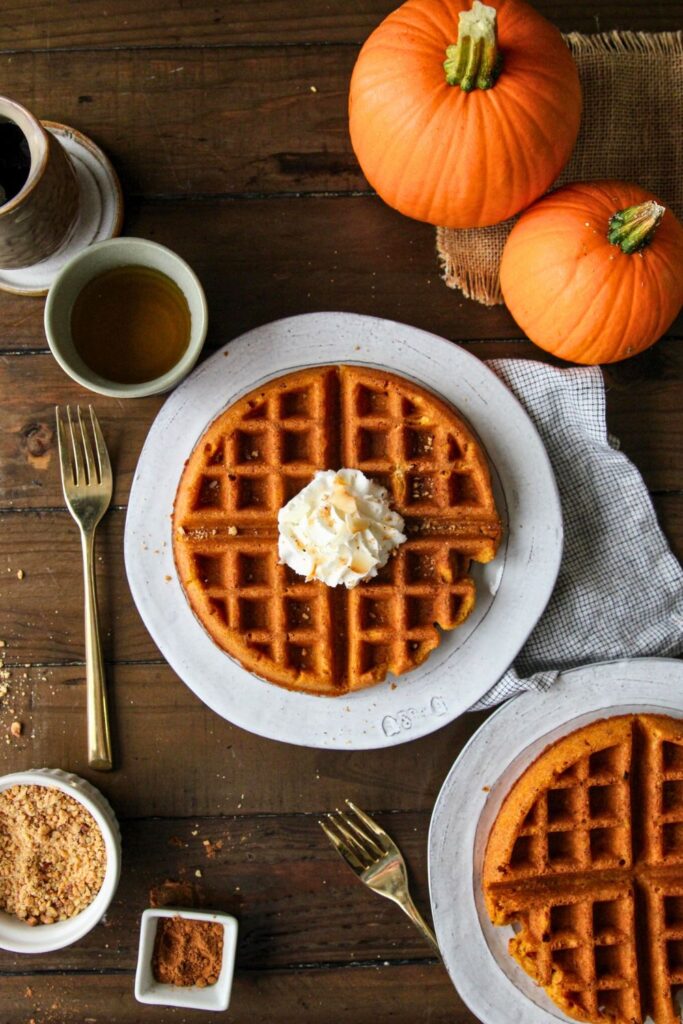
Measure everything before mixing; the recipe makes one batch of pumpkin-spice batter, while the final waffle count varies with the iron’s size.
| Ingredient | Measurement | Purpose |
|---|---|---|
| Eggs | 2 large | Help structure and bind the batter; egg-free substitutes change rise and texture |
| Milk | 1 cup | Dairy milk is the base option; unsweetened non-dairy milk can change flavor and browning |
| Melted Butter | 2 tablespoons | Use melted butter that has cooled, or the same amount of neutral oil |
| Vanilla Extract | 1 teaspoon | Adds a background vanilla note |
| Pumpkin Purée | ¾ cup | Plain purée supplies moisture and pumpkin flavor; not prepared pie filling |
| All-Purpose Flour | 1½ cups | Provides the batter’s flour base |
| Baking Powder | 2 teaspoons | Leavens the batter as it cooks |
| Sugar | 1 tablespoon | Adds light sweetness and helps browning |
| Salt | ¼ teaspoon | Seasons the batter; measure rather than using an unspecified pinch |
| Pumpkin Pie Spice | 2 teaspoons | Use 2 teaspoons prepared spice or the homemade blend below |
Homemade pumpkin pie spice option:
For the 2 teaspoons needed here, combine:
- Ground cinnamon: 1 teaspoon
- Ground ginger: ½ teaspoon
- Ground nutmeg: ¼ teaspoon
- Ground allspice: ¼ teaspoon
Stir the four spices together and use the full 2-teaspoon mixture in place of the prepared spice blend.
The result is a thick, scoopable pumpkin batter suited to a warm breakfast or brunch.
Step-by-Step: How to Make Pumpkin Waffles from Scratch
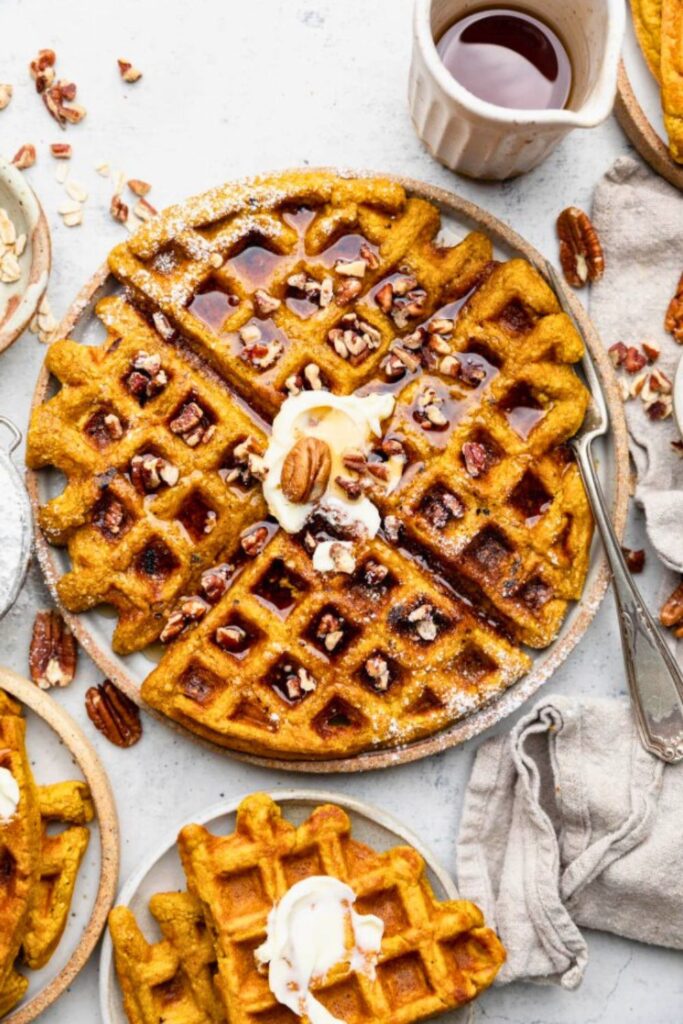
The batter comes together in one bowl, then cooks in batches according to the capacity and heat pattern of your waffle maker.
You can serve the waffles as they come off the iron or cool extra portions for the refrigerator or freezer.
Follow the steps from preheating through checking doneness before adding your toppings. 🍂🧇
Step 1: Preheat the Waffle Iron
Start by preheating the waffle iron according to its instructions while you prepare the ingredients.
Why preheating helps:
Hot plates begin setting and browning the batter promptly. Starting too cool can affect release and leave the surface softer than intended.
Before adding batter:
- If the machine has adjustable heat, medium-high is a starting point; use the setting recommended for your model.
- Wait for the ready indicator. If there is no indicator, follow the manufacturer’s preheating guidance rather than assuming every iron needs the same 5–10 minutes.
- Give the plates time to heat fully, including on a nonstick machine.
Prepare the batter while the iron preheats so you can start cooking once both are ready.
Step 2: Mix the Wet Ingredients
Use a large mixing bowl and begin with the wet ingredients. The flour will be folded in later to keep its mixing time brief.
Combine the wet ingredients:
- Whisk 2 large eggs until the whites and yolks are blended.
- Add 1 cup milk. A suitable unsweetened non-dairy milk is an option, though it can alter flavor and browning.
- Mix in 2 tablespoons melted butter, cooled so it is not hot, or the same amount of neutral oil.
- Add 1 teaspoon vanilla extract for background flavor.
- Stir in ¾ cup plain pumpkin purée, not sweetened pumpkin pie filling.
Whisk until evenly combined, with no separate streaks of egg or pumpkin remaining.
Butter temperature: Cool melted butter before it touches the eggs. It should still be liquid, but not hot enough to begin cooking them.
Step 3: Add Dry Ingredients
Add the dry ingredients to the same bowl, distributing the baking powder, salt, and spices across the flour rather than dropping them in one clump.
🥄 Add the following:
- 1½ cups all-purpose flour
- 2 teaspoons baking powder
- ¼ teaspoon salt
- 1 tablespoon sugar
- 2 teaspoons pumpkin pie spice, prepared or homemade
Fold with a spoon or spatula until no dry flour pockets remain. Small lumps are fine; continued beating can make the waffle texture tougher.
Look for a thick but scoopable batter that drops from the spoon slowly rather than running like a thin liquid.
If excessively thick, fold in a small splash of milk.
If unusually thin, add a little flour, making any adjustment gradually.
Avoid large changes before trying the first waffle. Small differences in pumpkin moisture and measuring can affect the batter.
Step 4: Prep the Waffle Iron
Prepare the plates as directed by your waffle maker’s manufacturer. Some models need a light coat of oil, while others advise against spray or added grease.
Proper preheating, suitable plate preparation, and enough cooking time all help the waffle release without tearing.
Prepare the cooking surface:
- If the manual permits greasing, lightly coat both plates with the recommended oil or method.
- For an oil coating, use a suitable heat-safe brush and keep hands away from the hot plates. Use butter only if appropriate for your machine.
Do not assume aerosol cooking spray is suitable for every nonstick iron. Follow the care instructions for its coating.
Step 5: Cook the Waffles
Once the batter and plates are ready, cook a first waffle and use it to judge the fill amount and timing.
Fill and cook:
- Spoon in about ½ cup batter as a starting amount only if it suits your iron. Smaller or larger plates need a different quantity.
- Spread gently toward the edges without filling every gap to the rim; the batter needs room to expand when the lid closes.
- Close the lid and cook according to the waffle maker’s usual cycle.
⏱️ Check Doneness, Not Just Time
The machine’s signal is a useful starting point, but these moist pumpkin waffles may need additional cooking.
If still pale or soft, another 30–60 seconds may help. Watch closely so the outside does not burn while you assess the center.
Slowing steam can suggest that a waffle is nearly ready, but it is not a reliable doneness test on its own.
Open the lid gently. If it resists, wait another 20–30 seconds before trying again, without forcing it. Remove when the surface is golden and the middle is cooked through, not wet batter.
🎯 Tips for Perfect Pumpkin Waffles

Proper preheating, gentle mixing, and cooling on a rack help maintain browned edges around a tender pumpkin center.
Use these checks as you cook each batch:
🔥 1. Start with a Fully Heated Iron
Preheating gives the batter a consistent hot surface and helps it begin setting when it touches the plates.
- Use the ready indicator or the preheating instructions supplied with your waffle maker.
- Choose medium-high heat only if appropriate for the machine’s settings.
- The first waffle helps you judge whether the heat or cooking time needs a small adjustment.
🎃 2. Include the Spice Blend
Pumpkin gives the batter its body and mild flavor; the spices add the more pronounced fall notes.
For a 2-Teaspoon Homemade Blend:
- Cinnamon: 1 teaspoon
- Ground ginger: ½ teaspoon
- Nutmeg: ¼ teaspoon
- Allspice: ¼ teaspoon
Mix these together and use the full amount in place of 2 teaspoons prepared pumpkin pie spice.
🥄 3. Fold Only Until Combined
Stop once the dry ingredients are incorporated. A few small lumps are acceptable, but leave no loose flour pockets and do not taste raw batter.
🧇 4. Match the Portion to Your Iron
About ½ cup batter is a starting guide, not a universal amount. Leave room for spreading and use the first waffle to adjust the fill.
💨 5. Use Steam as One Clue
Pay attention to both the machine’s signal and the waffle itself. Steam behavior can help with timing but cannot confirm the center is cooked.
- Heavy steam usually means plenty of moisture is still escaping.
- Less steam can mean the waffle is approaching readiness.
- Very little steam is a cue to check color and the cooked center.
Waiting until the waffle has set before lifting the lid helps reduce tearing.
🧈 6. Keep Steam from Softening the Surface
Pumpkin adds moisture, so manage the waffles carefully after they leave the iron if you want a crisper finish.
- If needed, cook another 30–60 seconds while watching the color.
- Set cooked waffles on a wire rack instead of stacking them on a plate, where steam can collect.
- Hold cooked waffles briefly on an oven-safe rack in a 200°F (95°C) oven while finishing the batch. This keeps them warm; it is not a substitute for fully cooking them in the iron.
🍓 Topping Ideas to Take Your Waffles Over the Top
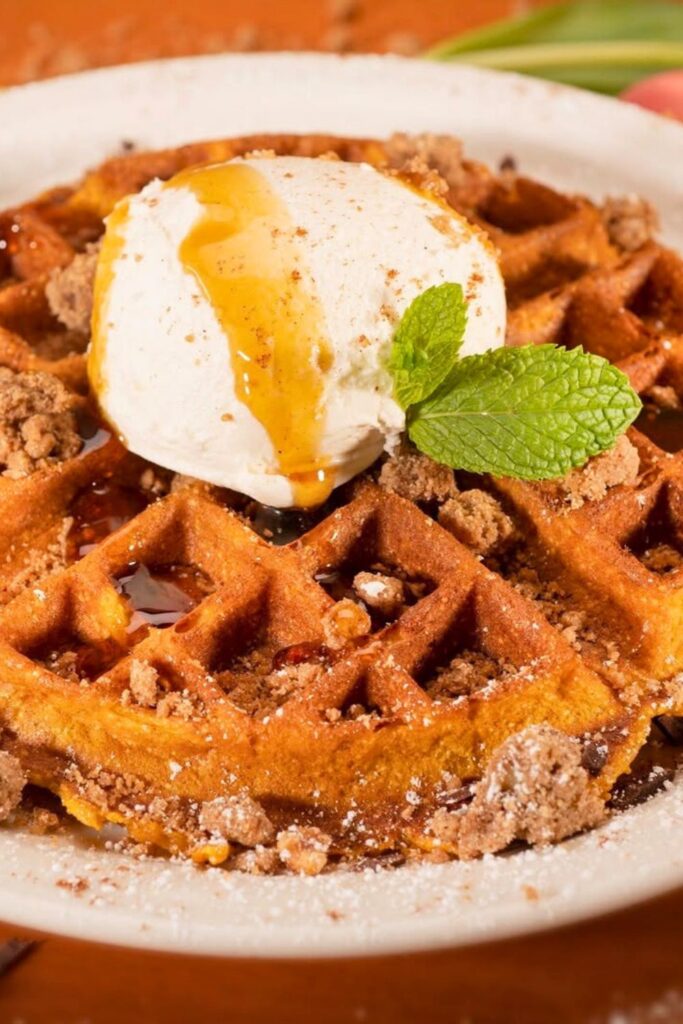
Add toppings only when you are ready to eat so syrup, fruit, or cream does not soften the freshly crisp surface too soon.
Offer a small selection at the table or choose one combination for the whole batch.
🧈 Classic Finishes
- Butter and maple syrup for a familiar waffle topping.
- A dusting of powdered sugar for a light sweet finish.
- A spoonful of whipped cream added at serving time.
🍓 Fruit Pairings
- Banana slices alongside a little nut butter.
- Warm cinnamon apples for an apple-spice topping.
- Berries, such as strawberries, blueberries, or raspberries, for fresh contrast.
🍫 Richer Toppings
- Chocolate-hazelnut spread, such as Nutella, in a thin layer.
- Peanut or almond butter for a creamy nut flavor.
- A little salted caramel sauce for a sweeter finish.
- Chocolate chips sprinkled onto warm waffles to soften.
🌰 Crunchy Additions
- Chopped pecans or walnuts for small nutty pieces.
- Toasted sliced almonds for a crisp topping.
- A little granola scattered on just before serving.
🍨 Dessert-Style Options
- Vanilla or pumpkin ice cream served over a warm waffle.
- Graham cracker or gingersnap crumbs for a cookie-like crunch.
- Marshmallow fluff or a cream cheese drizzle as an optional sweet topping.
❄️ Make Ahead & Freezing Instructions
Extra cooked waffles refrigerate or freeze well, giving you a quick breakfast that only needs reheating instead of a fresh batch of batter.
Cool, refrigerate, or freeze them using the following guidance.
🕓 Preparing Waffles for the Refrigerator
For a short make-ahead batch:
- Cook each waffle through before putting it aside.
- Cool on a wire rack without stacking, and refrigerate promptly within 2 hours, or 1 hour above 90°F (32°C).
- Use a sealed container or food-storage bag once cooled, keeping the waffles refrigerated.
- Use refrigerated waffles within 3–4 days.
To reheat: Use a suitable toaster or a 350°F (175°C) oven, starting checks around 5 minutes. Continue until heated through to 165°F (74°C); thickness and equipment change the time.
❄️ Freezing Cooked Waffles
Freezing separate pieces makes it easier to reheat only what you need.
🧇 Freeze in Stages:
- Cook the waffles fully and cool them promptly on a rack.
- Arrange in a single layer on a parchment-lined baking sheet.
- Freeze until firm, usually around 1–2 hours.
- Pack into freezer-safe bags or containers and label with the date.
- Use within about 3 months for best quality.
🔥 Reheating from Frozen
- Toaster: If the waffle fits safely and your toaster permits it, toast without toppings until hot and crisp.
- Oven: Heat at 350°F (175°C) for around 10–12 minutes, turning halfway, then continue as needed until the center reaches 165°F (74°C).
You can reheat without thawing, but the time depends on waffle thickness and the appliance rather than a guaranteed fifteen-minute limit.
Portioning tip: Freeze individual waffles separately so you can remove one or several without thawing the entire bag.
🍂 Final Thoughts: Cozy Mornings Start with Pumpkin Waffles
These pumpkin waffles pair real purée with warm spices in a flexible breakfast that tastes good plain or finished with your favorite toppings.
Make them for a weekend brunch, then cool and store any extras for another morning; a fully heated iron and a visual doneness check keep the process reliable.
Measure the purée accurately, heat the waffle iron completely, and serve each waffle while its edges are still crisp.
Pumpkin Waffles

🎃 More Pumpkin Recipes You’ll Love
For more pumpkin dishes to add to your seasonal menu, try these related recipes:
🔸 Stunning Pumpkin Scones Recipe for Fall
Pumpkin scones are a buttery baking option to serve with coffee or tea.
🔸 The Ultimate Pumpkin Cinnamon Rolls Recipe
Pumpkin cinnamon rolls offer soft, spiced layers and a sweet topping for a weekend treat.
🔸 The Only Pumpkin Chili Recipe You Need
Pumpkin chili takes the same ingredient in a savory direction for a hearty dinner.


Dana Brooks is a home-cooking writer at Feastbears, where she shares easy family recipes, cozy dinners, quick desserts, and beginner-friendly kitchen tips. Her goal is to make everyday cooking feel simple, warm, and enjoyable for busy home cooks.


