These homemade pumpkin scones pair a tender, buttery crumb with cinnamon, pumpkin spice, and a simple sweet glaze.
They deliver the cozy flavor of a café pastry while letting you control the glaze, spice level, and optional chocolate, nut, or ginger additions.
With two bowls and very cold butter, you can shape one square of dough into eight neat triangles without a stand mixer.
🧡 Why You’ll Fall in Love With These Pumpkin Scones

Each scone bakes with a soft center, lightly crisp exterior, and warm cinnamon flavor throughout.
A long dough rest is not required, although a short freezer chill can help the shaped scones hold their form. Allow extra time if you choose that step.
Making them at home gives you control over the finish, whether you prefer a small drizzle or a more generous café-style coating.
The pumpkin adds moisture, while small pieces of cold butter help create a crumb that breaks apart easily instead of becoming chewy.
These are the main details to keep in mind:
- Very cold butter: leave small pieces visible in the flour mixture.
- Plain pumpkin purée: adds pumpkin flavor and moisture without pie-filling seasonings.
- Brown sugar and cream: bring richness and a softer crumb.
- No stand mixer: two bowls and basic mixing tools are sufficient.
- Adjustable spice: choose a pumpkin spice blend you enjoy and keep extra additions modest.
Finish with the simple sugar-and-milk glaze, or add pumpkin and spice to part of it for a second drizzle. Let the scones cool first so the coating stays on the surface.
🍁 Ingredients You’ll Need

Organize and measure the dry ingredients first, then bring out the butter, cream, pumpkin, and egg so the butter stays cold until mixing.
For the Dry Mixture
| Ingredient | Measurement | Notes |
|---|---|---|
| All-purpose flour | 2 ¼ cups (270g) | Measure accurately for a dough that stays tender rather than dry. |
| Granulated sugar | ¼ cup (50g) | Adds sweetness alongside the separate brown sugar. |
| Baking powder | 1 ½ teaspoons | Distribute evenly through the flour to help the scones rise. |
| Baking soda | ¼ teaspoon | Works with the acidic ingredients in the dough as an additional raising agent. |
| Salt | ½ teaspoon | Rounds out the butter, sugar, and spice flavors. |
| Cinnamon | 1 ½ teaspoons | Adds a distinct cinnamon note to the spice blend. |
| Pumpkin pie spice | 1 ½ teaspoons | Choose a blend you like; it already contains several warming spices. |
For the Cold Butter Layer
| Ingredient | Measurement | Notes |
|---|---|---|
| Unsalted butter | ½ cup (113g) | Cube and chill thoroughly so small pieces remain when mixed into the flour. |
For the Pumpkin Mixture
| Ingredient | Measurement | Notes |
|---|---|---|
| Pumpkin puree | ½ cup (122g) | Use plain, thick purée; drain watery homemade pumpkin. |
| Heavy cream | ½ cup (120ml) | Adds moisture and richness; keep additional cream for brushing the tops. |
| Brown sugar | ¼ cup (55g) | Whisk out lumps in the wet mixture. |
| Vanilla extract | 1 ½ teaspoons | Brings vanilla flavor to the pumpkin dough. |
| Egg | 1 large | Whisk into the wet ingredients to help bind the mixture. |
🔪 Useful Baking Tools
- One large mixing bowl and one medium bowl
- A whisk plus a spatula for folding
- A pastry mat or a clean surface dusted with flour
- A bench scraper or sharp knife for portioning
- A baking sheet lined with parchment
- Measuring cups, spoons, and a scale if available
- Optional: a pastry cutter for working in the butter
🥣 Step-by-Step: How to Make Pumpkin Scones From Scratch

These ten steps cover everything from freezing the butter and mixing the dough to shaping, baking, cooling, and glazing the finished scones.
Bake the shaped pieces right away when they still feel firm and cool; if the dough softens or sticks, chill the tray before it goes into the oven.
🔥 Step 1: Preheat and Prep
Preheat the oven to 400°F (200°C). Starting in a fully heated oven helps the scones begin rising before the butter melts too far into the dough.
Line a baking sheet with parchment and set out the shaping equipment:
- A clean work surface or pastry mat, lightly floured
- A sharp knife or bench scraper
- A large bowl and a medium bowl
Preparing these items first reduces the time the mixed dough spends warming on the counter.
❄️ Step 2: Freeze the Butter
The butter should be cold enough to stay in distinct pieces while you work it through the flour.
Cut ½ cup (113g) unsalted butter into small cubes. Place it in the freezer for 10–15 minutes while you measure the remaining ingredients.
Small pockets of butter help separate the dough as it bakes, contributing to a tender, flaky texture.
If the butter becomes soft or greasy while you work, pause and chill it again. Keeping it cold is more useful than working quickly through melting butter.
🧂 Step 3: Mix the Dry Ingredients
Add these ingredients to the large bowl:
- 2¼ cups (270g) all-purpose flour
- ¼ cup (50g) granulated sugar
- 1½ teaspoons baking powder
- ¼ teaspoon baking soda
- ½ teaspoon salt
- 1½ teaspoons ground cinnamon
- 1½ teaspoons pumpkin pie spice
Whisk thoroughly so the raising agents, salt, and spices are spread evenly through the flour.
Spice tip: Use your preferred pumpkin pie spice blend. A small additional pinch of cardamom or allspice can change the character, but avoid adding so much that it overwhelms the pumpkin.
🎃 Step 4: Combine the Wet Ingredients
In the medium bowl, whisk together:
- ½ cup (122g) plain pumpkin purée
- ½ cup (120ml) heavy cream
- ¼ cup (55g) brown sugar
- 1½ teaspoons vanilla extract
- 1 large egg
Whisk until smooth, breaking up any brown sugar lumps. If using homemade pumpkin, drain excess liquid so it has a thick, spoonable consistency.
Canned plain pumpkin is a convenient option. Check that the label says purée or plain pumpkin, not sweetened pumpkin pie filling.
🧈 Step 5: Incorporate the Butter
Add the chilled butter cubes to the dry mixture and toss briefly to coat them with flour.
Choose whichever of these methods is most comfortable:
- Fingertips: work quickly, rubbing the butter through the flour while leaving some pieces about the size of peas.
- Pastry cutter: press through the cubes until the mixture becomes coarse and uneven.
- Two knives or forks: cut the butter into smaller pieces without mashing it into a smooth paste.
The mixture should look crumbly, with visible butter scattered through it. It should not resemble a fully blended cake batter.
Know when to stop: some finer crumbs and some pea-sized pieces are useful. Continuing until every trace of butter disappears can reduce the distinct flaky texture.
🥄 Step 6: Mix It All
Pour the pumpkin mixture into the flour and butter. Fold gently with a spatula or wooden spoon until the dry flour is just incorporated.
Expect a thick, sticky, slightly rough dough. Stop mixing once it holds together; extended stirring develops more gluten and can make the scones tougher.
Optional mix-ins: gently fold in ½ cup total of your choice from the following:
- Mini chocolate chips for small chocolate pockets
- Chopped pecans or walnuts for crunch
- Chopped crystallized ginger for a sharper, sweet-spiced bite
📏 Step 7: Shape the Dough
Dust the surface, your hands, and the top of the dough with enough flour to prevent sticking. Turn out the dough without kneading in a large amount of extra flour.
Pat gently into an 8-inch square, approximately ¾–1 inch thick, keeping the thickness as even as possible.
With a sharp knife or bench scraper, portion the square in two stages:
- Cut it into 4 equal smaller squares.
- Cut each small square diagonally to make 2 triangles.
This gives you 8 scones. Lift them onto the prepared baking sheet with space between the pieces.
Shaping tip: slide a lightly floured bench scraper underneath each triangle to move it without stretching the dough.
🧊 Step 8: Chill (Optional But Recommended)
A freezer rest is optional when the dough is still cold, but helpful if the butter has softened during mixing and shaping.
Chill the shaped scones on their tray for 20–30 minutes. Firm butter and cooler dough help them retain their shape in the oven.
You can also freeze the unbaked pieces solid for another day. They will need longer in the oven than freshly shaped dough.
🖌️ Step 9: Brush and Bake
Brush the tops lightly with a little additional heavy cream just before baking.
Bake in the preheated 400°F (200°C) oven, using these times as checks rather than guaranteed doneness points:
- At 20 minutes: begin checking the color and whether the centers have set.
- Around 20–25 minutes: many batches will be golden and baked through; allow more time if needed.
- From frozen: expect roughly 25–30 minutes, checking the centers before removing the tray.
Look for golden tops, set edges, and centers that are baked rather than wet or doughy. Larger or colder pieces can need longer.
Avoid drying them out: once the centers are cooked, remove the tray instead of baking extra minutes solely for a darker color.
Rest the scones on the tray for a few minutes, then move them to a wire rack to finish cooling.
🍬 Step 10: Glaze Time!
Prepare the glaze while the scones cool. Use the basic mixture alone, or reserve part for a pumpkin-spice drizzle.
Basic Sugar-and-Milk Glaze
| Ingredient | Measurement |
|---|---|
| Powdered sugar | 1½ cups (180g) |
| Milk | 2 tablespoons, added gradually |
Whisk the powdered sugar with the milk added gradually until smooth. Drizzle over cooled scones, using less milk for a thicker coating.
Optional Pumpkin-Spice Glaze
To make a spiced version, mix these additions into the basic glaze or a reserved portion:
- ¼ teaspoon pumpkin pie spice
- 1 tablespoon plain pumpkin purée
Stir until evenly colored, then drizzle over the cooled scones. If using both glazes, let the first layer settle before adding the second.
For neater lines: use a spoon or piping bag. Thin a stiff glaze a little at a time, since a small amount of milk changes its consistency quickly.
✅ Tips for the Best Pumpkin Scones
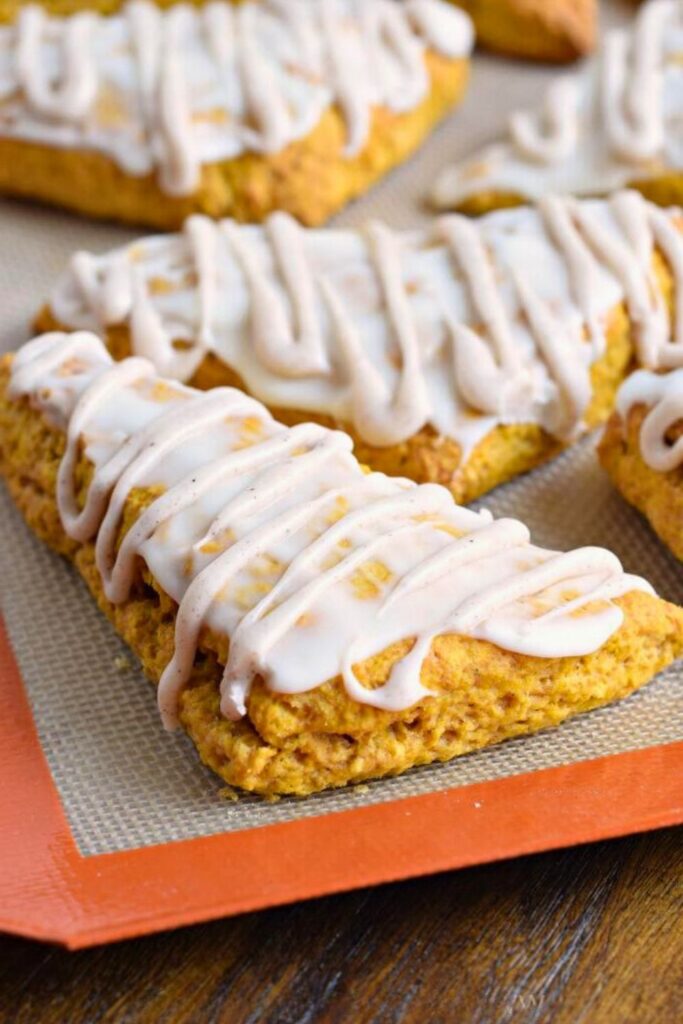
Cold butter and minimal handling matter more than specialized tools. Use these checks to keep the crumb tender and the triangular shape intact.
1. Keep the Butter Thoroughly Chilled
Cold butter stays in small pockets instead of immediately blending into the flour. Give the cubes at least 10 minutes in the freezer before working them into the dry ingredients.
If it softens: return the bowl or shaped dough to the cold briefly. A greasy mixture is a sign that the butter needs to firm up.
2. Mix Only Until the Dough Comes Together
Fold the wet and dry mixtures just until the flour is incorporated. The surface does not need to become perfectly smooth.
Let the dough look rustic. Repeated kneading or stirring can make a scone chewy instead of tender.
3. Flour the Shaping Surface Lightly but Evenly
Pumpkin makes the dough moist and sticky. Use enough flour to release it from the counter, but avoid working large handfuls into the dough.
A pastry mat can simplify cleanup, and a bench scraper helps lift sticky edges. Use a ruler if you want to check the 8-inch square.
4. Chill the Shaped Scones When Needed
A 20–30 minute freezer rest gives softened butter a chance to firm up and helps the pieces keep their triangular shape.
Make-ahead option: freeze the triangles solid, then package them for baking later.
5. Adjust the Spice Blend Thoughtfully
A little extra cinnamon, cardamom, or nutmeg can personalize the flavor. Start with small changes, since the dough already contains cinnamon and pumpkin pie spice.
☕ Serving Suggestions: How to Enjoy Pumpkin Scones
Serve these scones for breakfast, brunch, or an afternoon coffee break, either plain, glazed, or paired with a richer topping.
1. Choose a Coffee or Tea Pairing
A warm drink balances the buttery crumb and sweet glaze.
- Pumpkin spice latte: echoes the spices in the dough.
- Vanilla chai: adds another gently spiced pairing.
- Cold brew with cream: offers a cooler coffee option.
- Hot apple cider: provides a fruity contrast.
2. Rewarm Leftovers Gently
For an individual scone, start with 10–15 seconds in the microwave, or try 300°F (150°C) for 5–7 minutes in the oven. Check and adjust as needed; an existing glaze may soften or melt.
3. Offer a Small Spread or Topping
If you would like something beyond the glaze, try one of these additions:
- A spoonful of whipped cream cheese
- A small pat of butter on a warm scone
- Apple or fig preserves served on the side
- A little maple syrup or extra glaze
4. Serve a Scone as Dessert
Add a scoop of vanilla ice cream and a light drizzle of caramel or glaze. The cold topping contrasts with a gently rewarmed scone.
❄️ Storing and Freezing Tips
Let every scone cool completely before storing, then choose room-temperature, refrigerated, or frozen storage according to whether it has been glazed.
Short-Term Storage for Unglazed Scones
- Keep plain, fully cooled scones in an airtight container for up to 2 days at cool room temperature. Refrigerate scones with the milk or pumpkin glaze instead.
- Avoid leaving the container in direct sun or a warm, humid part of the kitchen.
- A paper towel beneath unglazed scones can help absorb surface moisture; replace it if it becomes damp.
Refrigerating Glazed Scones
- Store glazed scones in a covered container in the refrigerator and use within 3–4 days.
- Warm only the portion you plan to eat, using the short oven or microwave checks above.
Wrap closely or use an airtight box to limit drying. Refrigeration can firm the crumb, so a gentle rewarm may improve the texture.
Freezing Unbaked Scones
To prepare a batch for future baking, freeze the shaped pieces separately first:
- Cut the dough into its eight triangles.
- Arrange on a parchment-lined tray and freeze until firm, usually about 1–2 hours.
- Move the solid pieces to a freezer bag or tightly sealed freezer container.
- Label and use within about 3 months for quality.
Bake without thawing: brush with cream and bake at 400°F (200°C), allowing extra time. Start checking around 25 minutes and continue until the centers are baked through.
Freezing Baked Scones
For already-baked scones, follow these packaging steps:
- Let them cool completely on a rack.
- Wrap each scone separately to protect the edges.
- Place the wrapped pieces in a freezer-safe bag or container.
- Use within about 2 months for best texture.
Thaw glazed scones in the refrigerator; plain ones can thaw covered at room temperature. Rewarm as needed at 300°F (150°C), starting with 5–10 minutes.
For the tidiest finish: freeze the scones without glaze and add a fresh drizzle after thawing.
🎃 Final Thoughts
Very cold butter, plain pumpkin purée, and gentle mixing give these homemade scones their tender interior and lightly crisp edges.
Finish with the basic sweet glaze, or reserve a portion and flavor it with pumpkin and spice for a contrasting second drizzle.
Enjoy a fresh batch the same day, or freeze the shaped triangles so a warm pumpkin pastry is ready for a future morning.
Wait until the scones are cool before glazing so the coating stays visible instead of melting into the crumb.
Pumpkin Scones with Sweet Glaze
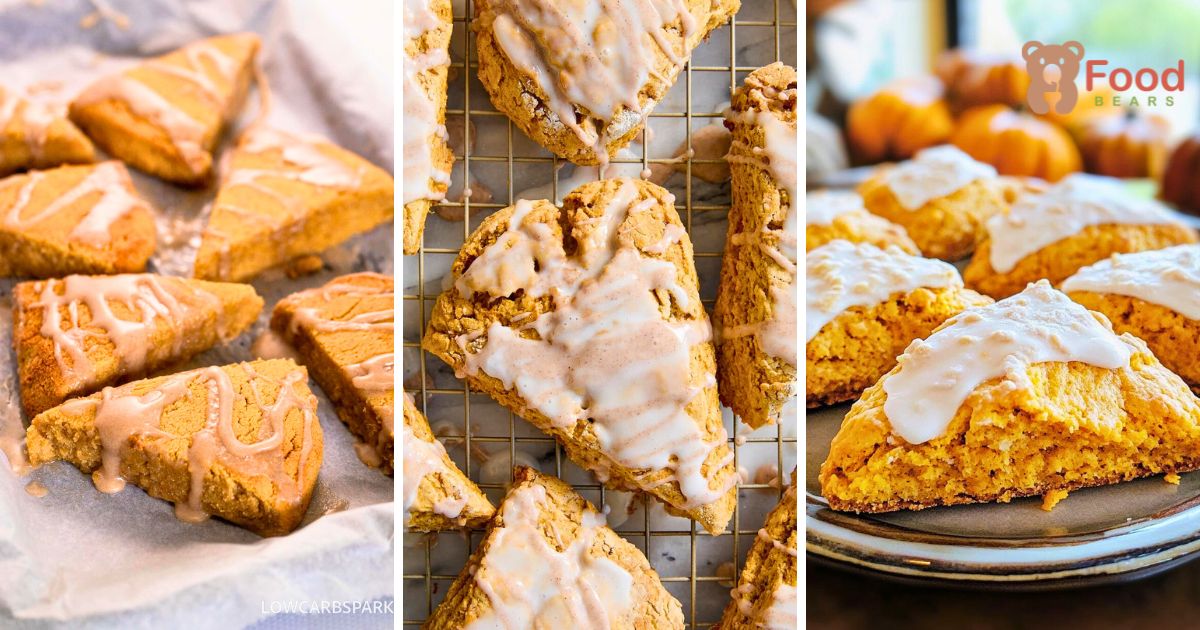
🍂 You May Also Love
Keep the pumpkin theme going with these related breakfast and dessert recipes:
- 🥞 Best Pumpkin Pancakes Recipe for Fall Mornings
A pumpkin pancake breakfast with warm spices for a relaxed fall morning. - 🍞 Best Pumpkin Bread Recipe for Busy Moms
A moist pumpkin loaf with a two-bowl method and several optional mix-ins. - 🍫 Easy & Fudgy Pumpkin Brownies
Chocolate and pumpkin brownies made without flour, then cooled and chilled for cleaner slices.


Dana Brooks is a home-cooking writer at Feastbears, where she shares easy family recipes, cozy dinners, quick desserts, and beginner-friendly kitchen tips. Her goal is to make everyday cooking feel simple, warm, and enjoyable for busy home cooks.


