This homemade chicken curry builds flavor patiently from onions, tomatoes, ginger, garlic, yogurt, and a warming blend of spices.
Instead of adding everything at once, the recipe develops the sauce in stages. That order helps the onions sweeten, the spices bloom, and the tomato base lose its raw edge.
The blended onion-tomato paste gives the gravy body, while yogurt adds gentle tang and richness without making the curry overly heavy.
Once the base is ready, the chicken simmers until tender and fully cooked, absorbing the fragrant sauce along the way.
The result is a warming, aromatic curry that you can serve with rice, flatbread, or a cooling yogurt side.
Use the steps as a guide, adjusting the heat and gravy consistency to your preference.

⭐ Why This Chicken Curry Recipe Works

The ingredient list matters, but the sequence is what gives this curry depth. Each stage prepares the pan for the next—from tempering whole spices to cooking the paste and folding in yogurt over gentle heat.
These are the techniques that support a flavorful curry, including a few details that are particularly useful for beginners:
1. A Freshly Blended Base
Onion, tomato, ginger, and garlic become a thick paste that spreads through the gravy. Blending them together makes it easier to distribute their flavor throughout the dish.
2. Adjustable Chili Heat
The green chilies are optional. Kashmiri red chili powder is generally chosen for color and gentler heat, but strength varies; reduce the amount if your powder is especially hot.
3. Soft, Golden Onions
Cook the sliced onions until soft and golden, lowering the heat as they color. This develops sweetness without introducing the bitterness of burned edges.
4. Gentle Handling of Yogurt
Whisk the yogurt smooth, then add it gradually over low heat. Tempering it with a little warm gravy can help reduce splitting, although no technique can guarantee that every yogurt behaves identically.
5. Time to Develop the Base
Let excess moisture cook away as you stir the chicken into the paste, but do not deliberately dry out the meat. The goal is a concentrated sauce followed by a gentle simmer.
🛒 Ingredients You’ll Need
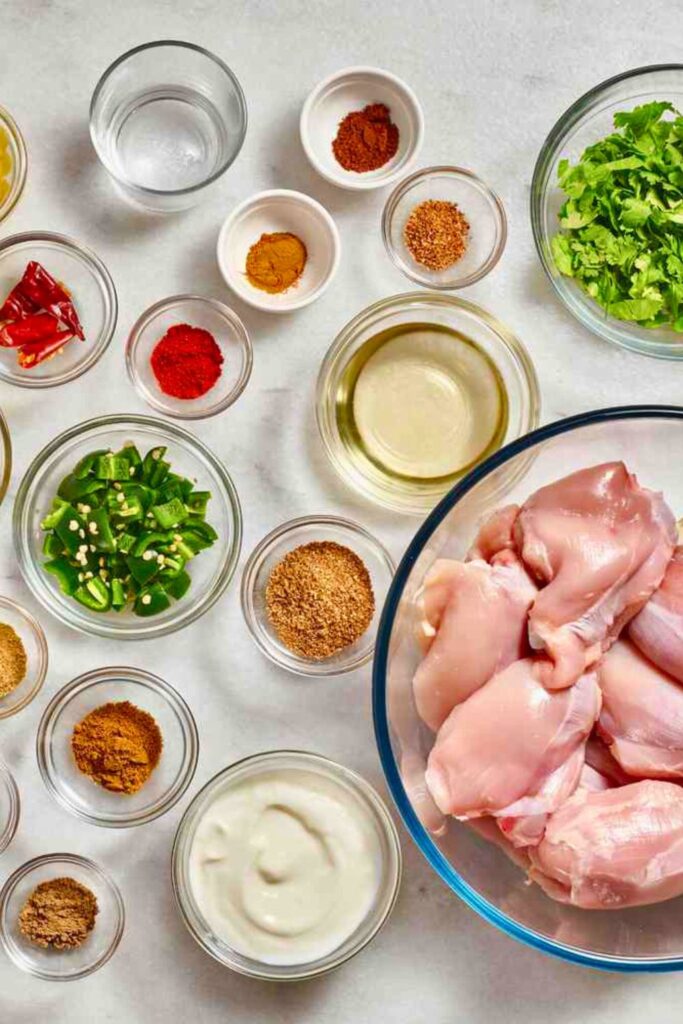
The ingredients are grouped by purpose so preparation stays organized. One large onion is divided between the blended paste and the sliced-onion base, giving the curry both body and texture.
| Category | Ingredient | Amount | Notes |
|---|---|---|---|
| Base Paste | Onion (large) | 1/4 onion | Use one quarter of the large onion for blending; reserve the remaining three quarters for slicing. |
| Garlic cloves | 5-6 cloves | Peel and blend with the onion, ginger, chilies, and tomato. | |
| Ginger | 1 thumb-sized piece | Peel and chop so it blends evenly. | |
| Green chilies | 2 | Optional; adjust to the heat of your chilies. | |
| Tomato (large) | 1 | Blend into the base paste. | |
| Dairy (or Alt) | Plain yogurt (unflavored) | 3–4 tbsp | Whisk smooth and add gradually over low heat; temper if needed. |
| or extra tomato (if skipping yogurt) | +1 tomato | Blend this additional tomato into the base at the start and omit yogurt. | |
| Cooking Oil & Spices | Vegetable or sunflower cooking oil | 3–4 tbsp | Use a food-grade cooking oil; never use mustard oil labeled for external use only. |
| Bay leaf | 1 | Remove before serving. | |
| Green cardamoms | 3 | Crack lightly to release aroma, then remove pods before serving. | |
| Cinnamon stick | 1 small piece | Briefly heat with the other whole spices and remove at the end. | |
| Cloves | 3–4 | Use whole cloves for the oil-tempering stage; remove before serving. | |
| Sauté & Curry Body | Onion (remaining) | 3/4 onion | Cook until soft and golden without scorching. |
| Salt | To taste | Count the pinch used with the onions toward the final seasoning. | |
| Water | ~1 cup | Add gradually; adjust to the pan and preferred gravy thickness. | |
| Dry Spices | Turmeric powder | 1/2 tsp | Stir briefly into the onions before adding the paste. |
| Kashmiri red chili powder | 1 tsp | Heat varies by brand; reduce the amount if using a hotter chili powder. | |
| Ground coriander (optional) | 1 tsp | Optional earthy seasoning added with the garam masala. | |
| Garam masala powder | 1/2 tsp | A concentrated spice blend; use the measured amount first. | |
| Sugar (optional) | 1/2 tsp | Optional; softens the tomato’s sharpness without removing chili heat. | |
| Protein | Chicken (bone-in or boneless) | ~1.5 lbs (700g) | Use evenly sized pieces; do not rinse raw chicken and cook to 165°F. |
| Optional Extras | Potatoes (peeled and cubed) | 2 medium | Cut into small, even cubes and simmer until fork-tender. |
| Ground mace & nutmeg (optional) | 1 pinch each | Optional finishing spices, used sparingly. | |
| Fresh coriander leaves | Handful | Scatter over the finished curry. |
🍛 How to Make the Perfect Indian Chicken Curry in 10 Easy Steps

Great curry is guided by aroma, color, and texture rather than the clock alone. Watch for golden onions, fragrant spices, a thickened tomato base, and chicken that reaches a safe internal temperature.
If your curry has previously been watery or unevenly seasoned, pay close attention to those stages.
Follow the ten steps below, using the texture and temperature checks alongside the suggested times.
🔪 Step 1: Make the Base Paste – Fresh Is Best
Begin with the homemade paste. Fresh ginger and garlic give you direct control over the balance of the base without needing a prepared curry paste.
Add these ingredients to a blender:
- ¼ of 1 large onion, roughly chopped.
- 5–6 garlic cloves, peeled.
- 1 thumb-size piece of ginger, peeled and chopped.
- 2 green chilies, optional according to your preferred heat.
- 1 large ripe tomato, chopped.
Blend into a smooth, thick paste. If the blades need help, add about a tablespoon of water rather than making the mixture runny.
💡 Omit the green chilies for a milder base. The red chili powder added later still contributes heat, so adjust that ingredient too if necessary.
🥣 Step 2: Whisk the Yogurt for a Smooth Gravy
Measure 3–4 tablespoons plain, unflavored yogurt. It adds tang and a little body to the gravy.
- Take out the measured yogurt shortly before cooking; do not leave dairy unrefrigerated for an extended period.
- Whisk until smooth and free of lumps.
A large temperature jump and high heat can encourage yogurt to split. Gentle heat, gradual addition, and tempering with warm gravy help limit that risk.
❗ Dairy-free option: Omit the yogurt and blend 1 additional tomato into the base paste in Step 1. The gravy will be more tomato-forward and less creamy.
🍳 Step 3: Heat the Oil and Temper the Whole Spices
Use vegetable or sunflower cooking oil for a neutral base. If choosing mustard oil, use only a product suitable and approved for culinary use where you live; never cook with a bottle labeled for external use only.
- Add 3–4 tablespoons oil to a heavy-bottomed pan.
- Heat until shimmering, not smoking, then lower the heat before adding the whole spices.
- Add the whole spices:
- 1 dried bay leaf.
- 3 green cardamom pods, lightly cracked.
- 1 small piece of cinnamon stick.
- 3–4 whole cloves.
Let the spices sizzle for a few seconds until fragrant, watching closely so they do not darken or burn.
🔥 Keep this stage brief and controlled. Very hot oil can scorch spices quickly and may cause splattering.
🧅 Step 4: Sauté the Sliced Onions to Golden Perfection
Add the remaining ¾ of the large onion, thinly sliced.
Sprinkle with a small pinch of salt, counting it toward the final seasoning.
Cook over medium-high heat, stirring often. As the edges begin to color, lower to medium-low and continue until the onions are soft and golden.
If the onions are catching, reduce the heat and cautiously add a small splash of water to loosen the pan.
Soft golden onions bring sweetness to the gravy; dark, scorched pieces can make it bitter.
🌶️ Step 5: Toast the Ground Spices, Then Add the Base Paste
Once the onions are ready, add the first ground spices.
- Stir in ½ teaspoon turmeric powder.
- Add 1 teaspoon Kashmiri red chili powder, using less if substituting a hotter chili powder.
Stir for just 2–3 seconds. Ground spices can burn rapidly in hot fat.
Immediately add the blended onion, tomato, ginger, and garlic paste. Stir over medium-high heat for about 1–2 minutes, or longer as needed, until it thickens slightly and loses its raw aroma.
🍗 Step 6: Pat the Chicken Dry and Add It to the Pan
Prepare about 1½ pounds (700 g) chicken, bone-in or boneless, in reasonably even pieces.
- Do not wash raw chicken. Rinsing can spread bacteria around the sink and nearby surfaces.
- Pat excess surface moisture away with paper towels, discard the towels, and wash your hands after handling the meat.
Use a separate board for raw chicken and clean the work area afterward. Removing surface moisture is useful; drying the meat out during cooking is not the aim.
Add the chicken to the paste and stir over medium-high heat, adjusting the burner so the sauce does not scorch.
Continue stirring while watching for these changes:
- The outside of the chicken becomes opaque and firms slightly.
- Excess watery liquid reduces, leaving the paste clinging more closely to the pieces.
Allow about 8–10 minutes as a guide. These surface changes do not prove the chicken is cooked through; the final simmer and temperature check are still necessary.
🧂 Step 7: Season and Spice With Care
Once the paste has concentrated around the chicken, add the remaining seasonings.
- Salt to taste, remembering the pinch added to the onions.
- 1 teaspoon ground coriander, optional.
- ½ teaspoon garam masala.
Stir to coat the chicken, then lower the heat before adding the yogurt.
✨ Garam masala is concentrated, so start with the measured amount and avoid overwhelming the other spices.
🥛 Step 8: Add the Yogurt Slowly (And Stir Constantly)
Use the 3–4 tablespoons whisked yogurt prepared earlier.
- With the pan on low heat, add it a little at a time. You can first stir some warm gravy into the yogurt to temper it.
- Stir continuously while incorporating each addition to help the gravy stay even.
Once blended, maintain a gentle simmer over medium-low heat rather than a rolling boil.
Stir occasionally along the bottom of the pan so the thickened paste does not stick.
If using the dairy-free tomato variation, skip the yogurt addition and proceed with the gravy stage; the extra tomato should already be in the cooked base.
🫕 Step 9: Add Water, Potatoes & (Optional) Sugar
Now add enough water for the covered simmer and include potatoes if using them.
- Optional: Add 2 medium potatoes, peeled and cut into small, even cubes.
- Pour in about 1 cup hot water, aiming for liquid roughly halfway up the chicken and potatoes. Add gradually; pan size affects how much is needed.
- If desired, stir in ½ teaspoon sugar to soften the tomato’s sharpness. It is optional, not a required thickener.
Cover the pan and reduce the heat to maintain a gentle simmer.
Allow about 25 minutes, checking that the chicken reaches 165°F in its thickest part and the potatoes are fork-tender. Boneless pieces may finish sooner, while larger bone-in pieces can take longer.
Check every 8–10 minutes, stirring gently and adding a little hot water if the base begins to stick.
🧂 Step 10: Final Check – Remove Whole Spices & Add Finishing Touches
Lift the lid carefully, keeping your face away from the steam, and check doneness before finishing the sauce.
Remove the bay leaf, cardamom pods, cinnamon, and cloves you can locate in the gravy.
Whole spices season the sauce but are unpleasant to bite into, so take a moment to fish them out.
Finish the curry as follows:
- Add a pinch each of ground mace and nutmeg, if using.
- Stir gently and adjust the thickness of the gravy
- Too thick? Stir in a little hot water.
- Too thin? Simmer uncovered for about 5 minutes, checking that the chicken does not overcook.
Taste the fully cooked curry for salt, then finish with a handful of fresh coriander leaves.
🥄 Bonus Tip: The Gravy Test
A little oil may separate on the surface as the gravy cooks down.
That can be normal, but oil separation is not a doneness test. Use a thermometer to check the chicken and a fork to check any potatoes.
For the gravy itself, look for these qualities:
- Well cooked: The blended base should have no raw tomato or onion taste; softened sliced onions may remain visible.
- Coating consistency: The sauce should cling to the chicken while still being easy to spoon.
- Balanced seasoning: Aim for a comfortable mix of spice, tang, aroma, and the optional hint of sweetness.
🍽️ Best Ways to Serve Chicken Curry
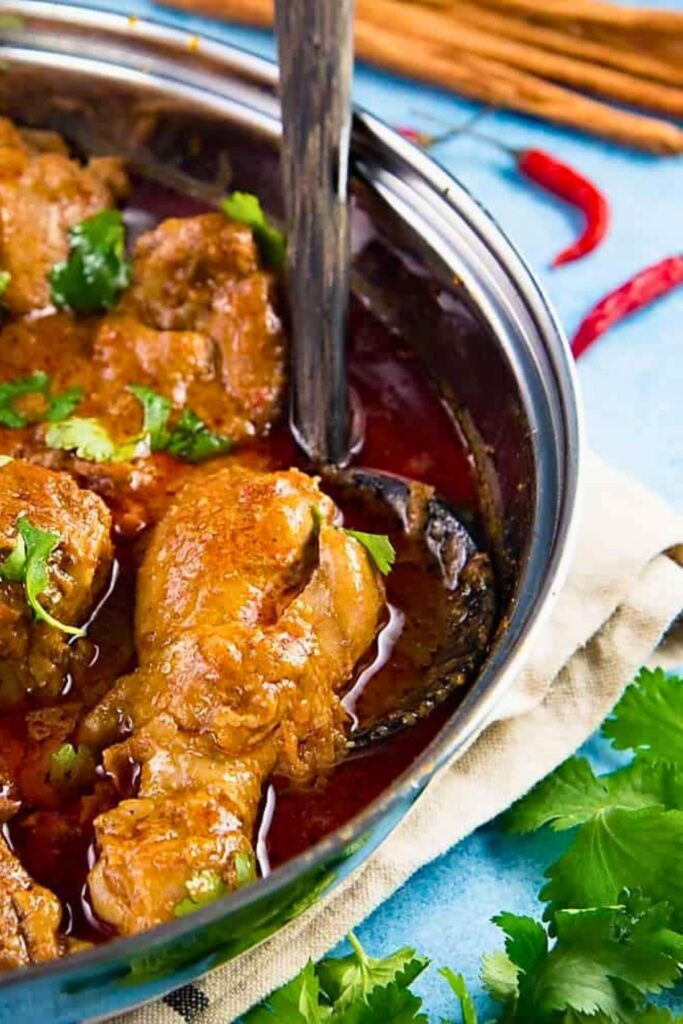
Choose a side that can catch the flavorful gravy. Steamed rice, jeera rice, naan, roti, or another flatbread all make natural companions, while yogurt or cucumber adds a cooling contrast.
Rice, flatbread, or a cooling yogurt accompaniment can complement the spices without adding much complexity.
These serving options work for different appetites and what you have available.
🍚 1. Steamed Basmati Rice
Fluffy basmati gives the sauce a simple base and lets the curry’s seasoning remain the focus.
For extra richness, add a little ghee or butter to the rice if desired.
Why it works: Mild rice balances the more assertive flavors in the gravy.
🍛 2. Jeera Rice
Cumin-scented rice adds another aromatic element. It is commonly prepared with cumin seeds and a little fat, with other whole spices depending on the recipe.
Why it works: The gentle cumin flavor complements the curry without needing a separate sauce.
🫓 3. Naan, Roti, or Paratha
Warm flatbread is useful for picking up the chicken and scooping the thicker gravy.
- Naan: A soft option for soaking up sauce.
- Tandoori roti: A firmer, chewy bread that holds up to a hearty curry.
- Paratha: A layered, richer choice when you want a more substantial side.
Serve the bread warm and tear off manageable pieces as you eat.
🍞 4. Bread or Pav
Plain bread or soft pav rolls are practical alternatives when you do not have rice or flatbread ready.
Why it works: They require little extra preparation and can pick up the remaining gravy.
🥗 5. Cucumber Raita or Yogurt
A cool yogurt side provides contrast to a warm, spiced curry.
Options include:
- Cucumber raita with yogurt, cucumber, cumin, and mint.
- Plain yogurt or Greek yogurt, seasoned lightly to taste.
Why it works: The cool, tangy side gives you a refreshing bite between spoonfuls of curry.
🍗 Chicken Curry Variants You’ll Want to Try Next
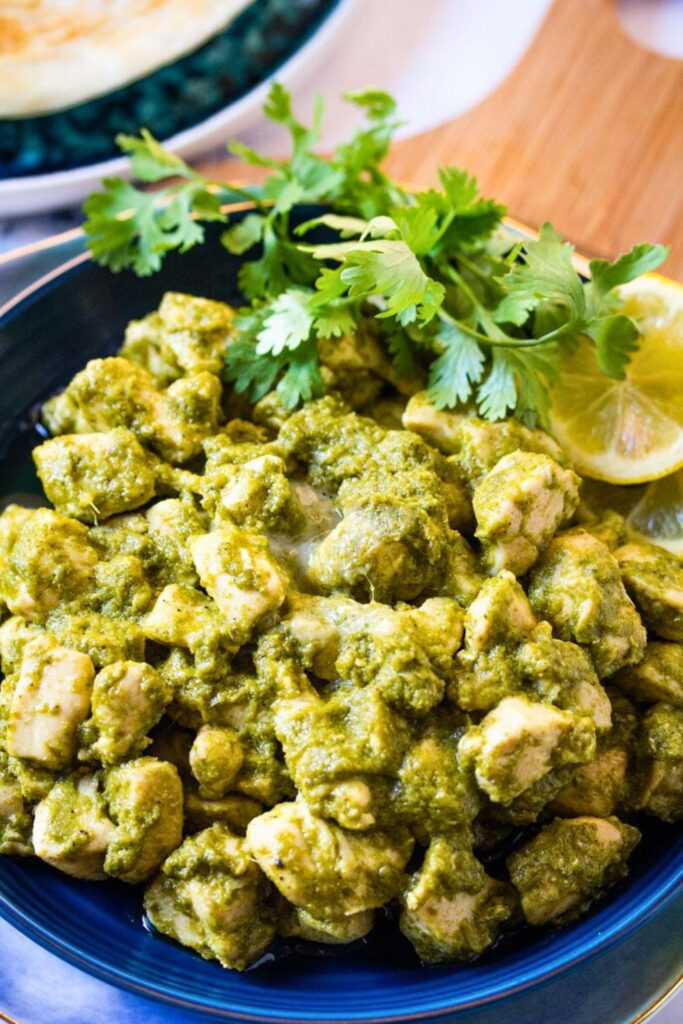
Chicken curry covers a wide family of regional and household dishes. Coconut milk, butter, fresh chilies, herbs, or different spice blends can each take the same basic idea in a new direction.
Other recipes emphasize butter, coconut, chilies, or fresh herbs, each producing a different gravy.
The examples below are broad styles to explore, not fixed formulas that every cook or region follows.
🔥 1. Butter Chicken (Murgh Makhani)
Butter chicken offers a richer, creamier direction, usually with a tomato-based sauce and a relatively gentle spice balance.
- Gravy: Tomato, butter, and cream; some recipes also include cashew paste.
- Flavor: Creamy and tangy, sometimes with a roasted note from the chicken preparation.
- Serve with: Naan or cumin rice.
Choose this style when you want a smoother sauce with a more pronounced dairy richness.
🥥 2. Kerala-Style Chicken Curry
Kerala chicken curries vary, and coconut-based versions offer a different direction from the yogurt gravy used here.
- Gravy: Depending on the recipe, coconut milk or ground coconut with ingredients such as curry leaves, black pepper, and fennel.
- Flavor: Aromatic and savory, with the character and richness of coconut.
- Serve with: Kerala parotta or steamed rice.
Look for a coconut-focused recipe if that is the flavor you would like to explore.
🌶️ 3. Andhra-Style Chicken Curry
Many Andhra-style preparations lean into chili heat, although the strength still depends on the household and recipe.
- Gravy: An onion-and-spice base with chilies and other seasonings that vary by preparation.
- Flavor: Often bold, hot, and aromatic.
- Serve with: Plain rice or ragi mudde.
Check the chili quantities before starting and adjust them to your own tolerance.
🌿 4. Hariyali Chicken Curry
Fresh herbs such as mint and coriander give this style its green color and distinctive aroma.
- Gravy: Blended herbs, often combined with yogurt, ginger, and garlic.
- Flavor: Herbal and fresh, with heat depending on the chilies used.
- Serve with: Roti or pulao.
A green color does not automatically mean fewer calories; the richness depends on the full ingredient list.
🍋 5. Maharashtrian-Inspired Curry With Goda Masala
One variation uses goda masala for a roasted spice character. Blends vary, and not all Maharashtrian chicken curries use the same masala.
- Gravy: An onion-tomato base with goda masala and, in some recipes, dried coconut.
- Flavor: Roasted, aromatic, and sometimes nutty, depending on the blend.
- Serve with: Bhakri or rice.
Follow a specific recipe for the spice balance instead of assuming every regional variation is interchangeable.
❓ Chicken Curry FAQs
1. How do I make a richer chicken curry?
Cook the onions until soft and golden, let the blended base lose its raw aroma, and reduce excess water without drying out the chicken. Add yogurt gently for a rounded finish.
2. Can I leave out the yogurt?
Yes. Blend one extra tomato into the base paste at the start and omit the yogurt step. Expect a tangier, less creamy gravy.
3. Why is the curry watery or separated?
Too much water or insufficient reduction can leave the gravy thin. Simmer briefly to thicken it; a little separated oil can be normal, while grainy yogurt may indicate that the dairy was heated too strongly.
4. What can I do if the curry is too spicy?
Serve it with plain rice or raita, or dilute a portion with a little yogurt or coconut milk, recognizing that this changes the flavor. Stir yogurt in off the heat. Sugar may soften the perception of heat but does not remove the chilies.
5. Can I prepare this curry ahead?
Yes. Refrigerate in shallow containers within 2 hours, or 1 hour above 90°F, and use within 3–4 days. Reheat to 165°F throughout, stirring and adding a little water if the gravy has thickened.
🏁 Final Thoughts: Your Chicken Curry Journey Starts Here
This curry rewards patient cooking more than complicated technique. A well-cooked onion-tomato base, controlled heat, and careful seasoning create a gravy that tastes layered and complete.
Let the chicken simmer only until tender and safely cooked, then adjust the consistency at the end so the sauce is as spoonable or thick as you prefer.
Once you understand those stages, it becomes easier to adjust the chili level and sauce thickness while keeping the recipe’s onion-tomato and yogurt character.
Keep these points in mind:
- Give the onions and base paste enough time to cook.
- Use gentle heat for the yogurt and final simmer.
- Taste for seasoning once the chicken is safely cooked.
- Adjust the gravy and sides to suit your meal.
This curry can fit a family dinner or a make-ahead plan. Allow enough time for the preparation and simmer rather than assuming it will always finish in under 45 minutes.
Save the recipe for another meal, and use the ingredient and method notes when you want to revisit the same style of curry.
Homemade Chicken Curry

🍽️ You Might Also Love…
For more chicken dinner ideas, explore these related recipes:
👉 Quick Indian Butter Chicken Recipe in 20 Minutes
A creamy, tomato-based chicken dish with a gentler spice profile.
👉 Grilled Chicken Salad with Eggs and Vinaigrette
Grilled chicken, romaine, vegetables, and eggs with a light vinaigrette.
👉 The Best Sesame Chicken Recipe You’ll Try
Crisp-coated chicken finished in a sweet, tangy glaze with sesame seeds.

Dana Brooks is a home-cooking writer at Feastbears, where she shares easy family recipes, cozy dinners, quick desserts, and beginner-friendly kitchen tips. Her goal is to make everyday cooking feel simple, warm, and enjoyable for busy home cooks.


