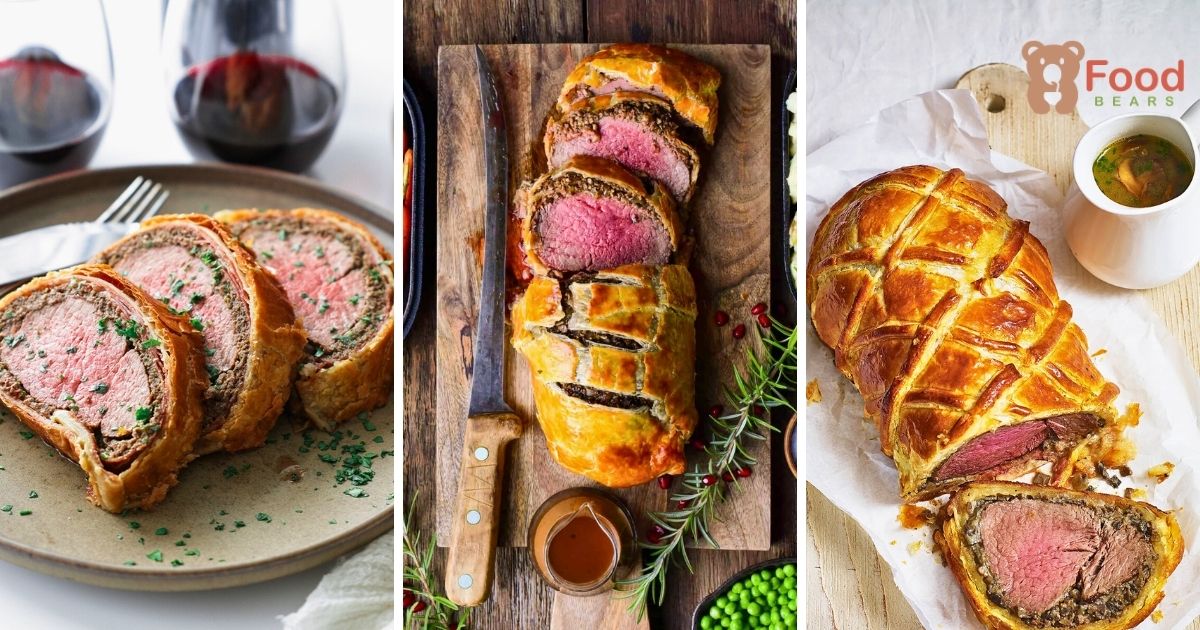
Few main courses create an entrance quite like Beef Wellington. The crisp pastry and careful presentation immediately make dinner feel like an occasion.
Inside the shell is tender beef surrounded by concentrated mushroom duxelles and a savory layer of cured ham. The contrast between juicy meat, earthy filling, and flaky pastry is what makes the dish so memorable.
Although the finished Wellington looks elaborate, it can be prepared at home by completing one layer at a time. It suits Christmas, anniversaries, and any gathering where the main course should feel extra special.
Work through the following stages patiently and the process becomes clear.
What Makes a Beef Wellington Truly Special?
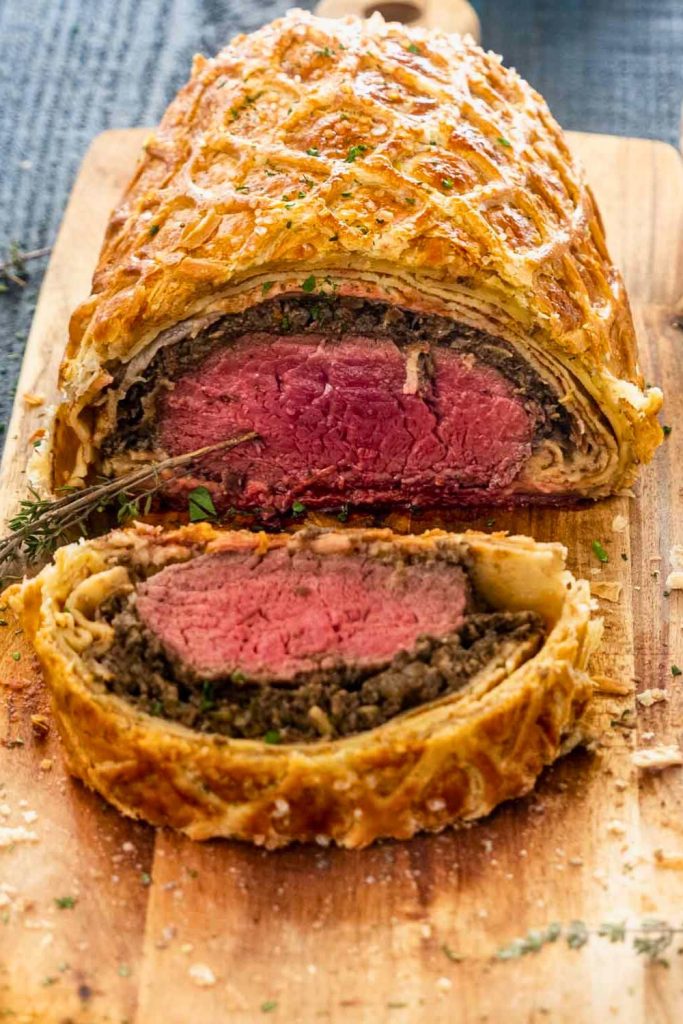
Beef Wellington feels luxurious because several distinct elements are assembled into one centerpiece:
- A center-cut beef tenderloin seared until browned
- A dry, deeply savory mushroom duxelles
- A crisp shell of buttery puff pastry
Each slice combines soft beef, concentrated mushrooms, salty ham, and delicate pastry. Even the aroma while it bakes draws attention to the kitchen.
This version keeps the rich components in proportion so the result is satisfying without feeling cumbersome, making it a natural fit for a holiday menu.
Gather the ingredients first, then complete the recipe in the order below.
Ingredients You’ll Need
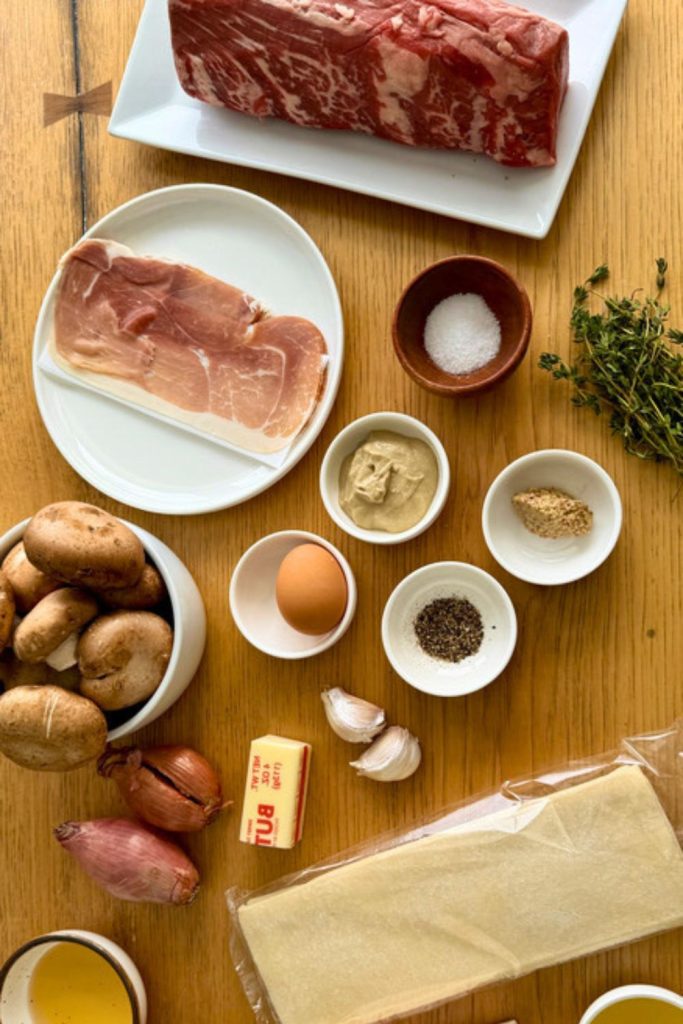
| Component | Ingredient |
|---|---|
| Beef | Center-cut beef tenderloin, olive oil, salt, black pepper, and English mustard or horseradish |
| Duxelles | About 700 g chestnut mushrooms, optional cooked chestnuts, 1 garlic clove, fresh thyme, salt, and pepper |
| Inner Wrap | Thinly sliced Parma ham or prosciutto |
| Pastry | 1 chilled puff pastry sheet, beaten egg yolk, and optional coarse salt |
| Shaping | Plastic wrap for forming and chilling the cylinder; remove it before baking |
The ingredient table separates the beef, duxelles, wrapping layer, and pastry components so you can prep each stage before assembly.
The Beef Wellington Recipe: Step-by-Step Guide
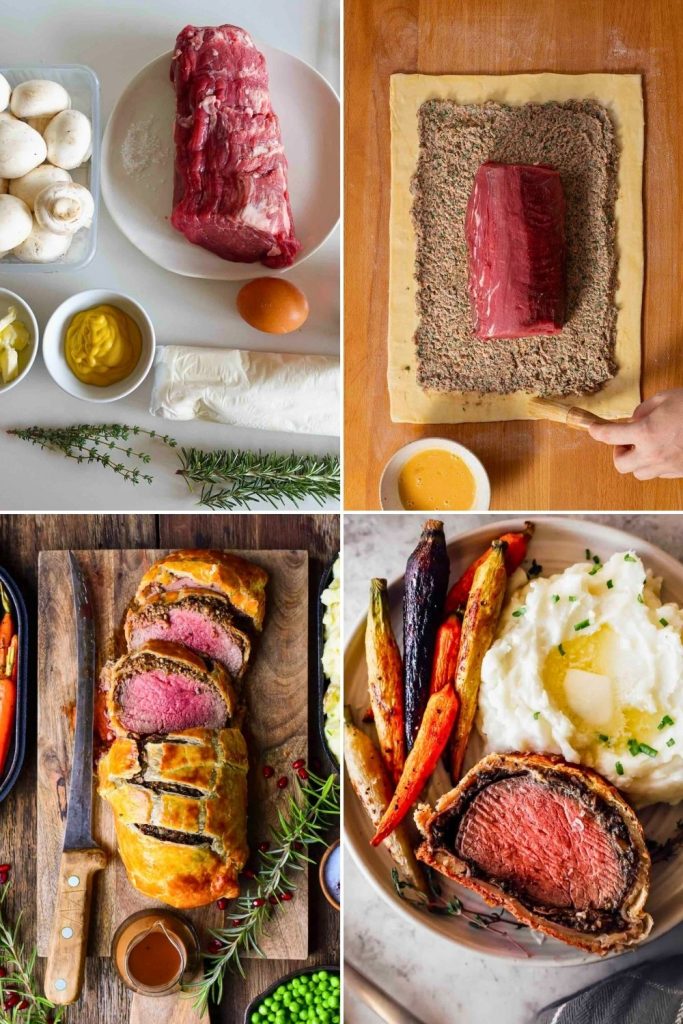
Beef Wellington becomes far less intimidating when you treat it as a sequence of small, deliberate jobs.
This walkthrough starts with selecting the tenderloin and continues through searing, drying the mushrooms, wrapping, baking, resting, and serving.
1. Choosing the Right Cut of Beef
The beef is the center of every slice, so choose a tender cut with a uniform shape. Center-cut beef tenderloin—also sold as beef fillet—is the classic option.
Tenderloin works especially well because it is:
- Naturally lean
- Boneless and easy to portion
- Exceptionally tender
- Low in tough connective tissue
The muscle sits along the lower spine and does little work, which explains its fine texture and softness.
Tenderloin costs more than many roasting cuts, but a Wellington stretches it into a complete centerpiece for a special meal.
Ask for an evenly thick center piece rather than a sharply tapered end. Consistent diameter helps the meat cook at the same rate throughout the pastry.
2. Searing the Beef: The Foundation of Flavor
Searing takes place before any wrapping. This quick, hot step adds the browned flavor that the enclosed beef cannot develop later in the oven.
Use this sequence:
- Heat a heavy skillet until the surface is very hot.
- Add a small amount of olive oil and turn the pan to distribute it.
- Season the tenderloin well on every side with salt and black pepper.
- Lower the beef carefully into the hot skillet.
- Rotate it frequently, browning the top, bottom, sides, and ends until a dark golden crust forms.
The goal is exterior color, not cooking the center. Tilt the skillet when helpful and press each curved surface against the hot metal for even contact.
Move the seared tenderloin to a clean plate.
Add the Mustard While Warm
Brush English mustard over the beef while its surface is still hot. The warmth softens the mustard and helps its sharp flavor cling to the crust.
That tangy layer cuts through the richness of the duxelles, ham, and butter pastry.
Prepared horseradish can replace the mustard for a different kind of heat.
Set the coated beef aside while you cook and cool the mushrooms.
3. Creating the Mushroom Duxelles
Duxelles is a finely chopped mushroom mixture cooked until concentrated. It supplies much of the Wellington’s earthy flavor and must be dry enough to protect the pastry.
For the mushroom layer, prepare:
- About 700 g chestnut or cremini mushrooms
- 1 garlic clove, roughly chopped
- Salt and freshly ground black pepper
- Fresh thyme leaves
- Cooked chestnuts, crumbled, if desired
Prepare the Mixture
- Put the mushrooms and garlic in a food processor.
- Pulse until the pieces are very fine but not completely puréed.
- Add a restrained amount of salt and pepper.
- Add the optional chestnuts and pulse briefly to distribute them.
Chestnuts lend gentle sweetness and a festive nutty note. They also help absorb moisture while keeping the mushroom layer soft enough to spread.
Cook Until Truly Dry
Place a wide dry skillet over medium-high heat, add the mushroom mixture, and stir often as the mushrooms release their water.
Continue cooking because this stage:
- Drives away liquid that could soak the pastry
- Concentrates the mushrooms’ savory flavor
- Creates a firm, spreadable filling
When the pan no longer gives off steam and the mixture looks dry, fold in thyme and cook briefly. Spread the duxelles on a plate and cool it completely.
4. Wrapping the Beef: The Parma Ham Layer
The cured-ham layer surrounds the mushrooms and beef, helping the cylinder stay neat while adding flavor and a moisture barrier.
- It limits contact between the damp filling and pastry.
- It contributes a salty, gently sweet cured-meat flavor.
- It helps the inner package hold a compact shape.
Build the Inner Wrap
- Spread a large piece of plastic wrap over the worktop.
- Overlap thin Parma ham slices to make a rectangle wide enough to encircle the beef.
- Season with black pepper only; the ham already provides ample salt.
- Spread the fully cooled duxelles in a thin, even layer across the ham.
Keep roughly a ½-inch border clear around the edges.
Place the mustard-coated tenderloin in the center. Lift the plastic wrap to roll the ham and mushrooms snugly around the beef.
Twist the plastic at both ends to tighten the cylinder, then refrigerate it for 15 minutes so it becomes firm.
5. Wrapping with Puff Pastry (The Final Layer)
Puff pastry creates the crisp golden casing and holds all the savory layers together.
Wrap the Chilled Beef
- Roll the cold puff pastry on a lightly floured surface until it is large enough to enclose the cylinder.
- Take the beef package from the refrigerator and remove all plastic wrap.
- Position the cylinder near one edge of the pastry.
- Roll it forward firmly so the pastry seam finishes underneath.
- Cut away excess dough and press the seam and ends closed.
Pinch and fold the ends under the roll for a tidy shape.
Wrap the pastry-covered Wellington in clean plastic and chill for another 5–10 minutes. Cold pastry holds its form and creates more distinct flaky layers.
6. Decorating and Egg Washing the Pastry
A simple egg wash and light scoring give the Wellington its glossy, decorative finish.
Finish it as follows:
- Remove the plastic and set the chilled Wellington seam-side down on a parchment-lined baking sheet.
- Brush the entire exposed surface with beaten egg yolk.
- If desired, draw a shallow pattern with the back of a knife. Avoid cutting all the way through the dough.
- Add a light sprinkle of coarse salt.
These small details encourage a burnished color and polished appearance.
7. Baking Your Beef Wellington to Perfection
The assembled Wellington is now ready for the oven.
Oven temperature: preheat to 200°C (392°F).
Approximate baking times:
- About 35 minutes for medium-rare
- Roughly 40–45 minutes for medium or more
Look for pastry that is:
- Richly golden all over
- Crisp and firm rather than soft
- Lifted into visible flaky layers
For greater accuracy, check the center with an instant-read thermometer:
- 125°F (52°C) for medium-rare
- 135°F (57°C) for medium
Once it leaves the oven, keep the Wellington whole for the resting period.
8. Resting: The Most Important Step
Resting is essential even though the pastry makes you eager to cut.
Leave the Wellington undisturbed for 10–15 minutes. This pause:
- Lets the beef’s juices settle through the meat
- Allows steam to escape without softening the pastry
- Makes cleaner, more attractive slices possible
Shield it loosely with foil if necessary, but never seal it tightly or the trapped steam will soften the crust.
9. Slicing and Serving Your Beef Wellington
After resting, the centerpiece is ready to portion.
Move it to a cutting board and use a sharp serrated knife with gentle sawing strokes. Cut substantial slices about 1 to 1½ inches wide.
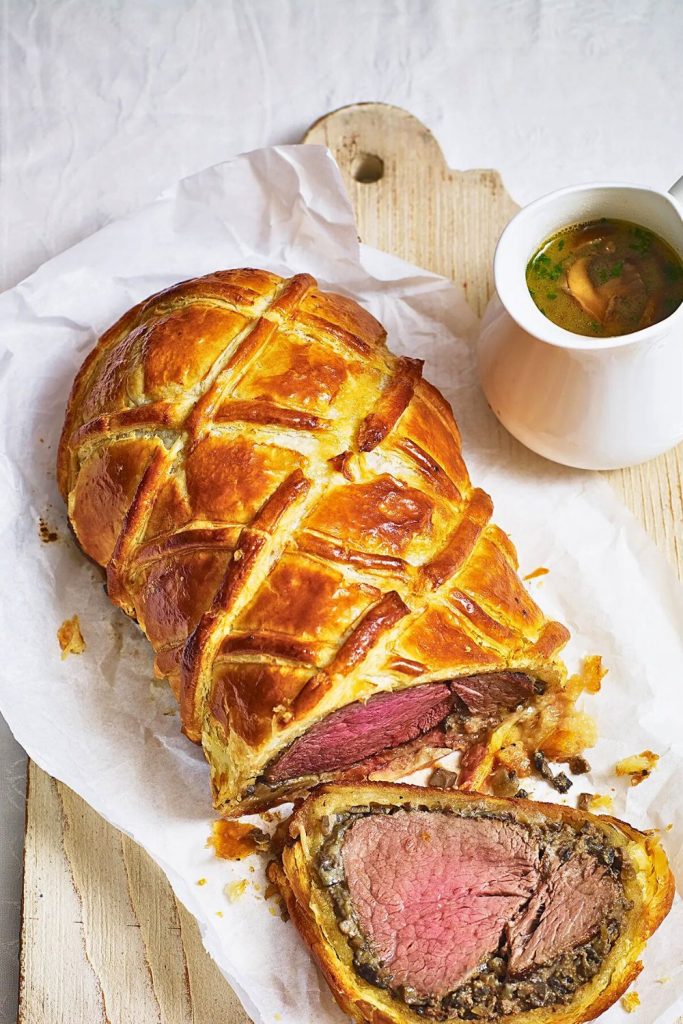
A good cross-section will reveal:
- A crisp, golden pastry exterior
- The thin layer of Parma ham
- A dark mushroom-and-chestnut duxelles
- Tender beef with a rosy center
Complete each plate with:
- Roasted potatoes or creamy mash
- A simple green vegetable
- Red-wine jus or a restrained spoonful of gravy
Serve promptly so every diner gets the intended contrast between warm beef and crisp pastry.
5 Tips for Beef Wellington Success
Success depends less on complicated technique than on a handful of details that control browning, moisture, and structure.
1. Brown Every Surface of the Beef
Use a smoking-hot heavy pan and work quickly. Rotating the tenderloin against the base and sides of the skillet builds savory color without cooking deeply into the center.
2. Remove Moisture From the Duxelles
Mushrooms release substantial liquid. Keep stirring them in the dry pan until the steam stops and the mixture becomes thick; this protects the bottom pastry from turning soggy.
3. Shape the Cylinder Firmly
Plastic wrap helps compress the ham, mushrooms, and beef into an even log. A regular shape bakes consistently and gives each serving a neater cross-section.
4. Chill After Both Wrapping Stages
Refrigerate the ham-wrapped beef, then chill again after adding pastry. Firm layers are easier to handle, stay aligned, and puff more evenly.
5. Wait Before Cutting
Give the baked Wellington at least 10 minutes. The rest keeps more juice in the tenderloin and reduces the moisture released against the pastry.
Best Side Dishes for Beef Wellington

Because the Wellington is already rich and savory, pair it with sides that add freshness, gentle sweetness, or a different texture.
Good accompaniments include:
- Creamy Garlic Mashed Potatoes: smooth potatoes provide a mellow base for the beef and pastry.
- Herb-Roasted Baby Potatoes: browned edges and earthy herbs echo the mushrooms without adding heaviness.
- Sautéed Green Beans: their fresh flavor, color, and snap lighten the plate.
- Honey-Glazed Carrots: mild sweetness complements both mushrooms and optional chestnuts.
- Roasted Brussels Sprouts: caramelized leaves bring a pleasantly nutty contrast.
- Buttered Asparagus: tender-crisp spears add a clean green element.
- Red-Wine Jus or Gravy: serve sparingly to deepen the beef flavor while keeping the crust crisp.
- Mixed Green Salad: a sharp vinaigrette refreshes the palate between rich bites.
Choose two or three restrained sides so the Wellington remains the focus of a balanced dinner.
Variations to Try

| Variation | What to Change | Result |
|---|---|---|
| Wild Mushroom Wellington | Replace some chestnut mushrooms with porcini, shiitake, or oyster mushrooms | A deeper, more complex earthy flavor |
| Prosciutto Wellington | Use prosciutto in place of Parma ham | A delicate cured-meat layer with balanced saltiness |
| Spinach-Mushroom Wellington | Add well-drained cooked spinach to the dry duxelles | Extra color and a fresh, earthy note without excess moisture |
| Chestnut-Rich Wellington | Increase the quantity of cooked chestnuts in the mushrooms | A sweeter, nuttier holiday-style filling |
| Herb-Decorated Wellington | Add finely chopped thyme to the egg wash before scoring | More fragrance and a decorative crust |
| Individual Wellingtons | Wrap smaller beef medallions separately | Quicker baking and easy portioning |
| Turkey Wellington | Use an evenly shaped turkey breast and cook to a poultry-safe temperature | A leaner centerpiece with the same crisp presentation |
| Salmon Wellington | Substitute a salmon fillet and pair it with spinach and lemon | A lighter seafood variation |
Final Thoughts
Beef Wellington looks ambitious, yet completing each component separately makes the recipe practical and rewarding.
A strong sear, thoroughly dried mushrooms, tight wrapping, and well-chilled pastry each solve a specific part of the final result.
When the pastry comes from the oven puffed, crisp, and deeply golden, the careful preparation becomes worthwhile.
The beef, cured ham, mushrooms, optional chestnuts, and buttery shell form one cohesive, celebratory bite.
Carve with a light hand and bring the platter to the table with confidence.
It is a layered main course designed for sharing on a memorable occasion.
Classic Beef Wellington

Cozy Recipes to Serve All Season Long
After mastering Beef Wellington, explore these comforting recipes for future family dinners and cool-weather gatherings:
- 🥄 Cozy Swedish Meatballs Recipe You’ll Love: Tender meatballs and creamy gravy make a warming partner for mashed potatoes.
- 🍅 Best Homemade Lasagna Recipe for Dinner Night: Pasta, robust sauce, and layers of cheese bake into a crowd-friendly classic.
- 🍝 Quick 25-Min Chicken Alfredo Recipe for Dinner: Chicken and fettuccine are coated in a smooth Parmesan sauce for a fast, satisfying meal.
Each recipe is approachable, generously flavored, and well suited to sharing with family or guests.

Dana Brooks is a home-cooking writer at Feastbears, where she shares easy family recipes, cozy dinners, quick desserts, and beginner-friendly kitchen tips. Her goal is to make everyday cooking feel simple, warm, and enjoyable for busy home cooks.


