Braised beef short ribs make a generous dinner without requiring complicated techniques. The preparation is manageable, and the oven supplies the long cooking time that tenderizes the beef.
This version pairs the ribs with sweetened onions, a stout-based braising sauce, and creamy Parmesan polenta. The result is rich, savory, and well suited to a leisurely meal.
Plan it for a Sunday dinner or another evening when you can cook ahead. The ribs braise in one pot, while the polenta is prepared separately before serving.
The steps below explain the seasoning, oven browning, braise, overnight chill, and final sauce reduction.
🧡 Why You’ll Love These Braised Beef Short Ribs
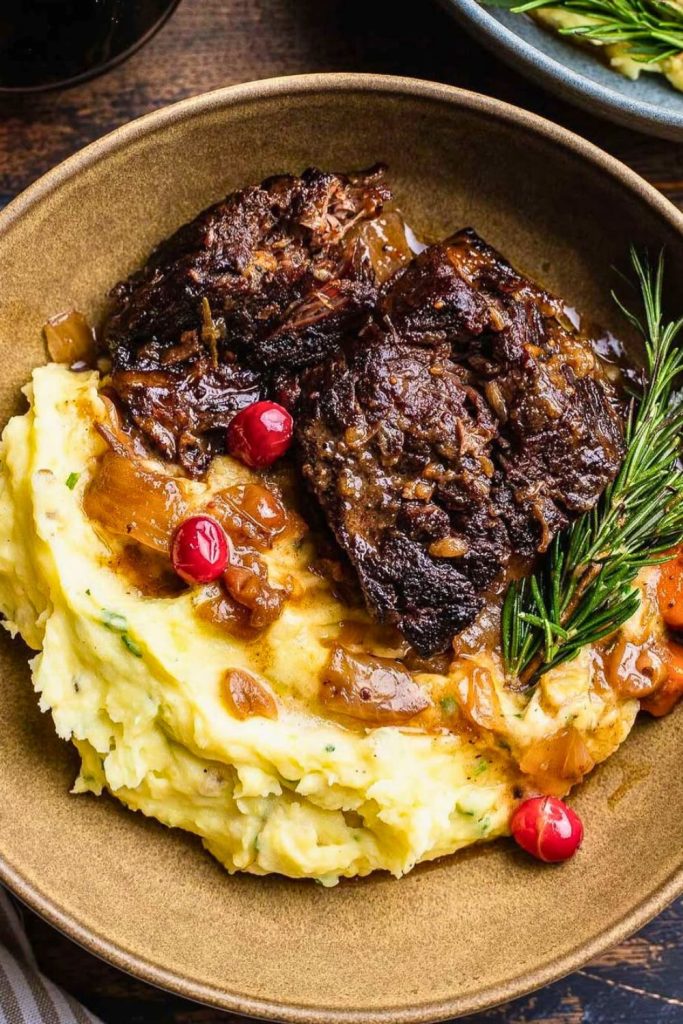
The appeal of these braised short ribs comes from the combination of tender meat and a deeply flavored sauce. Here are the main features of this version:
1. Tender Beef That Still Has Structure
A covered braise at 325°F gives the ribs time to soften in their cooking liquid. Aim for meat that yields readily to a fork but can still be lifted out in large pieces.
2. Flavor Built in Several Stages
The ribs brown first, then the onions cook until golden. Stout, demi-glace, Worcestershire, and tomato paste build on that base as everything braises together.
3. A Sauce with Body and Shine
Reducing the braising liquid concentrates its flavor and gives it a coating consistency. Optional powdered gelatin adds body, particularly when using a thin purchased stock.
4. A Useful Cook-Ahead Schedule
An overnight chill separates the long braise from the final serving work. It also firms the cooked ribs for easier handling and makes the fat on the sauce easier to lift away.
5. Creamy Parmesan Polenta Alongside
The polenta combines milk, butter, and Parmesan into a soft base for the beef. Its creamy texture holds the onion sauce and complements the ribs.
📋 Ingredients You’ll Need
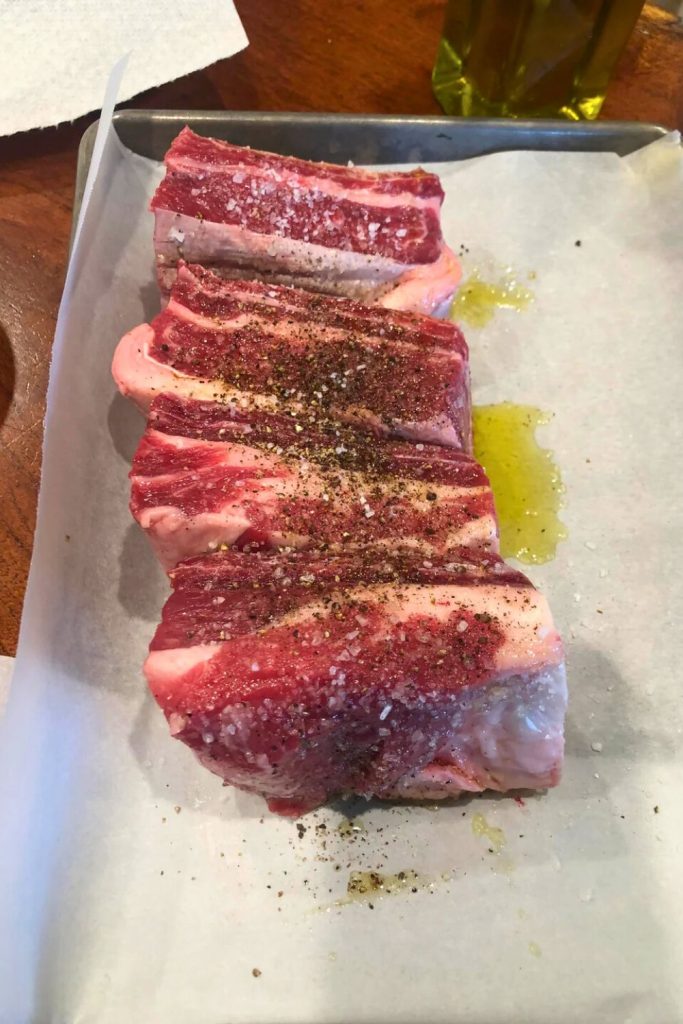
The ingredients are grouped into the short-rib braise and the Parmesan polenta served beneath it.
🥩 Ingredients for the Short-Rib Braise
| Ingredient | Quantity / Description |
|---|---|
| Bone-in beef short ribs | 5–6 pounds bone-in ribs; alternatively about 12 boneless chuck pieces weighing 3–4 ounces each, not an equal-weight substitution |
| Neutral oil | Enough to lightly coat the ribs; canola or grapeseed works |
| Kosher salt | For seasoning, allowing for salt in the stock and sauces |
| Yellow onions | 3–4 large onions, about 1000g, cut into a medium dice |
| Garlic | 6–7 large cloves, about 20–25g, minced or pressed |
| Olive oil | Enough for sautéing the onion mixture |
| Worcestershire sauce | 50g, added before the braising liquid |
| Tomato paste | 50g, cooked briefly with the onions |
| Demi-glace (pre-made) | 42.5g prepared demi-glace; alternatively 25g beef bouillon paste, adjusted for product strength |
| Guinness stout | 900g total; bottle sizes vary, so use the weight |
| Beef stock | 1000g; reserve a portion cold if blooming gelatin |
| Powdered gelatin | 28g, optional; packet sizes vary, so weigh it and follow the blooming instructions |
| Fresh thyme | A few sprigs, removed after braising |
| Bay leaves | 2–3 leaves, removed before reducing the sauce |
Possible ingredient swaps:
- Instead of demi-glace: Use the listed 25g beef bouillon paste, accounting for its saltiness when seasoning. Product concentrations differ, so follow the label as well.
- Instead of stout: Red wine gives a different, wine-braised flavor. For an alcohol-free approach, use an alcohol-free cola-and-stock combination and check the other ingredients too.
- Instead of short ribs: Beef chuck pieces can be braised using the same general method, with cooking time judged by tenderness.
🍚 Ingredients for Parmesan Polenta
| Ingredient | Quantity / Description |
|---|---|
| Polenta (medium grind cornmeal) | 300g medium-grind polenta |
| Whole milk | 1200g milk; add hot water as needed while cooking |
| Salt | 7g, with final seasoning adjusted to taste |
| Unsalted butter | 115g, cut into cubes for stirring in |
| Grated Parmesan cheese | 100g, finely grated for a smooth finish |
💡 Cornmeal note: Use medium-grind cornmeal intended for polenta, and follow its package guidance for cooking time. Different grinds absorb liquid differently, so keep hot water available to loosen it as needed.
🍖 Step-by-Step: How to Make Braised Beef Short Ribs
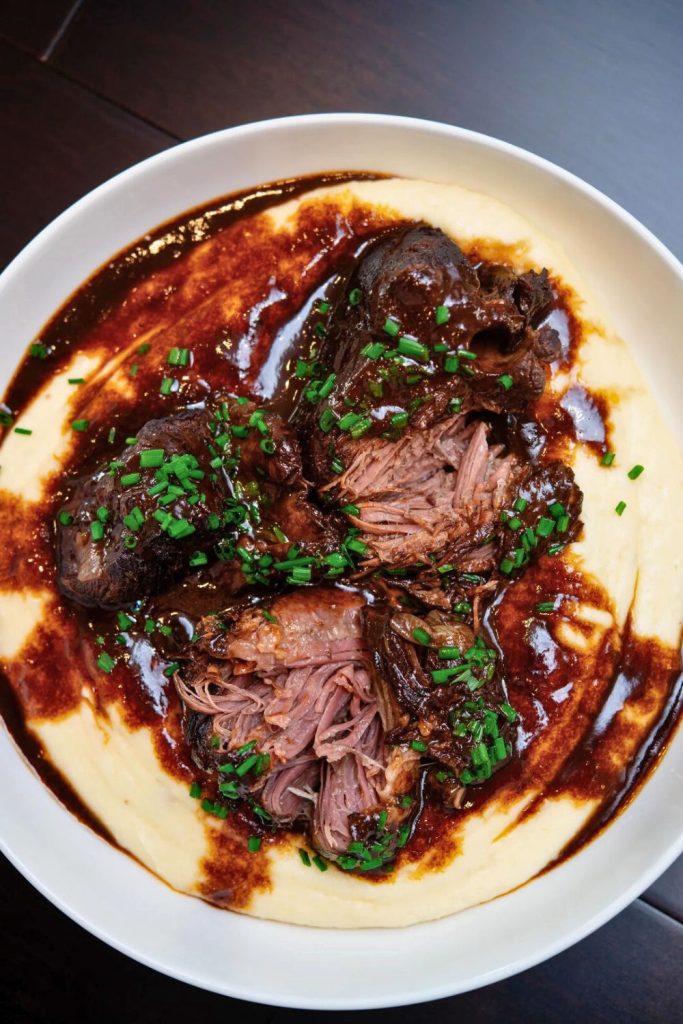
This braised beef short rib recipe is a sequence of straightforward stages. The important parts are developing color, maintaining enough braising liquid, and cooking until tender.
Work through the browning and onion preparation first, then let the oven handle the long braise. Chilling and reducing the sauce finish the dish for serving the next day.
Here is the method in detail.
🧂 Step 1: Prep and Season the Short Ribs
Start with 5–6 pounds bone-in beef short ribs. Choose pieces of reasonably similar thickness so they cook at a comparable rate.
For the chuck alternative, the source quantity is about 12 boneless pieces, 3–4 ounces each. That is not the same total weight as the bone-in ribs, so adjust the pot and liquid level accordingly.
Prepare the ribs as follows:
- Blot the beef thoroughly with paper towels.
- Rub the surface lightly with neutral oil, such as canola or grapeseed oil.
- Season all sides with kosher salt, remembering that the stock, demi-glace, and Worcestershire also bring salt to the finished sauce.
Preparation tip: Season while the oven heats. If preparing the ribs ahead, keep them refrigerated rather than leaving them on the counter for an extended period.
🔥 Step 2: Oven-Sear the Ribs
Heat the oven to 500°F (260°C). Arrange the ribs on a sturdy rimmed sheet pan rated for that temperature, with space between the pieces.
Roast for approximately 10–15 minutes, checking for a deeply browned exterior. This is a browning step, not the full cooking stage.
This oven-browning approach has several practical advantages:
- High heat develops a browned surface across the exposed meat.
- Some exterior fat renders onto the sheet pan.
- It avoids the need to turn multiple batches in a skillet.
Set the browned ribs aside briefly while finishing the braising base, then continue cooking them promptly in the hot liquid.
🔪 Step 3: Dice the Aromatics
Prepare the onion and garlic that will flavor the sauce.
You will need:
- 3–4 large yellow onions, about 1000g
- 6–7 large garlic cloves, about 20–25g
Peel the onions and cut them into a medium dice. Their sweetness develops as they cook and becomes a major part of the braising sauce.
Peel and finely mince the garlic, or use a garlic press. Have both aromatics ready before beginning the stovetop stage.
🧅 Step 4: Caramelize the Onions and Garlic
Heat a generous drizzle of olive oil over medium heat in a heavy, oven-safe pot of at least 6-quart capacity. It must hold the ribs and liquid safely without overfilling.
Put the following into the pot:
- The medium-diced yellow onions
- The minced or pressed garlic
- A pinch of salt, allowing for the salty ingredients added later
Stir to coat the aromatics in oil and begin softening them.
Cook for about 20 minutes, stirring every 2–3 minutes and lowering the heat if the garlic catches. The onions should soften and start turning golden.
Look for these changes:
- A brown layer of fond developing on the pot, without blackened patches.
- Onions becoming softer, smaller, and more golden.
- Garlic cooking gently without burning or turning bitter.
💦 Step 5: Deglaze and Repeat
As the onions continue to color, small deposits stick to the base of the pot. Loosening them keeps that flavor in the sauce.
Whenever the browned layer threatens to scorch:
- Add a couple of tablespoons of water.
- Scrape the base with a wooden spoon to release the browned bits.
- Stir them into the onions and let the added water evaporate.
Continue for roughly another 20 minutes, repeating this splash-and-scrape process 3–4 times as needed. Adjust the heat if the mixture darkens too fast.
The onions should end up soft and golden, with some deeper brown edges. They do not need to become the dark, uniformly caramelized base of a long-cooked onion soup.
🍅 Step 6: Build the Flavor Base
Now add the concentrated seasonings to the onion mixture.
Stir in these ingredients in sequence:
- 50g Worcestershire sauce: stir for about 30 seconds to let it reduce slightly.
- 50g tomato paste: cook and stir for 1–2 minutes, coating the onions without scorching the paste.
Together, these ingredients deepen the savory base before the larger volume of liquid goes in.
🍖 Step 7: Add Braising Liquids and Beef
Next, assemble the liquid that will surround the ribs during braising.
Add the following to the pot:
- 42.5g prepared demi-glace, or the listed 25g beef bouillon paste alternative
- 900g Guinness stout, approximately two bottles depending on bottle size
- 1000g beef stock, reserving some cold stock first if blooming gelatin
- 28g powdered gelatin, optional; bloom it in a portion of the cold stock according to its package directions before dissolving it into the hot mixture
- A few fresh thyme sprigs for herbal flavor
- 2–3 bay leaves
Stir until the demi-glace and any prepared gelatin have dissolved, then bring the liquid to a simmer.
Carefully nestle the browned ribs into the hot liquid. They should be mostly submerged; choose a suitable pot and avoid overfilling it.
Put the lid on, leaving it only slightly ajar for gentle evaporation. Check the liquid during cooking and close the lid fully if it reduces too quickly.
⏲️ Step 8: Braise Low and Slow
Reduce the oven to 325°F (163°C) and transfer the oven-safe pot to it. Use oven mitts and keep the pot level when moving the hot liquid.
Braise until the beef is fork-tender, allowing approximately 3–3½ hours but checking before 3 hours because rib size and oven performance vary. During the braise:
- The beef softens as its connective tissue breaks down.
- The cooking liquid gradually becomes more concentrated.
- The stout, onions, herbs, and beef juices combine into one sauce.
Judge the finish by the meat itself:
- A fork should enter easily and separate the meat without force, while the rib can still be handled in a large piece.
- Tough or resistant meat needs more cooking, even if the sauce smells ready. Keep enough liquid in the pot throughout.
Remove the cooked ribs from the oven. For the overnight method, divide the beef and sauce into shallow containers and refrigerate promptly, within two hours; do not wait for a large pot to cool completely.
❄️ Step 9: Chill Overnight for Flavor and Texture
Refrigerate overnight with the beef stored in some of its sauce. This makes the next day’s finishing steps easier:
- The sauce’s flavors have time to settle together.
- The chilled ribs firm up, making them easier to move without breaking apart.
- The rendered fat solidifies on top and can be removed with a spoon.
Begin the final reheating and sauce reduction about 45 minutes before serving, allowing longer if needed to heat the ribs fully.
- Take the chilled beef and sauce out of the refrigerator when ready to reheat.
- Lift off most of the firm fat layer from the surface. A little remaining fat is fine.
🥄 Step 10: Reduce the Sauce and Finish
Transfer the sauce and ribs to a suitable pot and warm over medium heat until the sauce liquefies. Carefully lift the ribs onto a plate briefly while you reduce the liquid; they must be reheated fully before serving.
Remove the bay leaves and thyme stems. Simmer the sauce over medium-high heat for about 20–30 minutes, aiming for a coating consistency; it may reduce by up to roughly 75%, but stop earlier if it becomes salty or overly thick. Spoon off excess surface fat.
The sauce is ready for the ribs when:
- Its bubbles become larger and slower as it thickens.
- It leaves a light coating on the back of a spoon.
- It tastes balanced and savory, not excessively concentrated or salty.
Return the ribs to the sauce and heat gently, turning or basting occasionally, until the beef reaches 165°F throughout. Allow longer than five minutes if needed; add a splash of stock or water if the sauce is too thick.
🍽️ How to Serve Braised Beef Short Ribs
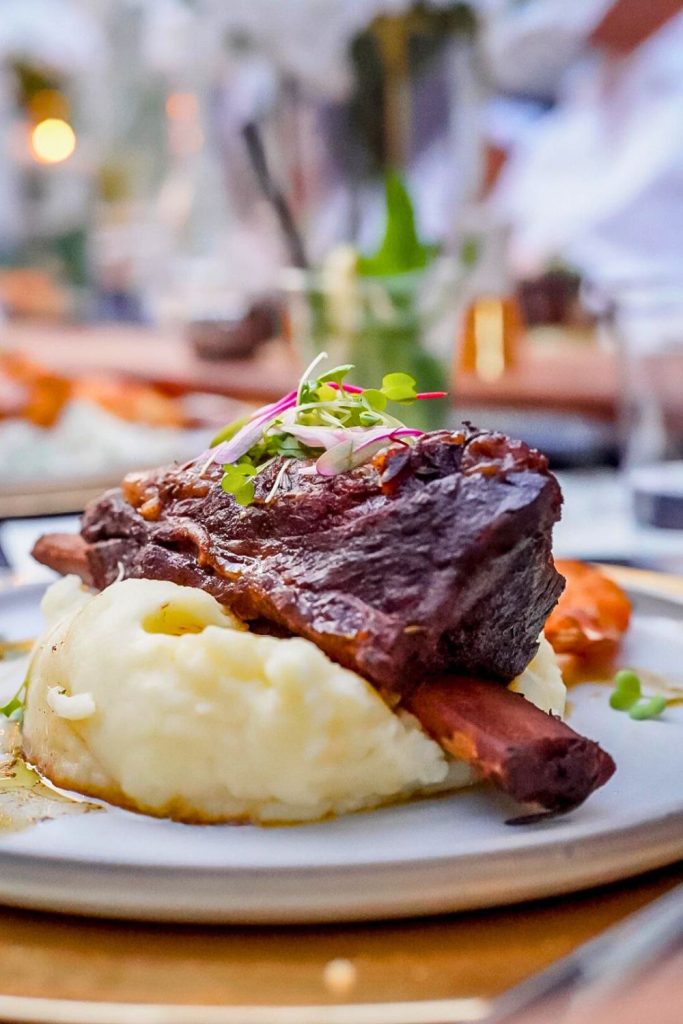
Serving braised beef short ribs is mostly about giving the meat and sauce a base that can hold them. A shallow bowl works especially well.
The onions and stout already provide plenty of flavor, so the accompaniment can stay simple and creamy.
Here is how to finish the polenta and arrange the dish.
🥄 Prepare and Serve the Parmesan Polenta
Heat 1200g whole milk with 7g salt in a separate heavy saucepan. Gradually whisk in 300g medium-grind polenta, then cook gently, stirring frequently, until tender according to the package guidance. Add hot water as needed for a soft consistency. Off the heat, stir in 115g cubed unsalted butter and 100g finely grated Parmesan.
To assemble each serving:
- Spoon warm, creamy polenta into the center of the plate or bowl.
- Set 1–2 short ribs over the polenta, depending on their size.
- Spoon the reduced onion-and-stout sauce over the beef and around the polenta.
- Finish with a little chopped parsley or fresh thyme if desired.
The soft polenta, tender beef, and glossy sauce provide all the main contrasts the dish needs.
🧑🍳 A few plating pointers:
- Choose shallow bowls or plates with enough space and depth to contain the sauce.
- Warm suitable plates before serving so the polenta does not cool immediately.
- Offer extra sauce separately for anyone who wants more, with bread if desired.
🧂 Other Accompaniments to Try
If you would rather serve something other than polenta, these options also work with the braising sauce:
- Mashed potatoes: a mild, creamy base for the beef.
- Buttered egg noodles: soft ribbons that carry the sauce.
- Garlic mashed cauliflower: a vegetable-based alternative.
- Crusty sourdough: useful for soaking up sauce from the bowl.
- Buttered risotto: another creamy accompaniment for a richer meal.
- Roasted root vegetables: carrots, parsnips, or sweet potatoes add a firmer texture and earthy sweetness.
Choose one main accompaniment so the ribs and their sauce remain the focus of the plate.
🔄 Variations of Braised Beef Short Ribs
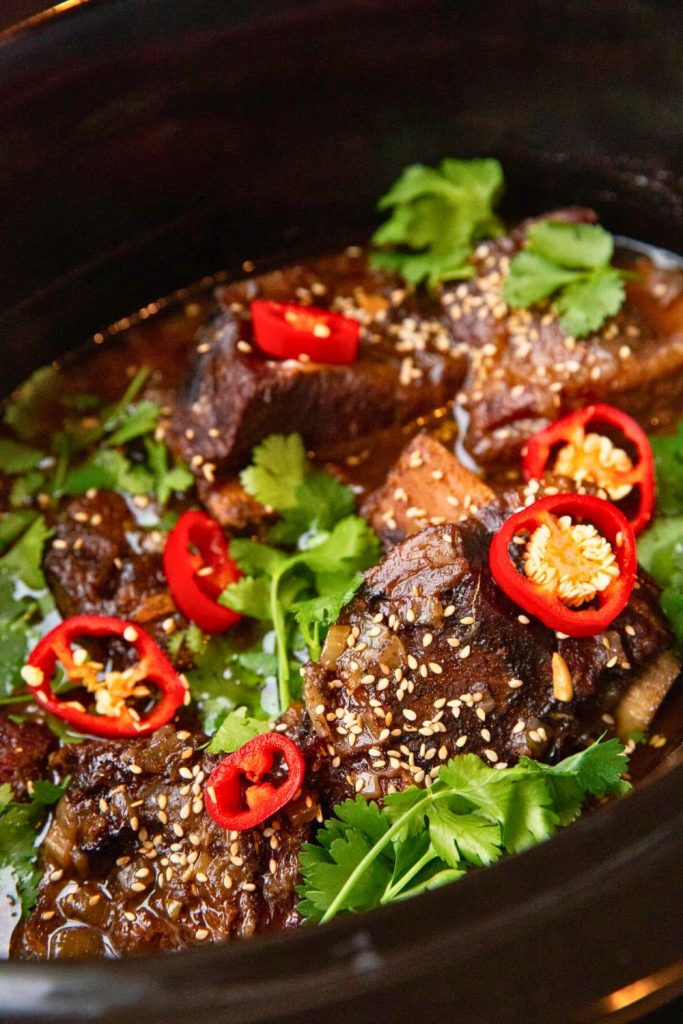
The basic braise can accommodate different liquids, aromatics, and cuts. Changes will affect the sauce’s flavor and sometimes its thickness.
Use this table as a guide to possible variations:
| Variation Type | Swap or Add | Description |
|---|---|---|
| Meat Substitution | Beef chuck roast (cut into chunks) | Chuck pieces also become tender with braising; their size and boneless weight affect timing and liquid needs. |
| Alcohol-Free | Coca-Cola + beef stock | Use cola and stock for an alcohol-free liquid, checking other ingredients too; expect a sweeter sauce than the stout version. |
| Gluten-Free | Red wine or gluten-free stout | Replace the Guinness and verify that the stock, demi-glace or bouillon, Worcestershire, and remaining ingredients are gluten-free. |
| No Demi-Glace? | Beef bouillon paste (25g, adjusted to product strength) | The main ingredient list uses 25g bouillon paste in place of 42.5g demi-glace; adjust for its concentration and salt level. |
| Spicy Kick | Add chili flakes or smoked paprika | Chili flakes add heat, while smoked paprika adds smokiness; use either gradually. |
| More Veggies | Carrots, mushrooms, or other braising vegetables | Add carrots, mushrooms, or other suitable vegetables, timing them so they do not overcook. |
| Lighter Sauce | Use chicken stock + wine | Chicken stock and wine produce a different, lighter-tasting base; gelatin and reduction still affect its body. |
| Asian-Inspired | Use soy sauce, ginger, star anise | Ginger, star anise, and soy sauce change the seasoning profile; choose broth or Shaoxing wine in place of stout and watch the salt. |
| Wine-Braised | Use full-bodied red wine | Red wine gives a more wine-forward braise with acidity; adjust the reduced sauce to taste. |
| Slow Cooker Method | Cook on LOW for 8 hours | Brown the meat and prepare the onion base first. Use a suitable slow cooker, follow its capacity guidance, and cook on low for about 8 hours or until tender; reduce the sauce separately. |
Keep the same tenderness cues when making substitutions, and check seasoning as the sauce reduces. Different stocks and sauces can have very different salt levels.
📝 Final Thoughts
These braised short ribs with Parmesan polenta bring together several comforting elements:
- A warm aroma of onions, herbs, and beef
- A deeply savory stout-based sauce
- Tender ribs served over soft, cheesy polenta
It is a meal to plan for a relaxed Sunday, a special dinner, or a gathering when you have time to cook ahead.
The method uses familiar techniques—browning, braising, chilling, and reducing—to produce a carefully finished dish. None requires elaborate equipment beyond suitable pans and a little patience.
The concentrated onion-and-stout sauce is a major part of the result, so taste it as it reduces and keep enough to spoon over the accompaniment.
Save the recipe for a cook-ahead dinner, and share your chosen accompaniment or variation in the comments. It is a useful meal to pass along to someone who enjoys slow-cooked beef.
Braised Beef Short Ribs with Parmesan Polenta
🍲 You Might Also Like:
For more comforting meals to add to your cooking plans, explore these recipes:
🧀 Easy 10-Min Prep Broccoli Cheddar Soup Recipe
Broccoli and carrots sit in a creamy cheddar soup that makes a warming lunch or dinner.
🥪 5-Minute Grilled Cheese Sandwich Recipe for Fall
Buttery toasted bread and melted cheese make a familiar sandwich to enjoy on its own or beside soup.
🍜 Hearty Chicken Noodle Soup for Fall Nights
Chicken, vegetables, and noodles combine in a homestyle broth for a comforting bowl.

Dana Brooks is a home-cooking writer at Feastbears, where she shares easy family recipes, cozy dinners, quick desserts, and beginner-friendly kitchen tips. Her goal is to make everyday cooking feel simple, warm, and enjoyable for busy home cooks.


