Pumpkin mousse is a creamy, no-bake dessert that brings pumpkin and warm spice together in a light, chilled treat.
Only five core ingredients go into the bowl, so there is no egg separation, pastry work, or stovetop custard to manage.
The hands-on work is brief, and chilling does the rest. It is a practical make-ahead choice for Thanksgiving, a fall gathering, or an uncomplicated dessert at home.
Follow the original sequence below to thicken the pudding base, blend in the pumpkin and spices, gently fold through the cream, and chill everything before serving.
Divide the mousse among small glasses or bowls, then finish each portion with a creamy or crunchy topping just before it reaches the table.
🎃 What Is Pumpkin Mousse and Why You’ll Like It
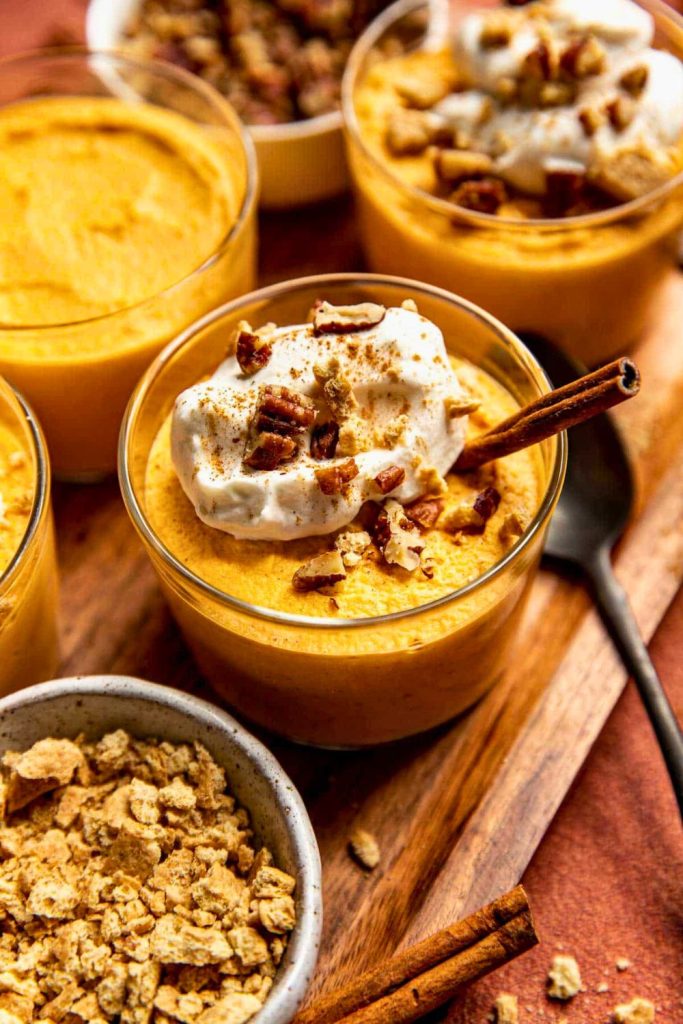
Fall baking often revolves around pumpkin bread and pie. Pumpkin mousse offers the same familiar flavor in a chilled, spoonable dessert.
Think of it as a soft, creamy alternative to pumpkin pie, with an airy finish and no pastry to make.
Some mousse recipes rely on eggs or a cooked base, but this one contains no eggs. You will not need to temper a mixture or set up a double boiler.
Instant vanilla pudding thickens the pumpkin base, while whipped cream or prepared whipped topping lightens it. That combination keeps the process manageable even when you have little time for hands-on preparation.
Why You’ll Fall in Love With It:
- Brief preparation: Mixing can take around 10 minutes once your ingredients and cream are ready. Allow additional time for chilling before serving.
- No oven needed: This leaves baking space free for the rest of a holiday meal.
- Approachable technique: The main skills are whisking a smooth pudding and folding in whipped cream.
- Flexible presentation: Choose your toppings, portion it into small glasses, or try the chilled pie variation below.
- An egg-free, crust-free option: The specified small pudding packets are the sugar-free type. That does not make the completed dessert sugar-free or establish a nutritional comparison with other desserts.
The result is a cool, creamy pumpkin treat for fall gatherings or a quiet evening at home. Make it ahead so you may serve it straight from the refrigerator.
🛒 Ingredients You’ll Need (Only 5!)

A short ingredient list is enough to build the pumpkin flavor, smooth base, and whipped finish. Measuring the pudding and cream correctly matters more than adding anything elaborate.
Here is what each of the five ingredients contributes:
1. Pumpkin Puree
(One 15-ounce can)
Choose plain pumpkin purée, not sweetened, spiced pumpkin pie filling. It supplies the pumpkin flavor and body without adding a second set of seasonings.
For homemade purée, roast a sugar pumpkin, blend until smooth, drain away excess liquid, and cool completely. Use 15 ounces by weight, about 425g, to match the canned amount.
2. Vanilla Instant Pudding Mix
(Two 1-ounce packets of sugar-free instant vanilla pudding)
The small 1-ounce packets specified here are the sugar-free style. They thicken the base without cooking. Regular sweetened pudding comes in different packet weights, so do not substitute 1 ounce of it or use cook-and-serve pudding.
Shopping tip: Check that your mix is instant and that its packet size and preparation directions match the type listed. Different brands or formulations may set differently.
3. Cold Milk
(3 cups, cold)
Milk hydrates the pudding mix and makes the base smooth. Whole milk gives a richer taste; 2%, 1%, or skim dairy milk can also be used.
Do not assume almond or oat milk will work as a direct one-for-one replacement. Non-dairy pudding often needs a different liquid amount; use a manufacturer-supported adaptation if you need that option.
4. Pumpkin Pie Spice
(2 teaspoons)
Pumpkin pie spice adds cinnamon-led warmth with notes of ginger, nutmeg, and cloves. Measure it into the base so the flavor is evenly distributed.
5. Whipped Cream or Topping
(1 cup of finished whipped cream or thawed whipped topping)
This is the amount to fold into the mousse, not the amount of liquid cream. If starting with 1 cup of heavy cream, whip it and measure out 1 cup of the finished cream; keep the rest for topping. Alternatively, measure 1 cup of thawed Cool Whip or a similar prepared topping.
Fold this in gently to retain some of its air. Vigorous stirring can leave the mixture heavier and closer to ordinary pudding.
✅ Summary: 5 Ingredients at a Glance
| Ingredient | Notes |
|---|---|
| Pumpkin Puree | 15 ounces of plain canned purée, or the same weight of drained, cooled homemade purée |
| Vanilla Pudding Mix | Two 1-ounce sugar-free instant vanilla packets; regular sweetened mix is not an ounce-for-ounce substitute |
| Cold Milk | 3 cups, refrigerated; whole or reduced-fat dairy milk |
| Pumpkin Pie Spice | 2 teaspoons for the spiced pumpkin base |
| Whipped Cream/Topping | 1 cup of finished whipped cream or thawed topping to fold in; reserve any extra separately |
Those five ingredients create the base dessert. Extra garnishes are optional, and neither eggs nor separately added gelatin are part of the recipe.
🧁 How to Make Pumpkin Mousse (Step-by-Step Guide)

Pumpkin mousse is a useful dessert when you want something creamy with very little hands-on work.
The five-ingredient mixture needs no baking or stovetop cooking. Mix it first, then leave enough refrigerator time for it to become cold and slightly firmer.
Follow these steps in order to prepare the cream, thicken the pudding, and combine everything without losing the whipped texture.
🔪 Step 1: Whip the Cream
Begin with the whipped cream so it is ready when the pumpkin base is mixed.
Whipping 1 cup of heavy cream produces roughly 2 cups of whipped cream. Measure only 1 cup of the finished whipped cream into this recipe and reserve the extra for serving.
To prepare the cream:
- Cool the equipment: Refrigerate or briefly freeze the bowl and beaters for about 10 minutes. Cold tools help keep the cream cool as you whip.
- Beat to stiff peaks: Add cold heavy cream to the chilled bowl and beat at medium-high speed. Stop when lifted beaters leave peaks that hold their shape, before the cream turns grainy.
- Keep it refrigerated: Cover the whipped cream and return it to the fridge while you make the pudding base.
💡 Shortcut: Use 1 cup of thawed prepared whipped topping instead of whipping cream. Measure the finished topping rather than adding an entire tub.
🥣 Step 2: Make the Pudding Base
Next, make the vanilla pudding that will support the pumpkin mixture.
Combine two 1-ounce packets of sugar-free instant vanilla pudding with 3 cups of cold dairy milk. This packet type and amount are important to the consistency.
Mix the pudding as follows:
- Choose a roomy bowl with enough space to hold the pumpkin and whipped cream later without spilling.
- Measure in 3 cups of cold milk. Whole milk is a rich option, while reduced-fat or skim dairy milk gives a less rich taste.
- Empty in both pudding packets: Use the specified 1-ounce sugar-free instant mixes, not cook-and-serve mix. Regular sweetened packets are not an ounce-for-ounce substitute.
- Whisk for 2–3 minutes until smooth and beginning to thicken. A hand mixer on low speed is another option.
✅ Packet check: A different brand may have a different formulation. Match the instant pudding type and directions rather than assuming every small packet behaves identically.
The mixture should now look smooth and slightly thickened, ready to blend with the pumpkin.
🎃 Step 3: Add the Pumpkin
Add pumpkin purée next. This turns the vanilla base into the pumpkin-flavored foundation of the dessert.
What you’ll need:
- One 15-ounce can of plain pumpkin purée
- Alternatively, use 15 ounces (about 425g) of smooth homemade purée that has been drained and fully cooled.
❗ Check for plain pumpkin, not pumpkin pie filling. Sweetened filling adds extra sugar and spices and may change the final consistency.
Blend in the pumpkin:
- Add the measured pumpkin purée to the bowl of thickened pudding.
- Use a whisk or spatula to combine gently, scraping the bowl until there are no separate pumpkin streaks.
Watch for an even pale-orange color and a smooth, pudding-like texture. Break up any visible pockets of purée before moving on.
🍂 Step 4: Spice It Up
Now season the base with pumpkin pie spice. The spices provide the familiar pie flavor; the whipped cream added later provides the lighter texture.
Measure the seasoning:
- Pumpkin pie spice: 2 teaspoons
Most blends contain cinnamon with some combination of ginger, nutmeg, cloves, and allspice. Use your usual prepared blend or a homemade one you enjoy.
Incorporate it evenly:
- Scatter the measured spice over the pumpkin and pudding mixture.
- Stir until the seasoning is distributed throughout, with no dry spice clumps remaining.
For a more cinnamon-forward flavor, you may add an optional extra ½ teaspoon of ground cinnamon.
💬 For a chai-inspired variation, try a small pinch of cardamom or ground black pepper. Add sparingly so it does not overwhelm the pumpkin.
🍨 Step 5: Fold in the Whipped Cream
The next step gives the pudding base a softer, whipped finish.
Take the chilled whipped cream from the refrigerator and fold the measured portion into the spiced pumpkin mixture.
What does folding do?
A gentle folding motion helps retain the air in the cream. Beating or stirring hard knocks out that air and can make the finished mousse denser.
Use this folding motion:
- Place 1 cup of finished whipped cream on top of the pumpkin base, keeping the rest refrigerated for garnish.
- With a spatula or large spoon, cut down through the center, sweep underneath, and lift the mixture over itself. Turn the bowl slightly and repeat.
- Stop as soon as the white streaks disappear and the color looks uniform. There is no need to keep mixing after it comes together.
The mousse should now be smooth and softly aerated. If checking the seasoning, use a clean spoon and return the mixture to chilling promptly.
🧊 Step 6: Chill and Serve
All that remains is portioning and refrigerator time.
Although the ingredients need no further cooking, chilling improves the texture and gives the flavors time to blend. Serve the mousse well chilled.
Portion and refrigerate:
- Spoon or pipe the mousse into your chosen serving dishes, such as:
- Small dessert glasses
- Individual ramekins
- Mini serving jars
- One larger trifle bowl for spooning out portions
- Chill for at least 1 hour, ideally 1½ hours or longer.
The mousse will become colder and somewhat firmer, while remaining a soft, spoonable dessert. - Just before serving, choose a garnish:
- The reserved whipped cream
- A light dusting of cinnamon or pumpkin pie spice
- Gingersnap crumbs or crushed graham crackers
- A small pinch of ground nutmeg
🍽️ Expect roughly six generous servings, around 1 cup each depending on the cream’s volume. For a dessert spread, divide it into 8–12 smaller portions instead.
🍧 Topping Ideas & Serving Suggestions
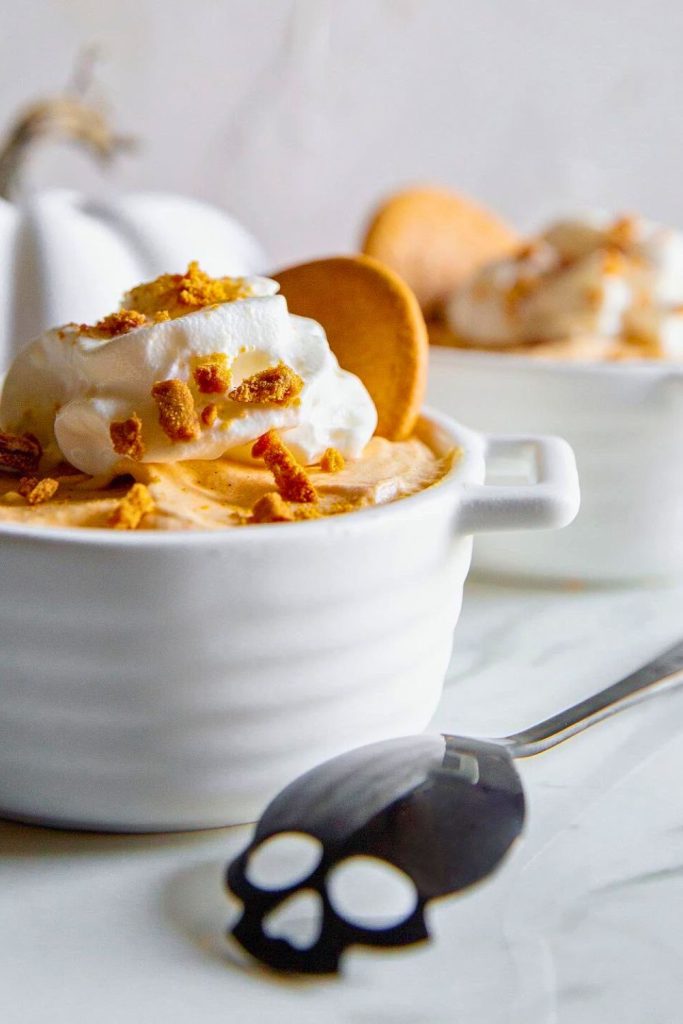
A simple garnish can add contrast to the smooth mousse. Choose a creamy topping, something crunchy, or a little extra spice.
For a party, arrange individual glasses ahead of time and add crisp garnishes just before serving so they retain their texture.
Use these topping and presentation ideas on their own or in combinations you like:
| Topping | Flavor/Texture Boost | Perfect For |
|---|---|---|
| Whipped Cream | A soft dollop with a whipped texture | A simple creamy finish |
| Ground Cinnamon | Fragrant warmth and a fine brown dusting | A subtle spice dusting |
| Pumpkin Pie Spice | Echoes the spices already in the mousse | A small extra pinch of fall spice |
| Crushed Gingersnaps | Crisp crumbs with a ginger bite | Adding crunch just before serving |
| Crushed Graham Crackers | Crumbly texture and a mild sweetness | A crust-like contrast without making a pie |
| Chopped Pecans or Walnuts | Firm nut pieces against the soft filling | A crunchy garnish; consider nut allergies |
| Caramel Drizzle | A smooth ribbon of caramel flavor | A small, sweet finishing drizzle |
| Mini Chocolate Chips | Small chocolate pieces that stay firm when chilled | A little chocolate in each spoonful |
| Maple Syrup Drizzle | Maple flavor with added sweetness | A light drizzle over the cream |
| Toasted Coconut Flakes | Toasted crunch and coconut flavor | A crisp alternative to cookie crumbs |
| Star Anise or Cinnamon Stick | Whole-spice decoration, not a spoonable topping | Decorative use only; remove whole spices before eating |
🎨 Serving idea: Pipe the mousse into glasses for a swirled finish, then add a small dollop of whipped cream and a light dusting of cinnamon.
🧠 Pro Tips for Perfect Pumpkin Mousse

These small checks help you control the texture without making the method more complicated:
1. Start with Chilled Milk and Cream
Keep the milk and heavy cream cold until needed. Cold milk suits the instant pudding method, and cold cream holds whipped air more readily than warm cream.
2. Cool the Bowl and Beaters
If making whipped cream, chill the tools for about 10 minutes first. This is particularly helpful in a warm kitchen.
3. Stop at Stiff Peaks
Watch the cream as it thickens. Once it holds a firm peak, stop beating; continuing can make it grainy and eventually separate it.
4. Use a Gentle Folding Motion
Lift and turn the whipped cream through the pumpkin base with a spatula. Stop when evenly combined to preserve as much air as practical.
5. Allow Refrigerator Time
Plan on 1–2 hours of chilling rather than serving immediately after mixing. Keep the mousse refrigerated until you are ready to bring it to the table.
🥧 Bonus Idea: Turn It Into a No-Bake Pumpkin Pie!
You may also serve the mousse in a no-bake graham cracker crust. It makes a soft cream-pie variation, though a standard pie shell may not hold the entire batch.
To Assemble the Pie Variation:
🧂 Gather the crust ingredients:
- Graham cracker crumbs: 1½ cups, measured after crushing
- Melted butter: 6 tablespoons
- Optional brown sugar: 2 tablespoons for extra sweetness
👩🍳 Prepare the crust:
- Make fine crumbs in a food processor, or crush the crackers in a sealed bag with a rolling pin.
- Stir in the melted butter and optional sugar until the crumbs are evenly moistened and hold together when pressed.
- Press into a 9-inch pie dish or tart pan, covering the base and working the crumb mixture up the sides.
- Refrigerate the crust for about 20 minutes to let the butter firm up.
🥣 Add the filling and chill:
- Spoon mousse into the cold crust only until comfortably filled. Do not force in the whole batch; portion any extra into separate dessert cups.
- Level the surface gently with a spatula without packing down the mousse.
- Refrigerate for 2–3 hours or overnight. This filling remains soft, so serve chilled and expect spoonable portions rather than guaranteed clean, firm slices.
🍽️ Choose a finishing topping:
- A spoonful of whipped cream
- A light cinnamon dusting
- Candied pecan pieces or a little caramel sauce
The pie variation is handy when holiday oven space is limited. Keep it cold until serving and add crunchy toppings at the last moment.
🎬 Final Thoughts
This 5-ingredient pumpkin mousse offers the familiar flavor of pumpkin pie in a cool, airy dessert that never needs the oven.
Make it ahead for dinner, a potluck, or holiday dessert cups, and refrigerate the portions until it is time to add the finishing touches.
The sequence stays simple: whisk the pudding, blend in pumpkin and spice, fold through the cream, and give the mousse enough refrigerator time to settle.
For more pumpkin desserts to enjoy after this mousse, explore the linked recipes below.
5-Ingredient Pumpkin Mousse
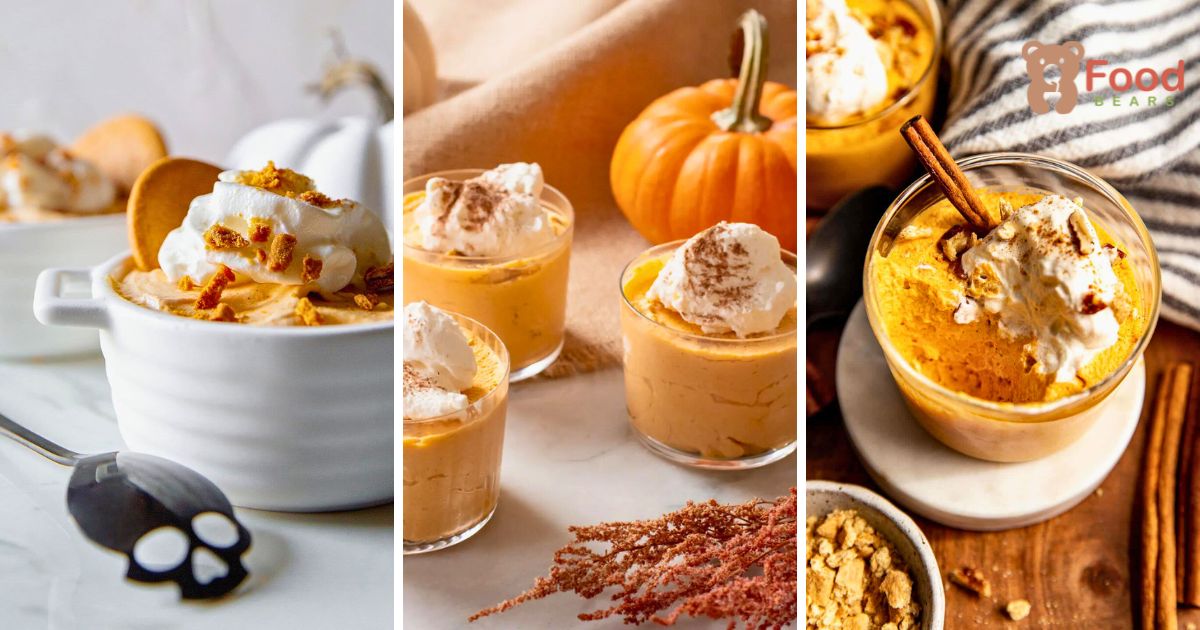
🎃 More Cozy Pumpkin Recipes to Try:
- 🥄 The Best Pumpkin Crisp Recipe for Fall – Try a warm pumpkin dessert with a crisp oat topping for a different texture.
- 🍫 Healthy Pumpkin Blondies Recipe for Cozy Nights – Pumpkin-spiced blondies offer a chewy bar option to serve with tea or coffee.
- 🍩 15-Min Pumpkin Donuts Gen Z Can’t Stop Baking – These baked pumpkin donuts are another way to bring fall flavor to your baking.
Save this recipe or pin it to your dessert board so the ingredient amounts and chilling steps are easy to find next time.
Enjoy a chilled pumpkin treat and make the toppings your own. 🎃🍂

Dana Brooks is a home-cooking writer at Feastbears, where she shares easy family recipes, cozy dinners, quick desserts, and beginner-friendly kitchen tips. Her goal is to make everyday cooking feel simple, warm, and enjoyable for busy home cooks.


