
A homemade peach pie is at its best when the filling tastes clearly of fruit and the pastry stays crisp. Here, ripe peaches are layered with cinnamon, vanilla, and just enough lemon to sharpen their sweetness, then covered with a classic woven lattice.
The method keeps the original recipe’s complete sequence intact, from preparing the peaches and managing their juice to rolling the dough, weaving the top, baking, cooling, and storing. None of the individual steps is difficult; the biggest difference comes from controlling moisture and waiting until the filling has fully set before slicing.
🍑 Why You’ll Fall in Love with This Peach Pie
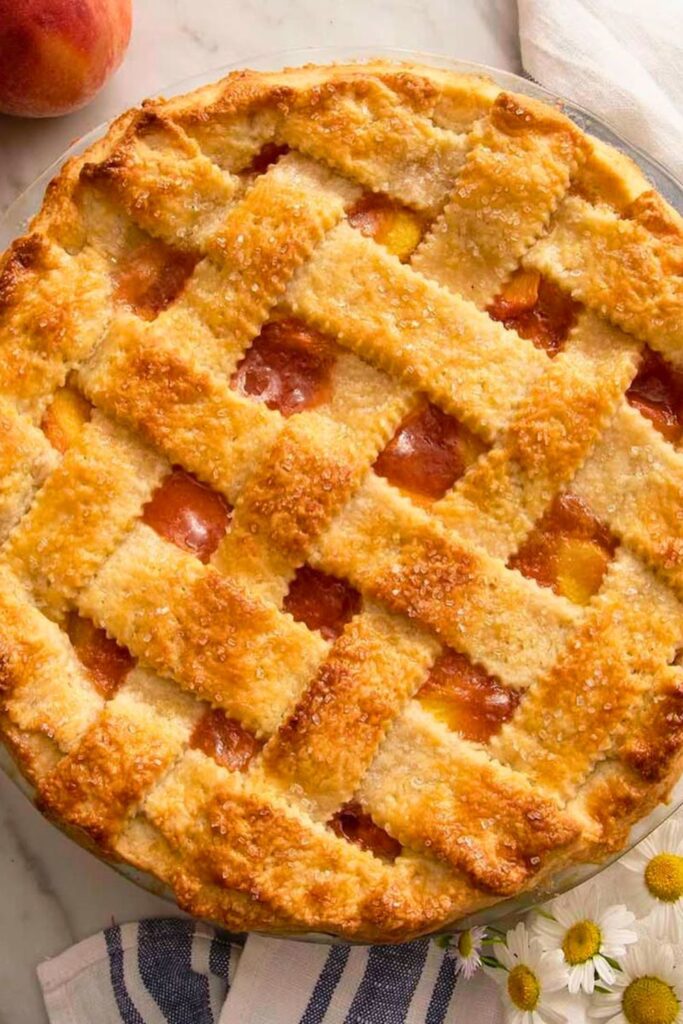
- Peach-forward filling: Lemon and vanilla support the fruit instead of masking it.
- Balanced texture: Cornstarch thickens the juices while the crust bakes crisp and golden.
- Flexible preparation: Use fresh peaches in season or properly thawed and dried frozen peaches.
- Classic presentation: A simple lattice makes the pie look special and vents steam.
- Make-ahead friendly: The filling needs time to set, so the pie can be baked several hours before serving.
Choose peaches that smell fragrant and yield slightly when pressed, but do not feel soft or bruised. They will soften during baking while still leaving recognizable slices in the finished filling.
🥗 Are Peach Pies Good for Your Health?

Peach pie is first and foremost a dessert. The peaches contribute fiber and naturally occurring nutrients, but the sugar, butter, and pastry also make this a rich treat best enjoyed in a portion that suits your overall diet.
- Making it at home lets you control the ingredient quality and portion size.
- Using fragrant, ripe peaches may reduce the need for extra sweetener.
- Serving a moderate slice with plain yogurt can add protein without as much sweetness as ice cream.
Homemade pie does give you control over the fruit, sweetness, crust, and serving size. Pair a modest slice with plain yogurt instead of a very sweet topping if you want a little protein alongside it.
📋 Ingredients for the Perfect Peach Pie
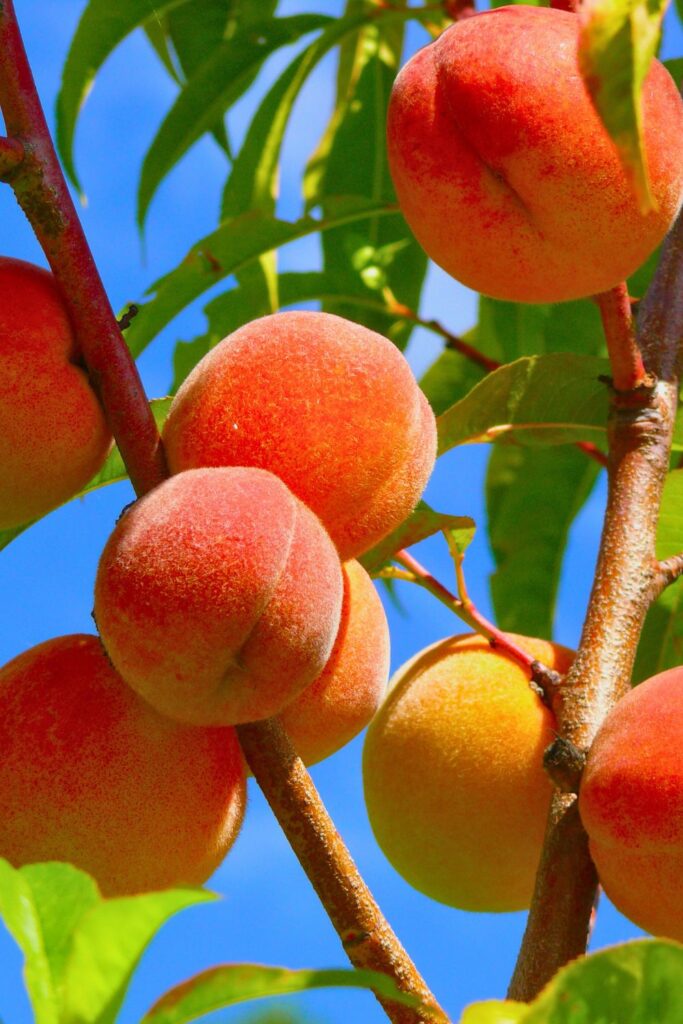
Measure the filling ingredients before taking the dough from the refrigerator. Using ¼ cup of cornstarch for three pounds of peaches gives the released juice enough body without leaving the filling pasty, while cool—not rock-hard—dough remains easiest to roll.
| Ingredient | Amount | Purpose |
|---|---|---|
| Fresh ripe peaches | 3 pounds | Main fruit filling |
| Granulated sugar | ⅔ cup (133g) | Sweetens the peaches |
| Cornstarch | ¼ cup (about 32g) | Thickens released juices |
| Lemon juice | 1 tablespoon | Balances sweetness |
| Vanilla extract | 2 teaspoons | Adds aroma and depth |
| Ground cinnamon | 1 teaspoon | Adds warm spice |
| Pie dough | 2 rounds | Forms the bottom and lattice crust |
| All-purpose flour | As needed | Prevents sticking while rolling |
| Unsalted butter | 2 tablespoons, cubed | Adds richness to the filling |
| Egg | 1 | Forms the egg wash |
| Water | 1 teaspoon | Thins the egg wash |
| Coarse or sanding sugar | As needed | Adds sparkle and crunch |
| Ice water | As needed | Stops the peaches cooking after blanching |
| Aluminum foil | As needed | Shields the crust from over-browning |
Frozen-peach tip: Thaw the fruit completely, drain it, and pat it dry. Extra surface moisture is one of the main causes of a loose pie filling.
🥧 How to Make Peach Pie: Step-by-Step Guide

Work through the preparation in order and reserve a full cooling window after baking. The filling may look loose when the pie first leaves the oven, but it thickens considerably as it returns to room temperature.
🍑 Step 1: Prep the Peaches Like a Pro
Peeling is optional, but blanching makes it quick when you prefer a smooth filling.
Here’s how to peel peaches easily:
- Cut a shallow X in the bottom of each peach.
- Lower the fruit into boiling water for 30–60 seconds.
- Transfer it immediately to a bowl of ice water.
- Starting at the X, slip off the loosened skin with your fingers or a paring knife.
Do not leave the peaches in boiling water longer than needed. The goal is to loosen the peel, not cook the flesh.
🔪 Step 2: Slice and Pit the Peaches
- Cut each peach along its natural seam and twist the halves apart.
- Remove the pit; for clingstone fruit, carefully slice the flesh away from it.
- Cut the peach into wedges about ½–¾ inch thick.
Place the slices in a large mixing bowl. Similar thickness helps the pieces soften at the same rate while retaining their shape.
🥄 Step 3: Mix the Filling
Add the sugar, cornstarch, lemon juice, vanilla, and cinnamon to the peaches. Fold gently until the fruit is evenly coated and no dry pockets of cornstarch remain.
Let the filling stand while you roll the dough. The sugar will draw out some juice, which helps you see how moist the fruit is before it goes into the crust.
Juicy-fruit tip: If a large pool collects in the bowl, transfer the peaches with a slotted spoon and leave some excess liquid behind.
📏 Step 4: Roll Out the Pie Dough
Let refrigerated dough sit at room temperature for about 15–20 minutes. It should bend without cracking but still feel cool.
Rolling the bottom crust:
- Lightly flour the work surface and rolling pin.
- Roll the first round into a roughly 13-inch circle.
- Rotate the dough as you work to prevent sticking.
- Transfer it to a 9-inch pie plate without stretching.
- Leave about 1 inch of overhang around the rim.
Rolling the top crust:
- Roll the second dough round into an 11-inch circle.
- Cut it into even strips about 1 inch wide for the lattice.
If you prefer a full top crust, lay the second round over the filling and cut several steam vents instead of making a lattice.
🥧 Step 5: Assemble the Pie
- Spoon the peach filling into the bottom crust and level the surface.
- Leave behind any clearly excessive liquid in the mixing bowl.
- Scatter the 2 tablespoons of cubed butter over the peaches.
Lay half the dough strips parallel across the pie. Fold back alternating strips, add a perpendicular strip, and return the folded strips to place. Repeat in the opposite direction to create the weave.
Lattice tip: Even spacing matters more than perfect strips. A slightly rustic weave will still bake beautifully.
✂️ Step 6: Trim, Fold & Crimp
- Trim the lattice and bottom crust, leaving about 1 inch beyond the plate.
- Fold the overhang under itself to seal the two crusts together.
- Crimp with your fingers or press with a fork.
Patch small tears with a scrap of dough and a dab of water. Avoid stretching the crust because stretched dough tends to shrink during baking.
🥚 Step 7: Egg Wash + Sparkle
Whisk one egg with one teaspoon of water. Brush a thin coat over the lattice and outer edge, then sprinkle with coarse sugar. Keep egg wash out of deep pools along the rim so it browns evenly.
🔥 Step 8: Tent and Bake
Set the pie on a rimmed baking sheet to catch drips. Shield the outer edge loosely with foil if it tends to brown quickly.
Here’s how to tent your pie:
- Shape strips of foil around the outer crust without pressing into the dough.
- Leave the center open so moisture can escape.
- Add a loose foil cover later only if the lattice becomes dark before the filling bubbles.
Bake in two stages:
- Bake at 425°F (220°C) for 20 minutes.
- Reduce the oven to 375°F (190°C) and bake for another 40–50 minutes.
The pie is finished when the crust is deeply golden and thick bubbles rise through the center, not only around the edge. Bubbling confirms the cornstarch has reached the temperature needed to thicken.
❄️ Cooling & Serving
Cool the pie at room temperature for at least 3–4 hours. Cutting too soon releases hot, thin juices that have not had time to set. Serve at room temperature or rewarm individual slices after the filling is firm.
📦 Storing the Pie
- Room temperature: Keep covered for up to one day in a cool room.
- Refrigerator: Cover and refrigerate for up to four days.
- Freezer: Wrap a fully cooled pie securely and freeze for up to three months for best quality.
- Reheating: Warm slices in a 300°F oven for 10–15 minutes.
🍴 Pro Tips for Peach Pie Success

- Choose peaches that smell ripe but still hold their shape.
- Blanch only long enough to loosen the skin.
- Dry frozen fruit thoroughly after thawing.
- Measure the cornstarch accurately and coat the peaches evenly.
- Keep dough cool, but let very firm dough soften briefly before rolling.
- Bake until the filling bubbles in the center.
- Give the pie several hours to cool before slicing.
🥧 What Is the Difference Between a Peach Pie and a Peach Cobbler?
Both desserts showcase peaches, but their structure and serving style differ.
| Feature | Peach Pie | Peach Cobbler |
|---|---|---|
| Crust or topping | Pastry crust on the bottom and often the top | Biscuit, cake, batter, or dumpling topping |
| Bottom layer | Always includes a pastry base | Usually fruit directly in the baking dish |
| Texture | Flaky, crisp pastry with thick filling | Soft, rustic topping over saucy fruit |
| Presentation | Cooled and cut into slices | Usually scooped with a spoon |
| Preparation | Requires rolling and shaping dough | Generally faster and more forgiving |
🍑 Frozen vs Fresh Peaches: Which Is Better for Pie?
Fresh peaches provide the best fragrance and firmer texture when they are in season. They require pitting and sometimes peeling, and their juiciness can vary.
Frozen peaches are convenient and available all year. They become softer and release more water, so complete thawing, draining, and drying are essential.
- Use fresh peaches when ripe local fruit is available.
- Use frozen peaches off-season, but weigh them after thawing and drying.
- Do not add the thawing liquid to the filling.
- If the fruit is exceptionally juicy, leave excess liquid in the bowl when filling the crust.
🍰 Final Thoughts: A Slice of Sunshine in Every Bite
Excellent peach pie depends on three practical choices: fruit that is ripe yet firm, the right amount of thickener for its juice, and enough cooling time for that thickened filling to settle.
Bake until you can see slow, thick bubbles near the center—not merely at the rim—then leave the pie untouched for several hours. Once set, the filling will hold inside clean slices and the deeply browned lattice will retain its delicate crunch.
Homemade Peach Pie with Flaky Lattice Crust
🍑 More Summer Desserts You’ll Love
Continue baking with these peach favorites:
- Easy Peach Crisp — A quick fruit dessert with a crunchy oat topping.
- Southern Peach Cake — A soft cake packed with ripe peach flavor.
- Southern Peach Cobbler — Warm peaches with a rustic golden topping.

Dana Brooks is a home-cooking writer at Feastbears, where she shares easy family recipes, cozy dinners, quick desserts, and beginner-friendly kitchen tips. Her goal is to make everyday cooking feel simple, warm, and enjoyable for busy home cooks.


