This crustless pumpkin pie keeps the spotlight on a smooth, warmly spiced pumpkin custard without adding a pastry crust.
Whisk the filling in one bowl and bake it straight in a greased pie plate for familiar pumpkin-pie flavor and a creamy texture with less hands-on work.
A brown-sugar substitute provides the sweetness in this version. Its suitability for a particular diet still depends on the brand, the rest of the ingredients, and the portion served.
For more pumpkin desserts, explore Pumpkin Crisp, creamy Pumpkin Cheesecake Bars, or baked Pumpkin Donuts.
The original sequence remains intact below, covering the mixing, baking, cooling, and serving of one nine-inch pie.
🥧 Why Make a Crustless Pumpkin Pie?

A crustless pumpkin pie is useful when you want the custard filling without preparing or rolling pastry.
A traditional pastry shell usually adds flour and fat around the filling. Leaving it out changes both the preparation and the overall ingredients, but it does not automatically make the dessert carb-free.
Almond-flour and coconut-flour crusts are other options if you want a pastry-style base in a different recipe.
For this version, you may skip crust preparation entirely and pour the filling directly into a greased dish.
Removing that step makes the preparation simpler and also:
- Leaves out the ingredients that would otherwise be used for the pastry shell.
- Keeps the pumpkin custard as the main texture.
- Reduces the number of bowls and pastry tools needed.
- Preserves the familiar combination of pumpkin and warm spices.
The appeal is the smooth, creamy filling rather than a flaky edge. Whether you prefer it to a traditional pie is a matter of taste.
Add whipped cream, chopped nuts, or a little caramel-style topping if desired, checking labels when dietary requirements matter.
📝 Ingredients You’ll Need

The base of this easy crustless pumpkin pie uses six ingredients, plus something to grease the dish. Each contributes to the flavor or the custard’s set.
Measure the ingredients using the reference table below.
| Ingredient | Amount | Purpose |
|---|---|---|
| Pumpkin Puree | 1½ cups | Use plain canned pumpkin rather than sweetened pie filling. |
| Large Eggs | 3 (beaten) | Beat lightly before mixing; the eggs set the custard during baking. |
| Brown Sweetener | ¾ cup | Use a brown sugar replacement designed for cup-for-cup baking and follow its label. |
| Ground Cinnamon | ½ teaspoon | Adds an extra cinnamon note alongside the spice blend. |
| Pumpkin Pie Spice | 1¾ teaspoons | Measure the full blend separately from the extra cinnamon. |
| Heavy Cream | ¾ cup | Adds richness; substitutions can change texture and baking time. |
✅ Label tip: Choose plain pumpkin purée, not pumpkin pie filling with sweetener and spices already added.
For a dairy-free variation, full-fat coconut milk can replace the heavy cream, with a different flavor and potentially a different texture.
You may adjust the spice profile with a small extra pinch of nutmeg or cloves. Changes to dairy or sweetener may affect the result, so do not treat every substitution as identical.
Equipment for This Recipe
- An oven for baking the custard.
- An oven thermometer, optional, to check the oven’s actual temperature.
- A 9-inch oven-safe pie dish, such as glass or ceramic, used according to its manufacturer’s instructions.
- Cooking spray, butter, or a suitable oil to grease the dish.
- A large mixing bowl for the filling.
- A small bowl, optional, for beating the eggs first.
- A balloon whisk or another whisk for combining the mixture.
- A silicone spatula for scraping the bowl.
- A hand mixer, optional; use low speed to avoid excessive air.
- A food thermometer and a thin knife or toothpick for checking the center.
- A cooling rack for the baked pie.
- A refrigerator for safely chilling and storing the custard.
- A freezer, optional, for longer storage once the pie is cooled and chilled.
🧑🍳 Step-by-Step: How to Make Crustless Pumpkin Pie
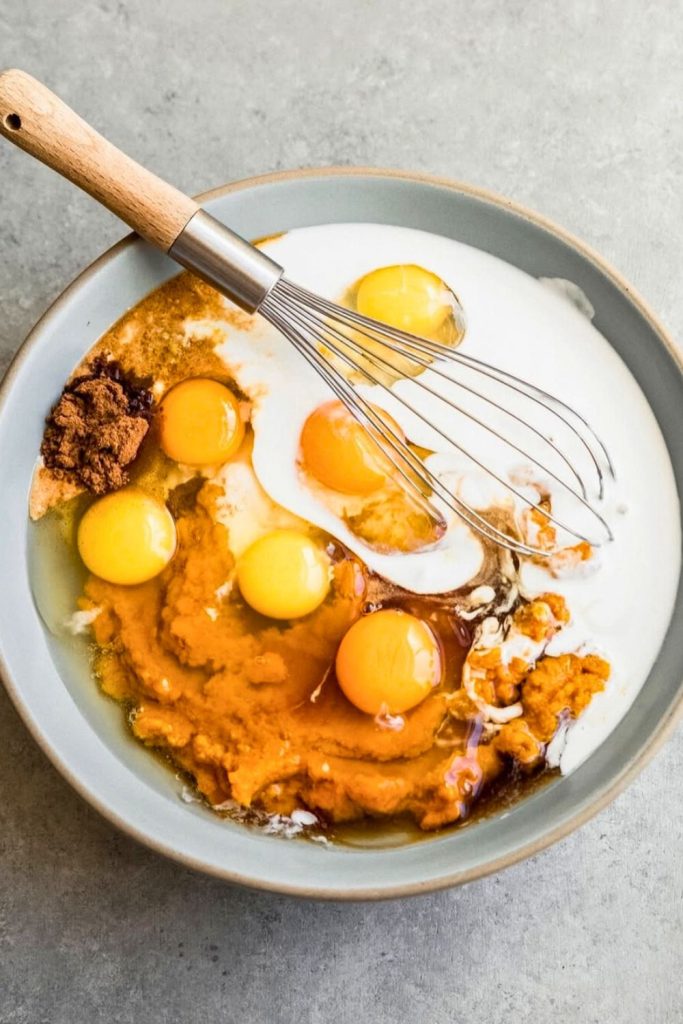
This guide takes you through the crustless pumpkin pie from oven preparation to a chilled, sliceable custard.
There is no pastry to roll. Focus on mixing evenly, baking the center properly, and allowing enough cooling time.
🔥 Step 1: Preheat the Oven
Preheat the oven to 350°F (175°C) before mixing the filling.
Have the oven ready when the custard goes into the dish so you may bake it promptly.
✅ Temperature tip: If you suspect your oven runs hot or cool, check it with an oven thermometer. Custard texture can be affected by excessive heat.
🧴 Step 2: Grease Your Pie Dish
Lightly but thoroughly grease a nine-inch pie dish. With no crust between the custard and the dish, an even coating helps the slices release.
Suitable greasing options include:
- Butter, if dairy is suitable for your meal.
- Coconut oil spray as an alternative.
- Avocado oil spray for another oil-based option.
🍽️ Pan tip: Cover the base and the sides where the filling will touch, without leaving pools of oil.
🎃 Step 3: Mix the Pumpkin Base
Add the pumpkin to a large bowl:
- 1½ cups plain canned pumpkin purée.
Check that it is plain pumpkin rather than pre-seasoned pie filling, which would change the recipe’s sweetness and spice levels.
Then add the eggs:
- 3 large eggs, lightly beaten.
Eggs help the pumpkin mixture set into a custard as it bakes. They need to be evenly incorporated before you fill the dish.
🥄 Beat the eggs in a separate bowl first, or break them up thoroughly in the pumpkin mixture. Do not leave distinct streaks of yolk or white.
🍬 Step 4: Add the Sweetness
For sweetness, this version uses a brown sugar replacement formulated for baking.
Add the measured sweetener:
- ¾ cup brown sugar replacement, using a product designed to measure cup for cup like brown sugar.
Products vary in sweetness, ingredients, and baking behavior. Follow the package’s measuring directions rather than assuming every brown-colored sweetener is interchangeable or carb-free.
If considering another sweetener, check the product’s conversion guidance. Options may include:
- A golden monk-fruit-based baking blend, with its own measuring instructions.
- An allulose-based blend, which may brown differently.
- A monk fruit and erythritol blend, provided it is suitable for this type of baking.
🍯 Important: Do not taste the uncooked filling after adding eggs. If you want to assess sweetness, do so with pumpkin and sweetener before any raw egg is added, or adjust a future batch after tasting the fully baked pie.
🌶️ Step 5: Add the Spices
The spice blend gives pumpkin pie its familiar warm aroma and complements the pumpkin’s mild flavor.
Add these spices:
- ½ teaspoon ground cinnamon.
- 1¾ teaspoons pumpkin pie spice.
Pumpkin pie spice commonly contains cinnamon, nutmeg, ginger, and cloves, though blends vary. The extra cinnamon is separate from the measured blend.
If making a blend yourself, these small mixture is a starting point; make enough in the same proportions to measure the full 1¾ teaspoons needed:
- 1 teaspoon cinnamon.
- ¼ teaspoon nutmeg.
- ¼ teaspoon ginger.
- A pinch of cloves or allspice.
Mix the homemade spices thoroughly, measure 1¾ teaspoons of the blend, and still include the separate ½ teaspoon cinnamon listed for the filling.
🥛 Step 6: Stir in the Cream
Next, pour in the cream:
- ¾ cup heavy cream.
Cream adds richness and gives the custard a fuller texture. It also helps disperse the spices throughout the filling.
For a dairy-free variation, consider these with care:
- Full-fat coconut milk in place of the cream, accepting that it adds coconut flavor.
- Almond milk with coconut oil is not a like-for-like replacement for heavy cream; use a separately tested version if choosing that thinner liquid.
🧁 Texture note: The balance of eggs, pumpkin, and cream affects the set. Changing the dairy can change the firmness and baking time.
🍴 Step 7: Whisk It All Together
Whisk the filling until it is smooth and uniform.
You may use:
- A balloon whisk to combine the eggs, cream, and pumpkin.
- A silicone spatula to scrape down the sides and bottom.
- A hand mixer on low speed, stopping once combined rather than whipping in lots of air.
Check that the sweetener and spices are evenly distributed and no separate egg streaks remain.
💪 Mixing tip: Sweep the whisk around the bowl and across the bottom, then scrape with a spatula to catch unmixed pockets.
The filling should look:
- Thick but pourable, rather than stiff.
- Evenly mixed, without visible clumps of spice or pumpkin.
- Consistently orange, with no separate cream or egg streaks.
🧁 Step 8: Pour and Bake
Pour the mixture into the greased pie dish and scrape the bowl with the spatula. Leave enough room to move the dish safely without spilling.
Bake in the center of the oven for about 30–40 minutes, beginning checks at 30 minutes. Continue longer if needed for the center to set safely.
🔍 Check the Custard, Not Just the Timer
- The edges should be set, with the center no longer liquid. A small, gentle wobble can remain.
- Use a food thermometer to confirm the egg custard’s center reaches at least 160°F (71°C); do not press your fingers onto the hot pie.
- A thin knife or toothpick near the center should come out mostly clean rather than coated with raw custard.
- The top may rise a little during baking and settle afterward.
⚠️ Avoid unnecessary extra baking: Once the custard is safely cooked and set, remove it. Excessive heat can cause cracking or a firmer, less creamy texture.
🧊 Step 9: Cool and Slice
Set the baked pie dish on a cooling rack.
Let it cool for about 30 minutes, then transfer it to the refrigerator within two hours of baking, or within one hour above 90°F (32°C). Follow the dish manufacturer’s guidance to avoid thermal shock.
Warm custard is softer and harder to cut neatly. For cleaner slices:
- Chill in the refrigerator for one to two hours, or until properly cold and firm.
- If using a brief freezer chill, do so only after the pie has cooled appropriately and the dish is freezer-safe. The refrigerator is the simpler option; do not move a hot glass dish straight into a freezer.
🍽️ If the Surface Cracks
A small crack is a cosmetic issue when the pie is otherwise correctly baked. It can happen as the custard contracts during cooling.
A spoonful of whipped cream or another topping can cover a crack if you want a tidier presentation.
🍦 Step 10: Serve It Up: Topping Ideas
Once the pie is chilled and firm, cut slices and add toppings just before serving.
The table below offers contrasting creamy, crunchy, and spiced finishes.
| Topping | Why It Works |
|---|---|
| Whipped Cream | A cool, creamy contrast; keep refrigerated until serving. |
| Cinnamon Sprinkle | Use a small pinch to reinforce the filling’s spice. |
| Chopped Pecans or Walnuts | Adds crunch; choose only nuts suitable for your diners. |
| Sugar-Free Caramel Drizzle | Check the product label and add a small drizzle to taste. |
| Keto Ice Cream | A scoop is an optional serving idea; ingredients and carbohydrate amounts vary by product. |
| Pumpkin Seeds | Use toasted, shelled pepitas for a crisp finish. |
🎉 Serve a slice with coffee, a latte, or tea. Choose toppings and portion sizes according to your preferences and ingredient requirements.
👩🍳 Pro Tips for the Best Crustless Pumpkin Pie
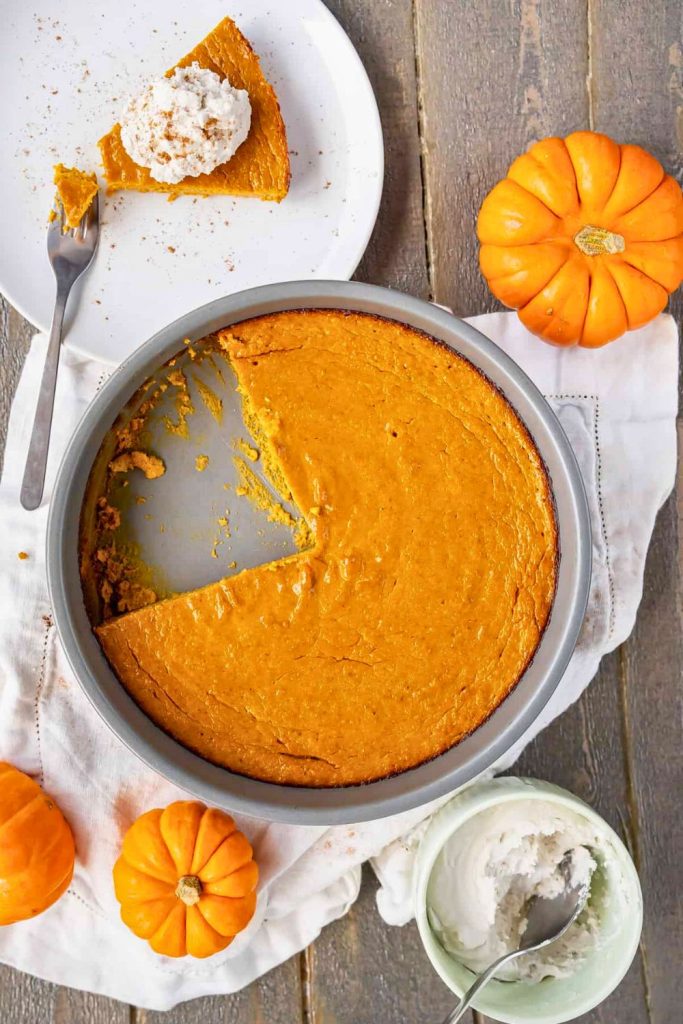
A few practical habits help the crustless pumpkin pie mix smoothly, bake evenly, and slice cleanly.
✅ Avoid Large Ingredient-Temperature Differences
Taking eggs and cream out briefly while you prepare the dish can make mixing easier. Ten to fifteen minutes does not always bring them fully to room temperature, and that is not essential.
Keep perishable ingredients out only as long as needed for preparation, then bake the mixed custard promptly.
✅ Mix the Eggs and Spices Thoroughly
A whisk helps break up egg streaks and spread the fine spices through the pumpkin. Scrape the bowl so no unmixed sweetener remains at the bottom.
🎯 Whisking tip: Use a motion that reaches the sides and base; the exact pattern matters less than an even mixture.
✅ Check the Center Carefully
Custard needs to be fully cooked without being left in the oven after it has set. Combine temperature and texture checks.
Watch for these:
- A center that is set rather than sloshing, although a slight wobble may remain.
- An internal temperature of at least 160°F (71°C) in the center.
- A thin knife or tester with little custard clinging to it, not liquid filling.
✅ Cool, Then Refrigerate
Cooling lets the custard become firmer, but it must not sit at room temperature indefinitely. Refrigerate within the safe cooling window.
For neat slices, chill for one to two hours or until firm. Store the remaining pie covered in the refrigerator and use within three to four days.
✅ Add Toppings Strategically
If a small surface crack appears, add whipped cream or chopped pecans just before serving if desired. Keep perishable toppings refrigerated until needed.
🎨 Variations to Try

Consider these variations for a different version of your crustless pumpkin pie. They are not automatically suitable for every low-carb or other eating plan; check the full ingredient list and serving size.
| Variation | What to Do |
|---|---|
| Maple Pumpkin Pie | Add ½ teaspoon maple extract, or adjust according to the product’s strength. |
| Chocolate Chip Pumpkin Pie | Fold in ¼ cup chocolate chips suitable for your preferences; labels vary even on products marketed as sugar-free. |
| Nutty Crunch Pie | Scatter a modest amount of chopped pecans or walnuts over the filling before baking. |
| Coconut Pumpkin Pie | Replace the heavy cream with full-fat coconut milk for a coconut-flavored variation; check the set and baking time. |
| Mini Pumpkin Pies | Divide among lined or suitable silicone muffin cups; begin checking around 20–25 minutes and continue until the centers are set and at least 160°F (71°C). |
| Extra Spicy | Add a very small pinch of cayenne or extra cloves, keeping their strength in mind. |
| Cheesecake Swirl | Swirl in a few spoonfuls of sweetened cream cheese. This may change baking time; verify that the egg custard is fully cooked. |
| Espresso Pumpkin Pie | Mix 1 teaspoon instant espresso powder into the filling for a coffee note. |
| Caramel Pecan Topping | Add a little caramel-style sauce and toasted pecans after chilling, checking the sauce label for your needs. |
Changes to dairy, sweetener, or added filling can also affect baking time and texture.
🥶 Can You Freeze Crustless Pumpkin Pie?
You may freeze this pie for a later meal, although thawed custard may be a little softer or release some moisture.
Prepare it for freezing using these steps:
🧊 How to Freeze the Pie
- Cool and Chill First: Cool briefly on a rack, then refrigerate within two hours of baking. Let it become fully chilled before wrapping for the freezer.
- Wrap Well: Wrap the chilled pie or individual slices closely, then add foil or a freezer-safe bag to help protect against drying and odors.
- Label and Freeze: Mark the date and aim to use it within about two months for best quality.
🔄 Thawing and Serving
- Refrigerator method: Move the wrapped pie to the refrigerator and let it thaw slowly, usually overnight.
- For smaller portions: Freeze slices separately so you may thaw only what you need in the refrigerator. Do not thaw this egg-and-cream dessert on the counter.
Serve the thawed pie chilled. If reheating leftovers, heat to 165°F (74°C); reheating may change the custard’s texture.
🧁 Topping tip: Add whipped cream, nuts, or seeds after thawing for a fresher finish.
🎯 Final Thoughts
This crustless pumpkin pie recipe creates a silky, spiced custard without the extra step of making pastry.
Because the custard must cool and chill before slicing, this is a convenient dessert to prepare ahead for an autumn dinner or holiday table.
A bowl, whisk, pie plate, and oven handle the job; the important part is allowing the complete baking and cooling time so the custard can set.
Serve each cold slice with whipped cream, nuts, or another topping you enjoy.
Crustless Pumpkin Pie
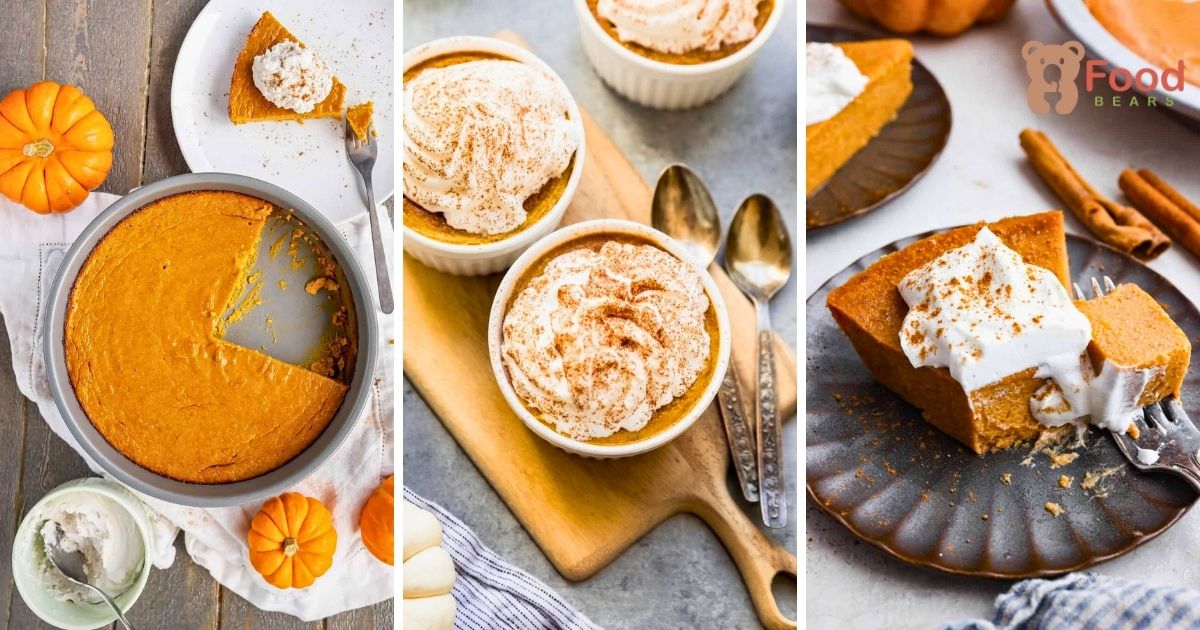
🥄 More Pumpkin Recipes to Try Next
For more pumpkin desserts to try, explore these recipes:
- 👉 The Best Pumpkin Bread Pudding You’ll Need
Pumpkin bread pudding is another custard-based dessert to serve when you want something comforting. - 👉 Fun Fall Treat: Pumpkin Cheesecake Bars Recipe
These bars pair pumpkin spice with a creamy cheesecake layer for a sliceable dessert. - 👉 Quick Pumpkin Chocolate Chip Muffins Recipe
Try pumpkin chocolate chip muffins for individual baked treats with pockets of chocolate.
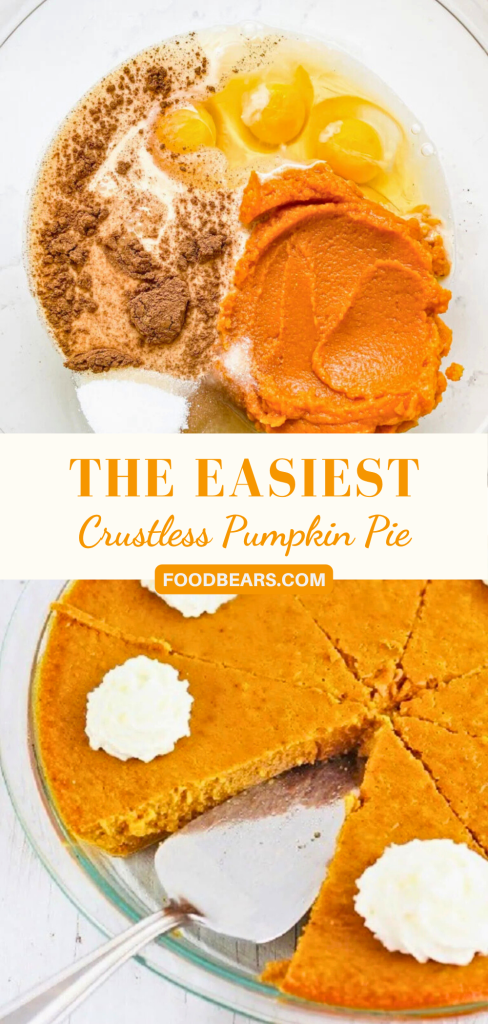

Dana Brooks is a home-cooking writer at Feastbears, where she shares easy family recipes, cozy dinners, quick desserts, and beginner-friendly kitchen tips. Her goal is to make everyday cooking feel simple, warm, and enjoyable for busy home cooks.


