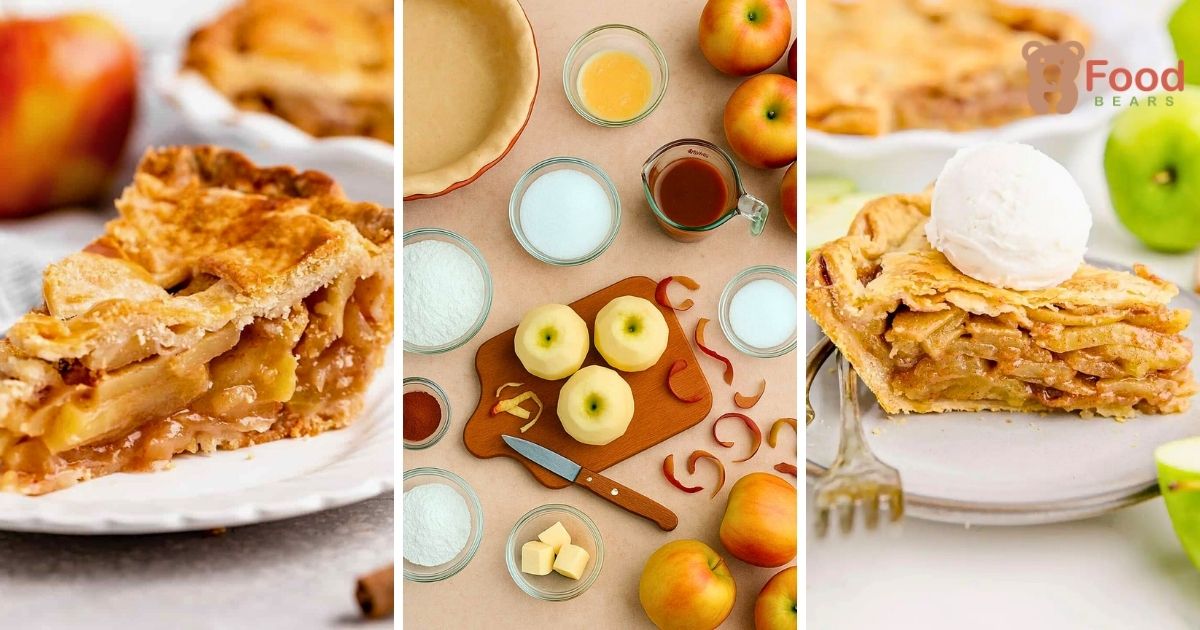
Fresh apple pie fills the kitchen with the aroma of cinnamon, buttery pastry, and tender fruit. In one slice, it brings together a flaky crust, warmly spiced apples, and the comfort of a familiar dessert.
This original method is explained from the caramel-style filling sauce through the woven lattice crust, so every stage is clear.
Even first-time pie bakers can follow the steps, provided the dough stays cold and the finished pie is given enough time to rest.
Why Apple Pie is an All-Time Favorite

Apple pie isn’t just a dessert; it is a story, a tradition, and a comforting reminder of family gatherings.
Across generations, this pie has symbolized warmth, togetherness, and celebration. But why exactly is it such a favorite? Let us dig deeper.
1. The Balanced of Flavors
A homemade apple pie is a dance between sweet and tart. Tart apples like Granny Smith bring a refreshing tang, while sugar and cinnamon add sweetness and spice. Together, they create a filling that’s rich yet balanced, never cloying, always satisfying.
2. A Dessert for Every Occasion
Unlike cakes or puddings that feel tied to birthdays or specific holidays, homemade apple pie is welcome anywhere. Thanksgiving, Christmas, Sunday dinner, or even a casual fall evening, it always fits right in.
3. Versatility in Pairings
This dessert pairs with many toppings. Add a scoop of vanilla ice cream for a classic à la mode experience, drizzle caramel for indulgence, or even pair it with a slice of sharp cheddar for a surprising savory twist.
4. Nostalgia and Tradition
Apple pie is the dessert many of us grew up eating at our grandmother’s table. It is tied to childhood memories, holiday traditions, and cozy moments that linger in our hearts. Every bite carries a sense of home.
Ingredients You’ll Need
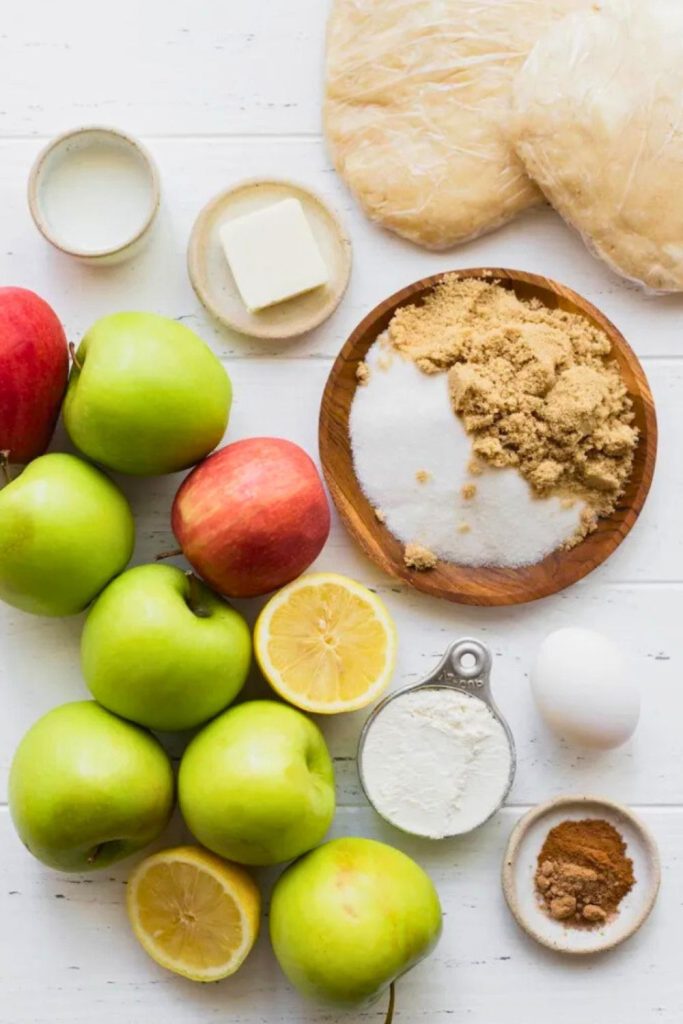
Before diving into the step by step process, let us gather everything. The table below gives a clear, easy-to-read table with all the ingredients you will need for this apple pie recipe.
| Category | Ingredient | Amount | Purpose |
|---|---|---|---|
| Filling Sauce | Unsalted butter | 8 tablespoons (1 stick) | Adds richness and base for caramel sauce |
| All-purpose flour | 3 tablespoons | Thickens the sauce | |
| Water | ¼ cup | Helps dissolve sugar and balance texture | |
| Granulated sugar | ¾ cup | Sweetens the sauce and apples | |
| Apples | Granny Smith apples (or tart variety) | 6–7 apples (about 2 ¼ lbs) | Provides the main filling with tart balance |
| Ground cinnamon | 1 ½ teaspoons | Adds warm spice and enhances apple flavor | |
| Pie Crust | All-butter pie dough (homemade or store-bought) | 2 rounds | Creates the base and lattice topping |
| All-purpose flour (for dusting) | As needed | Prevents dough from sticking while rolling | |
| Topping | Egg | 1 large | Creates shine and color in the crust |
| Sugar | 1 tablespoon | Adds sparkle and slight sweetness on top |
How to Make Apple Pie
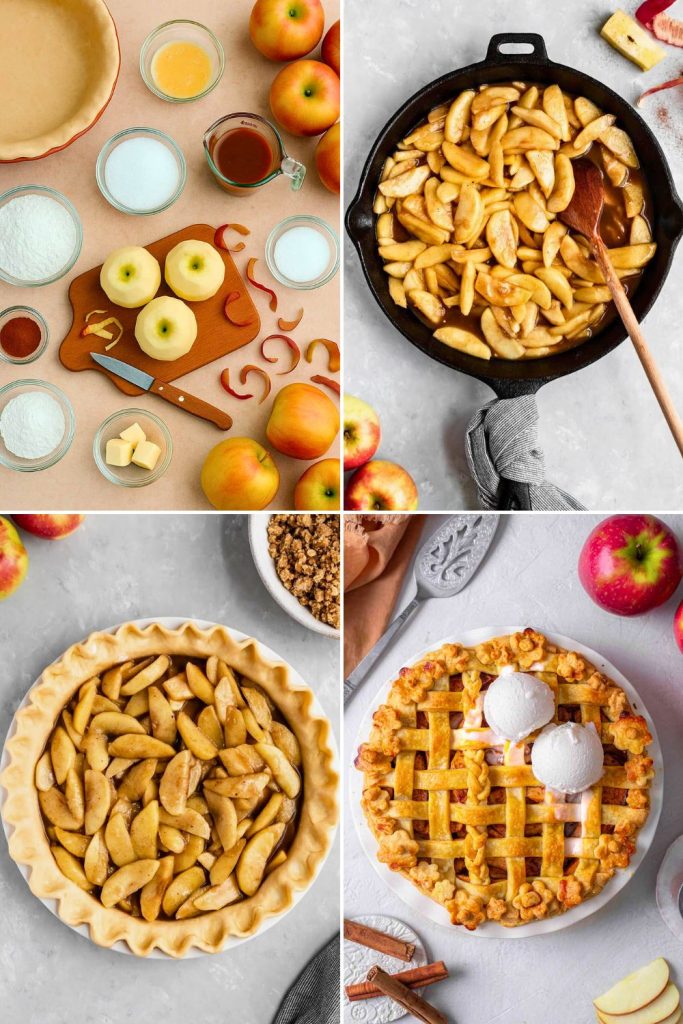
There is nothing quite like baking your own apple pie at home. The buttery crust, spiced filling, and warm aroma fill your home.
This is the kind of recipe that turns an ordinary day into something memorable. Let us break down each step in detail so you can bake comfortably.
Step 1: Make the Secret Sauce
The filling begins with a quick caramel-style sauce that gives this pie its depth and signature taste. While most apple pies rely only on sugar and spices, this extra step transforms your pie into something bakery-worthy.
- Place a medium saucepan on medium heat.
- Melt 8 tablespoons of unsalted butter until fully liquid.
- Mix in 3 tablespoons of flour, whisking constantly to prevent lumps. This forms a roux, which thickens the sauce.
- Add ¼ cup water and ¾ cup sugar.
- For reliable results, bring the mixture to a boil, then reduce the heat to low and simmer for about 3 minutes, stirring occasionally.
The result should be smooth and slightly thickened, resembling light caramel. It only takes about 5 minutes, but this sauce ensures your pie filling is full, glossy, and never bland.
👉 Pro Tip: Do not skip whisking while adding the flour. This prevents clumps and gives you a silky sauce.
Step 2: Prepare the Apples
The apples are the main ingredient, so preparing them properly makes a noticeable difference.
- Choose 6–7 firm, tart apples such as Granny Smith, Honeycrisp, or Braeburn; these varieties hold their shape instead of becoming mushy.
- Peel the apples using a vegetable peeler or paring knife.
- Core them by cutting in half and removing the centers with either a corer, little knife, or melon baller.
- Cut the apples into even wedges roughly ⅛ to ¼ inch thick so they bake at the same rate.
You should have roughly 7 cups of sliced apples. Place them in a large mixing bowl, sprinkle with 1 ½ teaspoons cinnamon, and toss gently just until coated. Finally, pour your cooled sauce over the apples, mixing until every slice glistens.
👉 Pro Tip: Slice apples evenly so they cook evenly. Thicker slices may stay crunchy, while thinner ones might turn too soft.
Step 3: Roll Out the Pie Dough
A flaky crust is what makes or breaks a homemade apple pie. Rolling it out properly ensures both structure and tenderness.
- Flour your work surface generously to prevent sticking.
- Roll one chilled round of pie dough into a 12-inch circle on the floured surface.
- When the dough sticks to your rolling pin, sprinkle more flour lightly.
- To transfer, lightly wrap the dough around your rolling pin and unroll it into a 9-inch pie plate.
Press the dough into the bottom and sides of the dish. Let about 1 inch of dough hang over the rim, which you will later fold in for sealing.
👉 Pro Tip: Keep your dough chilled. If it warms up and becomes sticky, place it in the fridge for 5 minutes before continuing.
Step 4: Add the Apple Mixture
Now it is ready to fill the pie.
- Pour the apple filling into the crust.
- Mound the apple slices a little higher at the center because they will shrink as the pie bakes.
- Keep the filling sauce away from the pastry rim; sticky dough edges are difficult to seal to the top crust.
At this point, the pie already looks inviting with its glossy apples peeking through the crust edges.
👉 Cook’s note: Gently tap the filled pie dish on the counter to settle the apples and release trapped air.
Step 5: Make the Lattice Crust
The lattice crust can look complicated, but it is actually simple once you take it one step at a time. Not only does it look stunning, but it also lets steam escape, preventing a soggy filling.
- Roll out your second dough round into an 11-inch circle.
- Using a pizza cutter or sharp knife, cut 10 even strips.
- For reliable results, place 5 strips across the pie in one direction, spacing them evenly.
- For reliable results, fold back every other strip halfway, then place one strip across in the opposite direction.
- Unfold the strips, then fold back the alternating ones and include another strip.
- Continue this weaving process until the lattice is complete.
After finishing, trim any excess dough and tuck it neatly into the bottom crust edge. Use your fingers to crimp the edges for that bakery-style look.
👉 Pro Tip: Do not worry about perfection! Even a slightly uneven lattice looks charming and rustic.
Step 6: Add the Egg Wash
An egg wash is the secret to that glossy, deeply golden finish.
- Beat 1 large egg in a small bowl.
- Mix in 1 tablespoon of sugar.
- Brush a thin, even layer of egg wash across the lattice strips and outer edge of the crust.
The sugar brings sparkle, while the egg ensures a deep golden color once baked.
👉 Cook’s note: A pastry brush gives more even coverage than pouring or spreading a heavy coat.
Step 7: Bake the Apple Pie
Now it is ready to let the oven handle the cooking.
- Preheat oven to 425°F (220°C).
- Place the pie in the center rack.
- Bake about 15 minutes at this high temperature.
- Keep the oven closed while lowering the temperature to 350°F (175°C), then bake the pie for 45 minutes longer.
The crust should be deeply golden, and the filling should bubble through the lattice openings. That bubbling means the apples are tender and the sauce has thickened.
👉 Cook’s note: Shield the outer crust with narrow strips of foil if it begins to brown too fast.
Step 8: Rest Before Serving
Waiting can be difficult here, but resting is essential.
- Let the pie cool for at least 1 hour at at room temperature.
- The one-hour rest gives the filling time to thicken. Cutting earlier can release the juices and make the slices collapse.
After resting, cut the pie into generous wedges and serve it warm, ideally with vanilla ice cream or fresh whipped cream.
👉 Cook’s note: For tidy wedges, cut lightly with a serrated knife and lift each piece with a pie server.
Tips for the Perfect Apple Pie

Even though apple pie is a classic recipe, the distinction between a “good” pie and a “perfect” pie lies in small details.
Here are some reliable tips to guarantee success every time you bake:
Select firm apples: Tart varieties such as Granny Smith, Honeycrisp, or Braeburn hold their shape and balance the sugar. Combining two varieties can create a more layered flavor.
For reliable results, chill the dough before rolling. Warm dough becomes sticky and tricky. Always chill your pie crust for at least 30 minutes before rolling it out. Cold butter inside the dough creates steam while baking, resulting in a flakier crust.
Do not Skip the Sauce. That quick caramel-style sauce made with butter, sugar, and flour is your secret weapon. It coats the apples evenly, giving the filling a glossy, thick texture and deeper flavor.
Pile Apples Higher in the Center. Apples shrink as they bake. By slightly mounding them in the middle, you will have a beautifully domed pie instead of a flat one.
Shield the rim: Because the outer crust browns first, cover it with foil partway through baking when necessary.
Variations to Try
Once you’ve become comfortable with the traditional apple pie, you can have fun experimenting with flavors and toppings. Here are some delicious variations:
| Variation | What to Change | Flavor Experience |
|---|---|---|
| Dutch Apple Pie | Replace lattice crust with a crumb topping made of butter, sugar, and flour | Crunchy, buttery topping with a rustic look |
| Apple Cranberry Pie | Add 1 cup dried cranberries to the apple filling | Tart bursts that balance the sweetness |
| Salted Caramel Apple Pie | Drizzle homemade salted caramel sauce over apples before adding the crust | Rich, indulgent, and slightly salty contrast |
| Maple Apple Pie | Replace ¼ cup of sugar with pure maple syrup | Warm, earthy sweetness with fall vibes |
| Apple Pecan Pie | Add ½ cup chopped pecans to the filling | Crunchy texture and nutty depth |
| Spiced Apple Pie | Increase spices with nutmeg, cloves, and allspice | Deeper, aromatic flavor with cozy warmth |
👉 These twists are well suited to seasonal gatherings when you want to surprise guests with something familiar yet unique.
What to Serve With Apple Pie
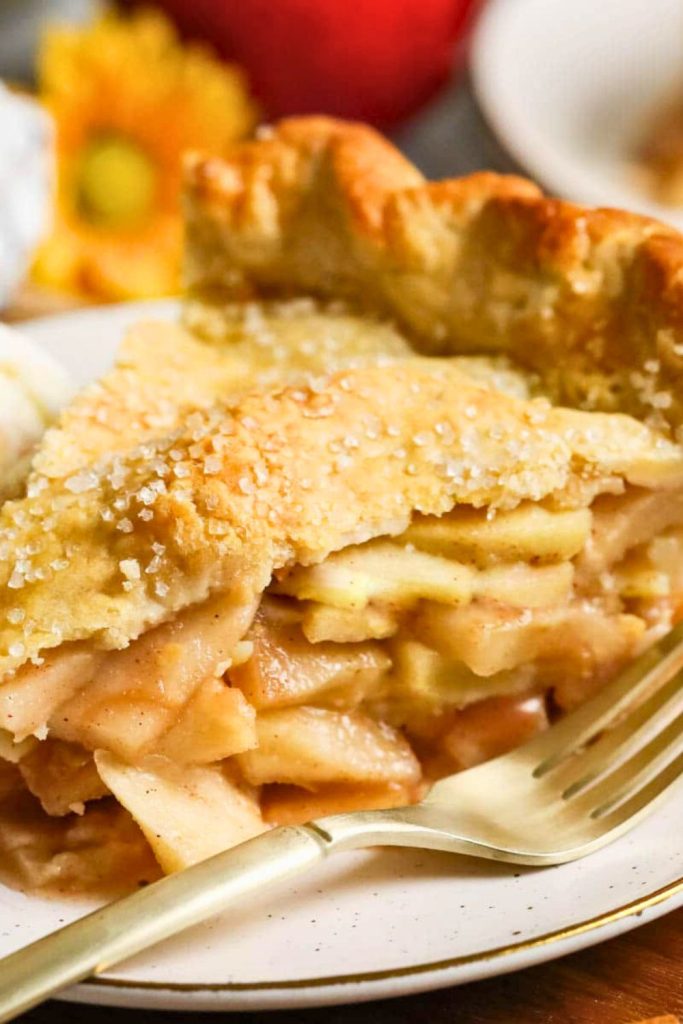
A homemade apple pie is terrific on its own, but the right pairing can take it from “great” to “unforgettable.” Here are some serving ideas:
- Vanilla ice cream: A cold scoop melting over warm pie is the traditional pairing.
- Whipped cream: Its light texture and gentle sweetness balance the substantial filling.
- Caramel sauce: A light drizzle makes each slice sweeter and adds a glossy finish.
- Sharp cheddar: This New England pairing uses salty cheese to contrast with the sweet fruit.
- Hot Coffee or Tea: Well suited to cozy fall evenings. The bitterness of coffee balances the sweetness of the pie.
👉 Cook’s note: If serving for guests, offer a “pie bar” setup with ice cream, whipped cream, and caramel sauce so everyone can customize their slice.
Common Mistakes to Avoid
Even seasoned bakers can run into challenges with apple pie. Here is a list of common mistakes and how to avoid them:
- Choosing soft apples: Red Delicious and McIntosh break down quickly; select firmer varieties to keep distinct slices.
- Overworking the dough: Excess handling makes pastry tough, so work lightly and keep it chilled.
- Skipping the rest: Slicing immediately releases runny juices, while cooling gives the filling time to set.
- Overbaking or Underbaking: If the crust is pale, it is underbaked. If it is dark brown and hard, it is overbaked. Aim for a deeply golden top with bubbling filling visible through the vents.
- Ignoring the bottom crust: Bake on a lower rack or use a metal pie plate to help the base turn crisp.
Final Thoughts
This homemade apple pie combines tender apples, warm spice, and a flaky lattice crust in a dessert that feels right for fall and holiday baking.
Serve it for Thanksgiving, Sunday dinner, or simply because you have good baking apples. The aroma makes the kitchen inviting, and a properly rested filling gives every slice a neat, rich texture.
Gather the apples, keep the pastry chilled, and work through the method one stage at a time for a pie that tastes as comforting as it looks.
Classic Homemade Apple Pie

Craving More Cozy Recipes?
If you loved this apple pie recipe, here are more comforting dishes consider trying next:
- Easy Weeknight Chicken Stuffing Casserole Recipe – A hearty, cheesy, and comforting dinner well suited to busy evenings.
- Easy 30-Min Sausage Stuffing Recipe for Fall Nights – A flavorful side dish packed with homestyle goodness, excellent for fall dinners and Thanksgiving.
- Best 45-Min Pecan Pie Recipe for Thanksgiving – This classic Southern-inspired dessert with crunchy pecans and a sweet, gooey filling.

Dana Brooks is a home-cooking writer at Feastbears, where she shares easy family recipes, cozy dinners, quick desserts, and beginner-friendly kitchen tips. Her goal is to make everyday cooking feel simple, warm, and enjoyable for busy home cooks.


