Soft pumpkin cinnamon rolls filled with butter, brown sugar, and plenty of cinnamon make a cozy centerpiece for a cool-weather breakfast.
Plain pumpkin purée adds moisture and color to the enriched yeast dough, which is rolled around a classic cinnamon-sugar filling.
Serve them for breakfast, brunch, or an afternoon treat. The process is mostly hands-off while the dough completes its two rises.
The instructions below walk through mixing, proofing, rolling, filling, slicing, baking, glazing, and storing the finished rolls.
Why You’ll Love These Pumpkin Cinnamon Rolls
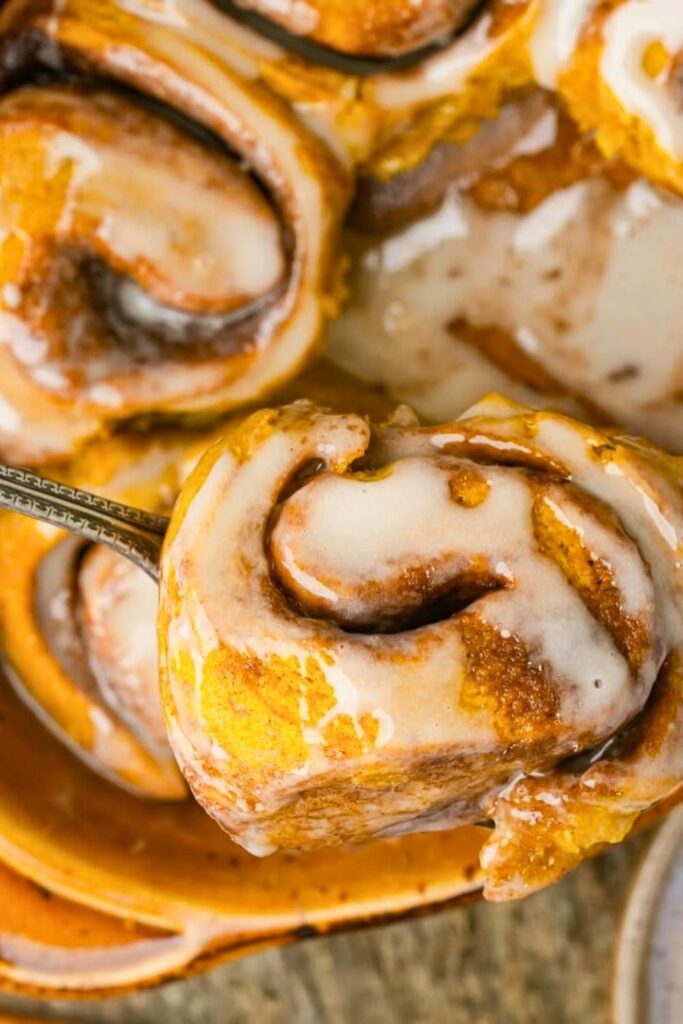
Pumpkin gives the soft dough a seasonal flavor and golden color while leaving the familiar buttery cinnamon spiral at the center.
The dough bakes into soft spirals around a butter-and-cinnamon layer, while a light milk glaze adds sweetness on top.
Here is what goes into that combination:
- A tender dough: milk, eggs, and butter enrich the flour-and-yeast base.
- Real pumpkin: plain purée adds moisture and a gentle pumpkin flavor.
- Cinnamon in two places: a little seasons the dough, with more in the rolled filling.
- Familiar baking ingredients: flour, sugar, yeast, and a few refrigerated staples form the recipe.
- Flexible serving: bring out the tray for breakfast, brunch, or a dessert-style treat.
Allow time for both rises, and you can fit the hands-on steps around other kitchen preparation.
Ingredients You’ll Need
Measure the dough, filling, and glaze ingredients in separate groups. For consistent results, follow the listed milliliters and grams for the milk and melted butter.
For the Pumpkin Dough
| Ingredient | Amount | Purpose |
|---|---|---|
| Warm Milk | 187 ml | Use 187 ml, warmed to 100–110°F (38–43°C) for this method. |
| Sugar | 3–4 tablespoons | Sweetens the dough lightly; measure separately from the filling sugar. |
| Eggs | 2 large | Adds richness and helps the dough hold together. |
| Melted Butter | 78 grams (about ⅓ cup) | Melt, then cool before mixing so it does not overheat the yeast mixture. |
| Salt | ½ teaspoon | Rounds out the dough’s sweet and spiced flavor. |
| Ground Cinnamon | 1 teaspoon | Seasons the pumpkin dough beneath the stronger cinnamon filling. |
| Pumpkin Puree | 173 grams (¾ cup) | Use plain, unsweetened purée for moisture and pumpkin flavor. |
| Instant Yeast | 1 packet (2¼ teaspoons) | Makes the dough rise; wait for expansion rather than the timer alone. |
| All-Purpose Flour | 4 cups | Add gradually to form a soft, slightly tacky dough. |
For the Cinnamon Filling
| Ingredient | Amount | Purpose |
|---|---|---|
| Softened Butter | 6 tablespoons | Keep soft enough to spread without tearing the rolled dough. |
| Brown Sugar | 7 tablespoons | Forms the sweet layer inside each spiral. |
| Ground Cinnamon | 3 tablespoons | Distribute evenly over the butter and brown sugar. |
For the Light Milk Icing
| Ingredient | Amount | Purpose |
|---|---|---|
| Icing Sugar (Powdered Sugar) | 4–5 tablespoons | Makes a light glaze rather than a thick buttercream-style topping. |
| Milk | 2 tablespoons | Add gradually, using only enough for the consistency you prefer. |
Step-by-Step: How to Make Pumpkin Cinnamon Rolls from Scratch
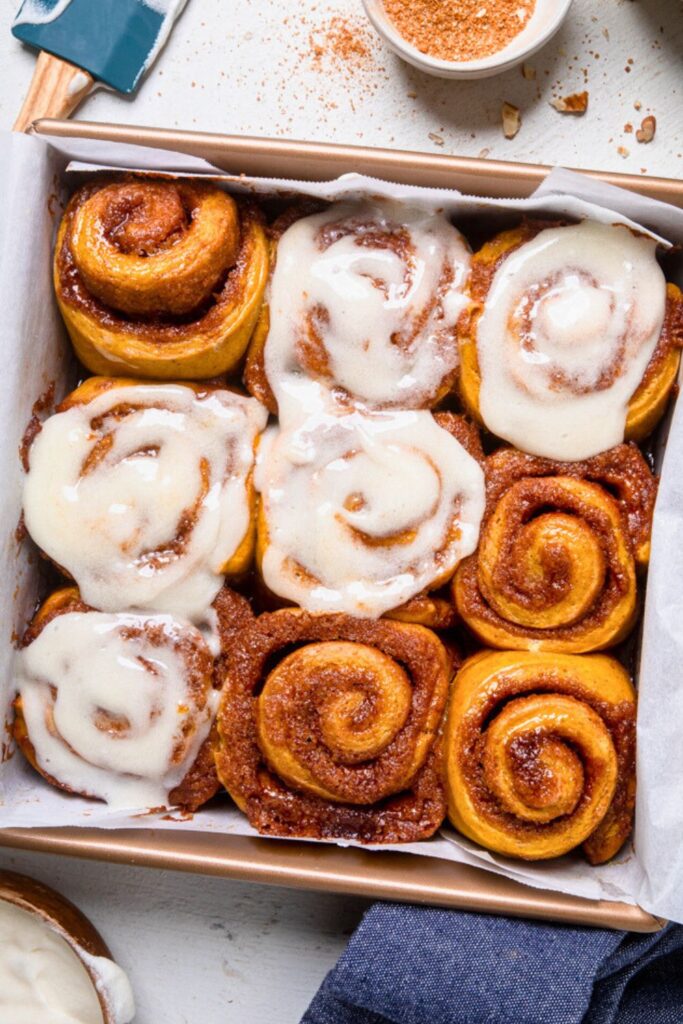
Break the recipe into clear stages: mix a soft pumpkin dough, allow the first rise, fill and shape it, proof again, then bake and glaze.
Before starting, cool the melted dough butter and soften the separate filling butter so both are at the right temperature when needed.
Step 1: Preheat and Prep
Clear a work surface, measure the ingredients, and choose a baking pan or pans that can hold the shaped rolls with a little room between them.
You do not need to preheat the oven at the start. Wait until the shaped rolls are approaching the end of their second rise.
Melt the dough butter and set it aside until it is no longer hot. Keep the separate filling butter soft and spreadable, not melted.
Step 2: Warm the Milk and Combine Wet Ingredients
Warm 187 ml milk to about 100–110°F (38–43°C). Check with a thermometer; it should be warm, not hot.
Very hot liquid can damage yeast, and hot butter can overheat the mixture too. Let either ingredient cool before continuing if necessary.
Whisk the warm milk together with:
- 3–4 tablespoons sugar
- 2 large eggs
- 78 grams melted butter, cooled
- ½ teaspoon salt
- 1 teaspoon ground cinnamon
Mix until the eggs are incorporated and the butter is dispersed through the milk.
Step 3: Add Pumpkin Puree
Next, work the pumpkin into the enriched mixture.
Whisk in 173 grams plain pumpkin purée, approximately ¾ cup.
Use purée rather than sweetened pumpkin pie filling. Stir until the mixture has a consistent orange color without large streaks of pumpkin.
Step 4: Add Yeast and Flour
Stir in 1 packet instant yeast (2¼ teaspoons). Instant yeast does not require a separate blooming step for this method.
Add 4 cups all-purpose flour gradually, stirring as you go until the mixture comes together as a soft dough.
Expect a slightly sticky dough. If it is too wet to handle, add flour only a tablespoon at a time rather than pouring in a large extra quantity.
The goal is a cohesive, soft dough, not a stiff ball. Extra flour can make the baked rolls heavier and less tender.
Step 5: Let the Dough Rise (First Rise)
Cover the bowl and leave the dough in a warm, draft-free place for about 1 hour, or until nearly doubled.
Choose gentle room warmth, around 75–78°F (24–26°C), if available. Do not put the dough into a 150°F oven; if using an unheated oven as a sheltered spot, make sure it is off and not hot.
Check the dough itself before moving on. A cool kitchen can make the first rise take longer than an hour, even when the yeast is working normally.
Step 6: Roll Out the Dough
Dust the work surface lightly with flour and turn out the risen dough.
Fold or knead it gently once or twice to bring it together, then roll it into a rectangle roughly 18 by 12 inches.
Aim for an even thickness across the rectangle. If it keeps springing back, let it relax briefly rather than pulling it thin or tearing it.
Step 7: Add the Filling
Spread the filling over the dough in an even layer.
Start with 6 tablespoons softened butter, spreading it gently without dragging holes in the dough.
Scatter over the butter:
- 7 tablespoons brown sugar
- 3 tablespoons ground cinnamon
Distribute the sugar and cinnamon across the surface, then press lightly so the filling stays in place when you roll.
Step 8: Roll It Up and Slice
Starting along a long edge, roll the rectangle into a log. Keep it snug enough to hold a spiral, but avoid stretching or squeezing the soft dough.
Set the log seam-side down so it stays closed while you portion it.
A strand of clean, unflavored dental floss can make neat cuts without pressing the log flat.
Mark the log into 12 equal portions, then slice with floss or a sharp serrated knife using a gentle sawing motion.
For 9 larger rolls, divide into fewer pieces and allow extra room in the pan. Larger portions may also need more baking time.
Step 9: Arrange and Rise Again (Second Rise)
Arrange the rolls in a greased or parchment-lined rectangular pan, or divide them between two round pans. Leave small gaps so they have room to expand.
Cover the shaped rolls and let them rise again for about 30 minutes, continuing longer if they still look compact.
They should look visibly puffier, with the gaps between them becoming smaller. This second rise helps the spirals bake into a softer crumb.
Step 10: Bake to Golden Perfection
As the rolls approach that stage, preheat the oven to 350°F (175°C). Remove any dough from the oven before switching it on.
Uncover and bake for about 20 minutes, using the condition of the center rolls to decide when they are ready.
The kitchen will smell of cinnamon as they bake, but aroma alone is not a reliable sign that the centers are cooked.
Begin checking at around 18 minutes. Look for lightly golden tops and fully baked centers without wet, raw dough; continue baking if needed.
Step 11: Make the Icing
While the rolls bake, stir together the ingredients for the simple glaze.
- Measure 4–5 tablespoons powdered sugar into a small bowl.
- Measure 2 tablespoons milk, adding it gradually rather than all at once.
Stir until smooth, using only enough milk to reach your preferred drizzle. Add a little more powdered sugar if it becomes thinner than you want.
These amounts make a light milk glaze, not a thick frosting. A drop of vanilla or a pinch of pumpkin spice is optional.
Step 12: Glaze and Serve Warm
Let the baked rolls stand for about 5 minutes, then drizzle the glaze across the tops.
On warm rolls, the thin icing flows into some of the spirals. For a more visible finish, let the rolls cool a little longer before glazing.
Serve the rolls while gently warm, with one of these simple pairings:
- A cup of freshly brewed coffee
- A glass of milk
- Tea with a flavor that complements cinnamon
- Nothing extra—the filled and glazed roll is a treat on its own
Tips for the Best Pumpkin Cinnamon Rolls
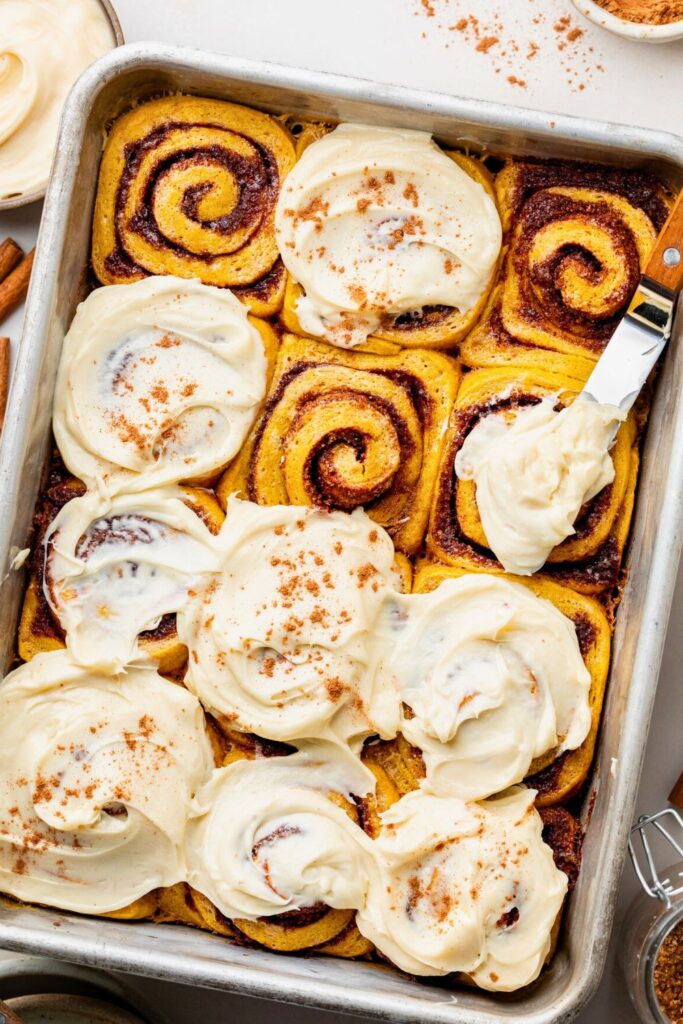
Watch the ingredient temperatures, dough softness, rise volume, and spiral shape to prevent the most common enriched-dough problems.
Keep the Milk Warm, Not Hot
For this mixing method, aim for 100–110°F (38–43°C) before combining the milk with the other ingredients.
A thermometer gives a more dependable reading than a finger test. If the milk is too hot, wait for it to cool rather than adding the yeast immediately.
Add Extra Flour Sparingly
Pumpkin dough can feel tacky while still being workable. A soft texture at this stage helps keep the finished rolls tender.
Use light dustings on the counter and tablespoon-sized additions in the bowl only when needed. Stop adding flour once you can handle the dough.
Give the Dough a Gently Warm Place to Rise
A draft-free counter is usually enough. If using the oven simply as a sheltered space:
- Keep it switched off and comfortably warm, not hot; do not proof this dough in a 150°F oven.
- Leave the dough covered and check its expansion. Take it out before preheating the oven for baking.
Slice Without Flattening the Spirals
Unflavored floss slips through the dough with less downward pressure than a blunt knife. A sharp serrated knife is another option.
To cut with floss:
- Slide the strand beneath the log where you want the cut.
- Bring both ends upward and cross them over the dough.
- Pull the ends in opposite directions to slice through cleanly.
Let the Shaped Rolls Puff Up
The suggested 30-minute second rise is a starting point, not a deadline. Wait until the rolls visibly expand.
Baking compact, under-risen rolls can leave the centers dense even when the tops have colored.
Serving Suggestions: How to Enjoy Pumpkin Cinnamon Rolls
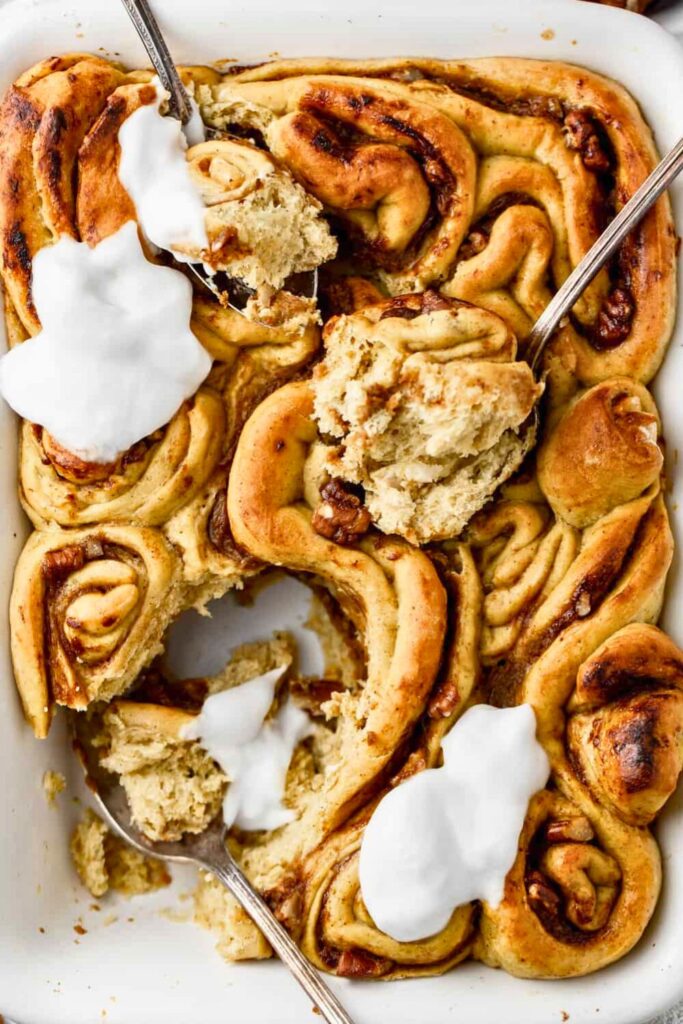
Enjoy the rolls gently warm on their own, or make them part of a brunch spread with drinks, fruit, and savory dishes.
Serve Them Gently Warm
A little warmth softens the spiral filling and brings out the cinnamon aroma. Let freshly baked rolls cool enough to handle comfortably.
Drinks to Pair With Them
- Coffee, either black or with milk
- Chai or another spiced tea
- Milk or a preferred milk alternative
Add Them to a Brunch Table
One tray works as the sweet part of a breakfast that also includes savory dishes and fresh fruit.
- Scrambled or baked eggs
- Cooked bacon or breakfast sausage
- A bowl of sliced seasonal fruit
- Roasted sweet potatoes
Set the rolls beside the other dishes so guests can choose their own mix of sweet and savory.
Make a Dessert-Style Serving
For a richer finish, try one of these additions:
- A small drizzle of caramel sauce
- A scoop of vanilla ice cream
- A scattering of chopped nuts
Keep extra toppings modest if you want the pumpkin dough and cinnamon filling to remain the main flavors.
Let Everyone Help With the Finishing Touches
The shaped spirals and orange-tinted dough make this a fun baking project to share, without assuming every child will prefer the same toppings.
Choose jobs that match each helper’s age and keep hot pans and the oven under adult control.
- Children can help scatter the filling or drizzle cooled rolls, with supervision. Do not taste raw dough containing flour and eggs.
- If desired, tint a little icing orange with food coloring for a seasonal decoration.
Store the Rolls for Another Day
Allow leftovers to cool, then package them so the exposed edges do not dry out.
- Because this version uses a thin milk glaze, refrigerate the glazed rolls in a covered container and use within 3–4 days.
- Warm an individual roll briefly in the microwave, starting with 15–20 seconds and checking before heating further. The icing may melt into the surface.
For freezing, wrap cooled baked rolls well and use within about 2 months for quality. Thaw in the refrigerator, then warm. If freezing shaped, unbaked rolls instead, thaw in the refrigerator, allow them to become puffy during their final rise, and bake them fully; unbaked dough is not ready to eat after reheating.
Final Thoughts: Fall Baking Never Tasted This Good
These pumpkin cinnamon rolls combine a tender enriched dough, a buttery brown-sugar spiral, and a light milk glaze.
Keep the dough slightly tacky, let both rises finish by appearance, and confirm the center rolls are baked before removing the pan.
Plan this recipe for an unhurried morning, then bring the glazed rolls to the table with coffee, tea, or milk.
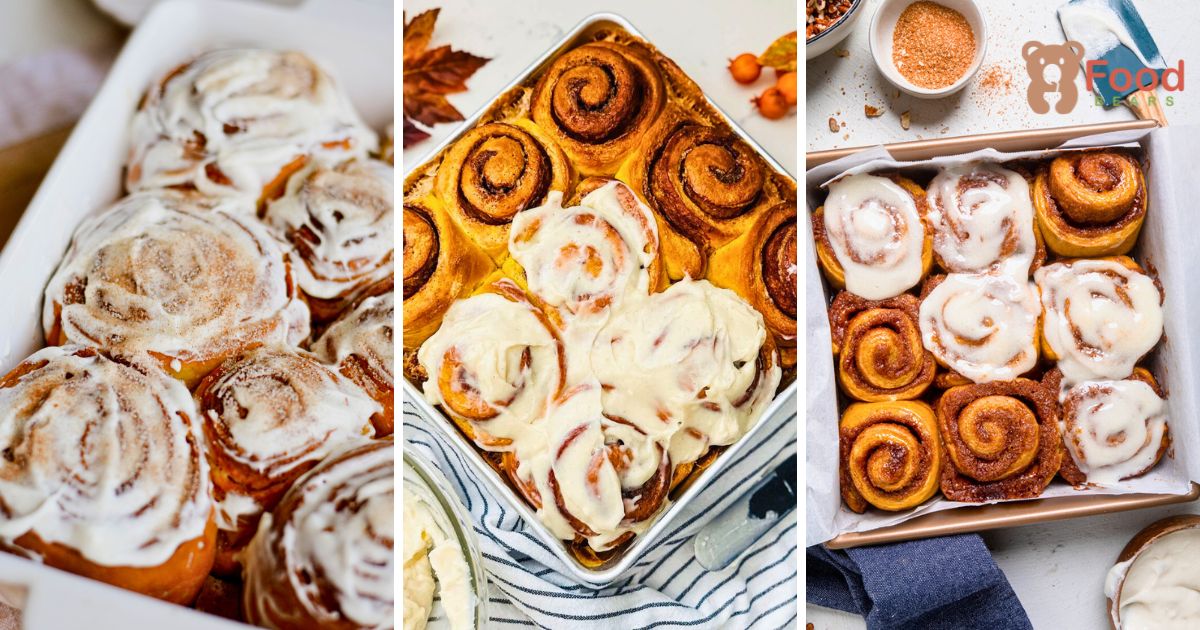
Pumpkin Cinnamon Rolls
More Fall Recipes You’ll Love
Continue your fall baking with these related pumpkin recipes:
- 🍞 Best Pumpkin Bread Recipe for Busy Moms
A spiced pumpkin loaf mixed in two bowls, with optional chocolate chips or nuts. - 🍫 Easy & Fudgy Pumpkin Brownies
Flourless pumpkin and nut-butter brownies that bake, cool, and chill before slicing. - 🍁 Stunning Pumpkin Scones Recipe for Fall
Cold-butter pumpkin scones with crisp edges and a sweet finishing glaze.

Dana Brooks is a home-cooking writer at Feastbears, where she shares easy family recipes, cozy dinners, quick desserts, and beginner-friendly kitchen tips. Her goal is to make everyday cooking feel simple, warm, and enjoyable for busy home cooks.


