These fudgy pumpkin brownies combine cocoa, chocolate chips, real pumpkin, and smooth nut butter in a rich one-bowl dessert.
The flourless batter gets moisture from pumpkin and body from almond or peanut butter. Choose labels and a preparation area that suit your dietary needs if avoiding gluten or dairy.
Once baked and chilled, the brownies have a dense chocolate texture that cuts neatly into shareable squares.
Cocoa remains the main flavor, while the pumpkin contributes softness and subtle earthy sweetness. The exact balance changes with the purée, nut butter, and chocolate you use.
Mix everything in one bowl, spread it in an 8-inch square pan, and bake until the edges set and the center is softly cooked.
Plan for cooling and refrigeration before slicing, since chilling is what helps this soft flourless slab hold clean edges.
Why You’ll Fall in Love with These Pumpkin Brownies

Instead of a flour-based crumb, this recipe uses pumpkin for moisture and smooth nut butter for richness, producing a dense, chocolate-forward brownie.
⭐ 1. A Flourless Take on Brownies
The base does not call for wheat flour or dairy milk. Check the cocoa, nut butter, chocolate chips, and other labels if avoiding gluten or dairy, and take cross-contact precautions where needed. The recipe still contains nuts and added sweeteners.
⭐ 2. Pumpkin for a Softer Texture
Plain pumpkin purée blends into the cocoa mixture and helps keep the brownies moist. Chocolate is the main flavor, though the pumpkin is not guaranteed to disappear completely.
⭐ 3. One Bowl for the Batter
Mix the base, fold in the chips, and spread it into the prepared pan. A bowl and spatula handle the batter without a separate wet-and-dry mixing setup.
⭐ 4. Easy to Portion and Share
Once chilled, the slab can be cut into squares for a dessert tray. Let guests know which nut butter you used rather than assuming the recipe suits every dietary need.
⭐ 5. A Dense, Chocolate-Rich Finish
Without a flour-based crumb, the brownies stay soft and fudgy. Cooling and refrigeration help them become firm enough to slice more cleanly.
Ingredients You’ll Need

Measure every ingredient before mixing, and stir natural nut butter until its oil is fully blended. A smooth, consistent nut butter mixes into the pumpkin more evenly.
| Ingredient | Measurement | Purpose |
|---|---|---|
| Pumpkin Puree | 1 cup | Use plain purée for moisture, without pie-filling sugar or spices. |
| Nut Butter (almond or peanut) | 1/2 cup | Choose smooth, well-stirred nut butter; this ingredient introduces a nut allergen. |
| Maple Syrup or Honey | 1/3 cup | Sweetens the batter; maple syrup is the option if avoiding honey. |
| Unsweetened Cocoa Powder | 1/2 cup | Supplies the main chocolate flavor; mix until no dry cocoa remains. |
| Baking Soda | 1/2 teaspoon | Provides a little lift in the dense, flourless batter. |
| Sea Salt | 1/4 teaspoon | Balances the sweetener and chocolate; check whether the nut butter is salted. |
| Vanilla Extract | 1 teaspoon | Rounds out the cocoa flavor. |
| Dairy-Free Chocolate Chips | 1/3 cup + extra for top | Fold ⅓ cup into the batter and use a few more on top; check labels for dietary suitability. |
📝 Ingredient note: use plain pumpkin purée, not pumpkin pie filling, so the added sugar and spice levels remain under your control.
🧰 Equipment for Mixing, Baking, and Chilling
| Tool | Use |
|---|---|
| Large Mixing Bowl | Holds the pumpkin, nut butter, cocoa, and remaining batter ingredients. |
| Rubber Spatula or Spoon | Scrapes the bowl and spreads the thick batter into the pan. |
| Measuring Cups & Spoons | Keeps the ingredient ratios consistent from batch to batch. |
| 8×8-inch Baking Pan | Keeps the batter depth close to the recipe’s baking guidance. |
| Parchment Paper (optional) | Leave an overhang for lifting after the slab has chilled. |
| Oven | Heat to 350°F (175°C) before the pan goes in. |
| Refrigerator | Chills the cooled brownies so they are easier to slice. |
Step-by-Step: How to Make Pumpkin Brownies from Scratch
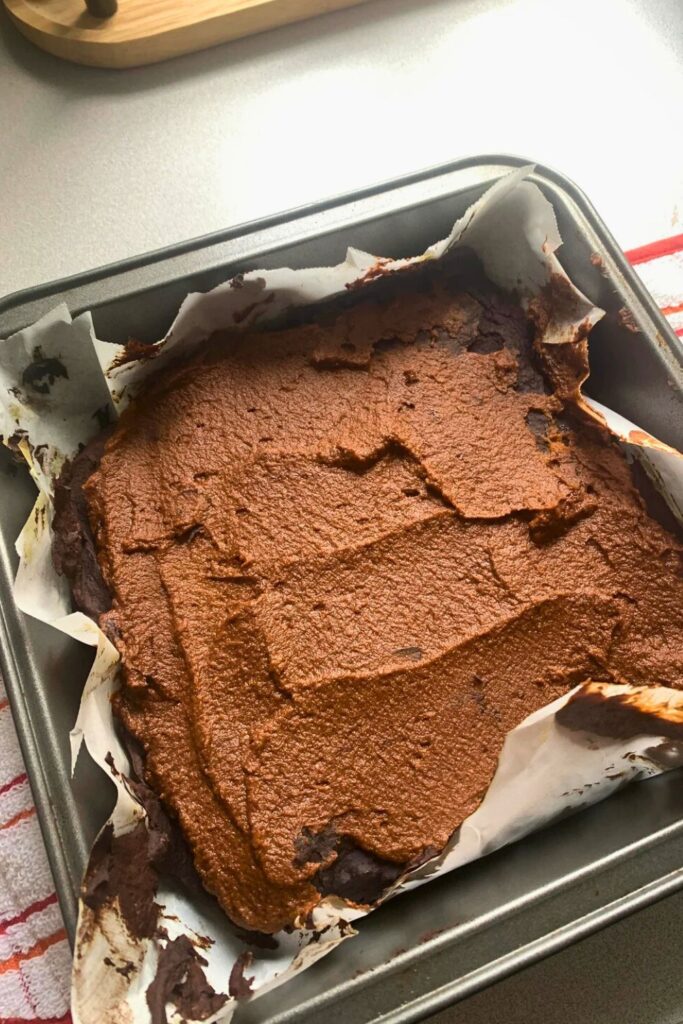
The method has six stages: prepare the pan, stir the one-bowl batter, add chocolate chips, spread, bake, then cool and chill.
Set aside an 8-inch square pan, a sturdy spatula, and enough refrigerator space for the cooled brownies before you start.
Step 1: Preheat and Prep
Preheat the oven to 350°F (175°C) before making the batter.
Set out an 8-by-8-inch baking pan. Keeping to this size helps the batter depth match the baking guidance.
Pan tip: line it with parchment, leaving overhang on two sides for lifting. Alternatively, lightly grease the pan with coconut oil or nonstick spray, knowing removal may be less tidy.
Check that the parchment sits flat in the corners so you can spread the thick batter evenly.
Step 2: Stir the Batter in One Bowl
The batter comes together by stirring rather than beating air into it.
Use a large bowl and a sturdy spatula or spoon. Scrape the sides and bottom as you mix so cocoa does not collect in dry patches.
Add the following ingredients to the bowl:
- 1 cup plain pumpkin purée
- ½ cup smooth almond or peanut butter, stirred before measuring
- ⅓ cup maple syrup, or honey as an alternative
- ½ cup unsweetened cocoa powder
- ½ teaspoon baking soda
- ¼ teaspoon sea salt
- 1 teaspoon vanilla extract
Stir until the ingredients form a thick, evenly colored chocolate batter.
Break up the cocoa lumps as you go, turning the mixture from the bottom of the bowl. Well-stirred nut butter is easier to incorporate than a dry scoop from the bottom of a separated jar.
The finished batter should be thick enough to spread rather than pour freely, with no powdery pockets or streaks of pumpkin.
What the ingredients contribute:
Thorough mixing distributes the cocoa, sweetener, and baking soda evenly through the moist ingredients.
Pumpkin supplies moisture, nut butter adds fat and body, and cocoa provides the chocolate base. The combination does not need a flour mixture to be folded in afterward.
Step 3: Add Chocolate Chips
Once the base is smooth, add the chocolate pieces.
Fold in ⅓ cup dairy-free chocolate chips. Use a product that suits any dietary requirements you are following.
Turn the batter gently until the chips are dispersed, rather than concentrated in one part of the bowl.
For an optional change in flavor or texture:
- Fold in some chopped nuts for a little crunch.
- Add a small amount of cinnamon or pumpkin spice for a warmer spice note.
- Use a mixture of dark and semisweet chips, checking both labels if avoiding dairy.
The plain cocoa-and-chip version is also complete as written, so extras are not necessary.
Finishing note: keep a few additional chocolate chips ready for the top of the pan.
Step 4: Pour and Spread
Transfer the finished batter to your prepared baking pan.
Scrape the bowl well and spread the batter into the corners. Smooth the top to an even thickness so one side does not bake much faster than the other.
Scatter a few extra chocolate chips over the surface before baking.
The topping adds visible chocolate pieces, though this flourless batter will not necessarily develop the same crackly crust as a traditional brownie.
Step 5: Bake It Just Right
Bake at 350°F (175°C) for about 25–30 minutes.
Start checking at 25 minutes. The edges should be set and the center no longer wet; a toothpick inserted away from a melted chip should show a few moist crumbs rather than liquid batter.
The middle can remain soft, but it should be baked through. Continue in short increments if the center is still wet, and avoid baking until every crumb is dry.
Checking tip: chocolate chips can leave melted chocolate on a tester. Check another spot if you cannot tell whether you have hit a chip or unbaked batter.
Oven performance and pan material affect the timing. The absence of flour does not make the brownies immune to drying out, so use the texture checks as well as the timer.
Step 6: Let Them Cool (Important!)
Letting the brownies settle is part of the recipe, not just an optional serving preference.
Place the pan on a rack and let the brownies cool before attempting to lift or slice them.
Do not assume they are cool after a fixed 20–30 minutes; the pan and room temperature make a difference. Once no longer hot, cover and refrigerate for at least 30 minutes, keeping total time out of refrigeration within 2 hours.
Chilling firms the soft batter and chocolate, making the slab less fragile when you cut it.
If it still bends or smears heavily, give it more refrigerator time before portioning.
Lift using the parchment handles, if fitted, and cut with a sharp knife. Wipe the blade between slices for cleaner edges.
Serve the squares chilled, or let an individual portion soften briefly before eating.
Tips for the Best Pumpkin Brownies
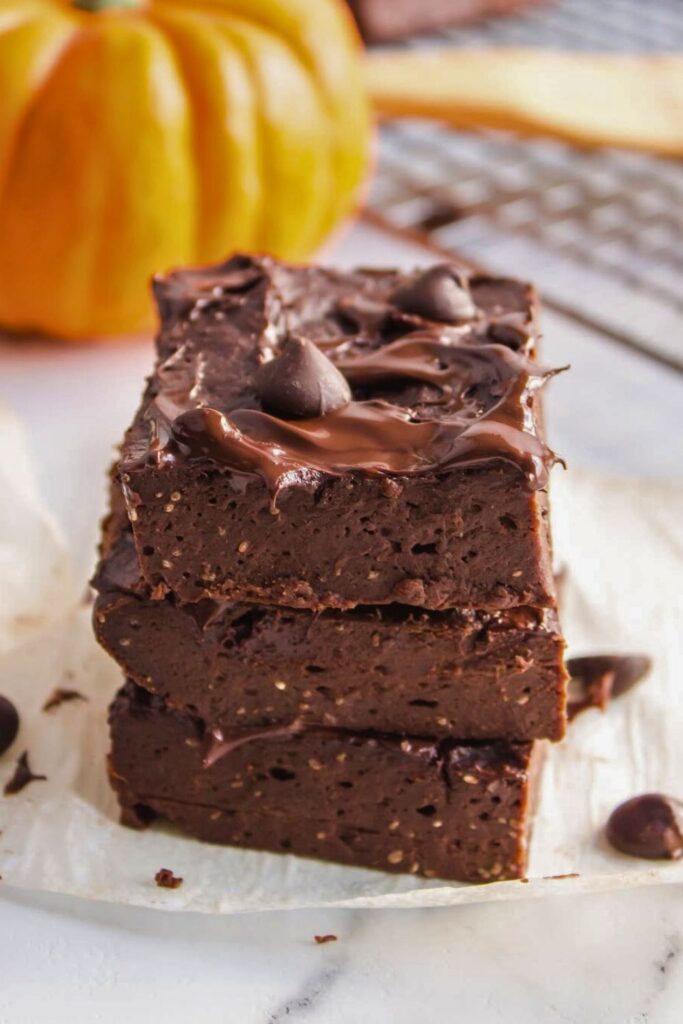
Consistent pumpkin purée, thoroughly stirred nut butter, fully incorporated cocoa, and enough chilling time make this simple batter easier to bake and slice.
🎃 1. Allow Enough Refrigerator Time
After cooling, cover and chill the brownies for at least 30 minutes before cutting. Store leftovers in the refrigerator in a covered container and use within 3–4 days.
The cold helps the soft squares become firmer and easier to portion. It does not compensate for a center that was left unbaked.
Why wait? a hot slab is fragile. Cooling first and chilling afterward gives cleaner slices with less batter sticking to the knife.
🍫 2. Choose Cocoa and Chips You Enjoy
Use unsweetened cocoa powder for the base and dairy-free semisweet or dark chips as listed. Cocoa color varies by processing, so darker color alone is not a quality guarantee.
Optional texture change: combine mini and regular chips, keeping the total folded-in amount at ⅓ cup.
🥄 3. Mix Until the Cocoa Is Fully Incorporated
There is no wheat flour here to overdevelop, but the batter still needs even mixing. Scrape the bowl and stop once there are no dry patches or streaks of nut butter.
💡 4. Use Smooth, Well-Stirred Nut Butter
Almond butter gives a different flavor from the more recognizable peanut-butter note. Use a smooth variety and stir any separated oil back into the jar before measuring.
Texture check: a dry, compact scoop or very chunky nut butter can make the batter harder to spread and change the finished crumb.
🌱 5. Add Spices Only If You Want Them
A pinch of cinnamon, nutmeg, or pumpkin spice adds a seasonal accent. The base recipe is chocolate-forward without those additions.
Serving Suggestions: How to Enjoy Pumpkin Brownies
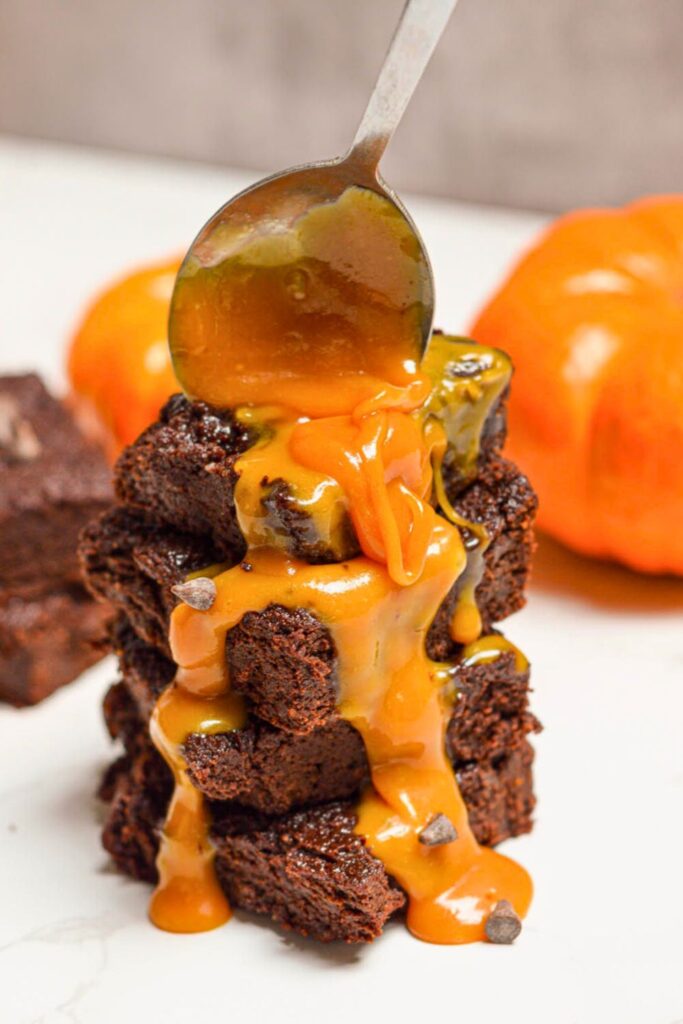
Enjoy a chilled square on its own, briefly warm an individual portion, or add a creamy topping when serving it as a plated dessert.
🍨 1. Rewarm a Portion and Add Ice Cream
Microwave a cut square briefly, starting with 10–15 seconds. Add coconut-based vanilla ice cream or a suitable dairy-free frozen dessert, with a little maple syrup or nut butter if desired.
☕ 2. Pair With a Warm or Spiced Drink
Try chai, hot cocoa, or a pumpkin-flavored coffee. Use a suitable milk alternative if you want the whole serving to remain dairy-free.
🍂 3. Add Coconut Whip and Cinnamon
A spoonful of whipped coconut cream gives a cool contrast to the chocolate. Finish with a light dusting of cinnamon if you like.
🧺 4. Pack a Chilled Portion to Go
Separate squares with parchment and carry them in an insulated bag with an ice pack. Check nut restrictions before packing them for a school or shared snack setting.
🎁 5. Package as a Homemade Chocolate Gift
Use a food-safe box with parchment between pieces. Label the nut ingredients and storage instructions, keep the gift chilled, and avoid presenting it as a universally allergy-safe or low-carb dessert.
Pumpkin Brownie Variations You’ll Want to Try
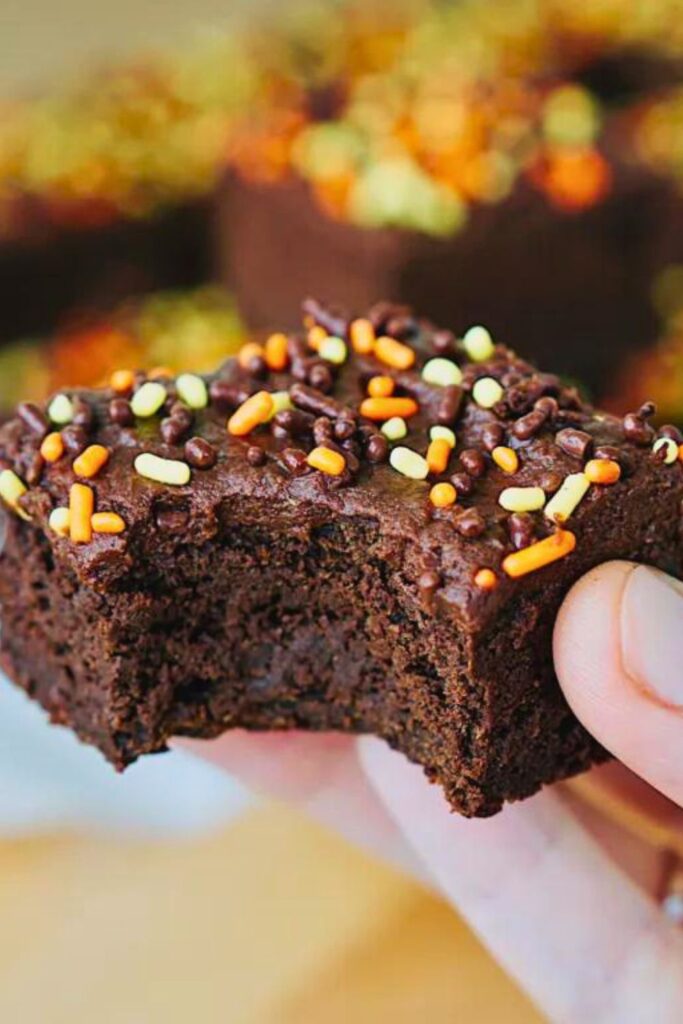
Use the ideas below to adjust the flavor or presentation while keeping in mind that major substitutions can change the batter’s moisture and structure.
| Variation | How to Make It |
|---|---|
| Nutty Pumpkin Brownies | Fold in ¼ cup chopped walnuts or pecans for texture; include these nuts in any allergen note. |
| Pumpkin Spice Brownies | Add ½ teaspoon cinnamon and ¼ teaspoon pumpkin spice for a warmer flavor. |
| Mocha Pumpkin Brownies | Mix in 1 teaspoon instant espresso powder with the cocoa. |
| Swirled Almond Butter Top | Drizzle a little smooth almond or peanut butter over the batter and swirl lightly before baking. |
| Protein-Packed Brownies | Protein powders vary in scoop size and absorbency; adding a scoop and removing cocoa is not a reliable one-for-one swap. Test a small batch if experimenting. |
| Pumpkin Cheesecake Brownies | A cream-cheese swirl changes moisture and baking needs. Use a separately tested swirl mixture rather than assuming any dairy-free cream cheese behaves the same. |
| Chili-Chocolate Kick | Use a small pinch of cayenne for heat; taste preference and pepper strength vary. |
| Double Chocolate Chunk | Replace some or all of the chips with chopped dark chocolate, checking the label if avoiding dairy. |
| Salted Caramel Drizzle | After cooling, add a small drizzle of dairy-free caramel and a light pinch of salt. |
| Mini Pumpkin Brownie Bites | Portion into a lined muffin tin and start checking early; 18–20 minutes is only a starting estimate and size affects doneness. |
Final Thoughts
These flourless pumpkin brownies offer a dense, fudgy alternative to a traditional flour-based brownie, with cocoa and chocolate chips providing the dominant flavor.
Give the batch enough time to bake, cool, and chill completely; rushing the last two stages makes the soft squares harder to portion.
The flavor and firmness will vary slightly with your chosen pumpkin and nut butter, so note which brands give you the result you prefer.
Fudgy Pumpkin Brownies

You May Also Love:
Continue your fall baking with these related pumpkin recipes:
- 🎃 Cozy Pumpkin Cake Recipe Perfect for Fall
A pumpkin cake option for a fall gathering or a shared dessert table. - 🥞 Best Pumpkin Pancakes Recipe for Fall Mornings
Pumpkin pancakes for a warmly spiced breakfast; check the recipe ingredients for your dietary needs. - 🍞 Best Pumpkin Bread Recipe for Busy Moms
A two-bowl pumpkin loaf with optional chocolate chips, nuts, or dried fruit.

Dana Brooks is a home-cooking writer at Feastbears, where she shares easy family recipes, cozy dinners, quick desserts, and beginner-friendly kitchen tips. Her goal is to make everyday cooking feel simple, warm, and enjoyable for busy home cooks.


