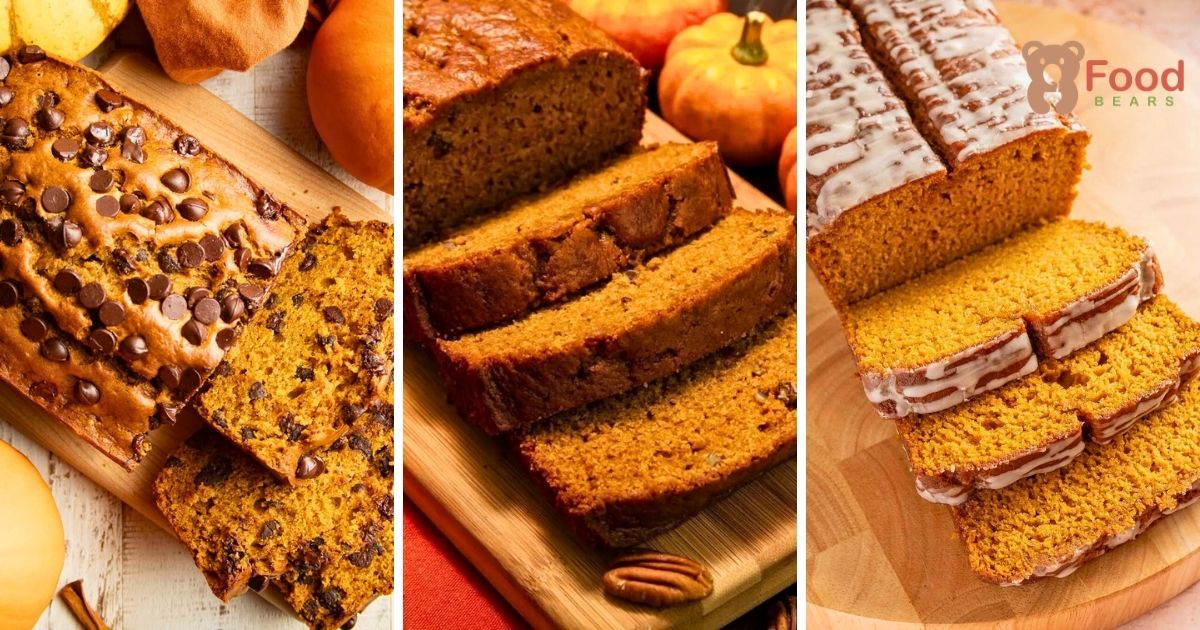
This moist pumpkin bread combines real pumpkin, cinnamon, and nutmeg in a soft quick-bread loaf that requires no yeast or electric mixer.
Plain pumpkin purée and oil keep the crumb tender, while the measured spice blend gives every slice a warm fall flavor.
The instructions walk through accurate measuring, two-bowl mixing, doneness checks, and cooling so beginners and experienced bakers can get consistent results.
Prepare two bowls, a whisk, a spatula, and a lined loaf pan before combining the batter.
🍁 Why You’ll Love This Pumpkin Bread Recipe
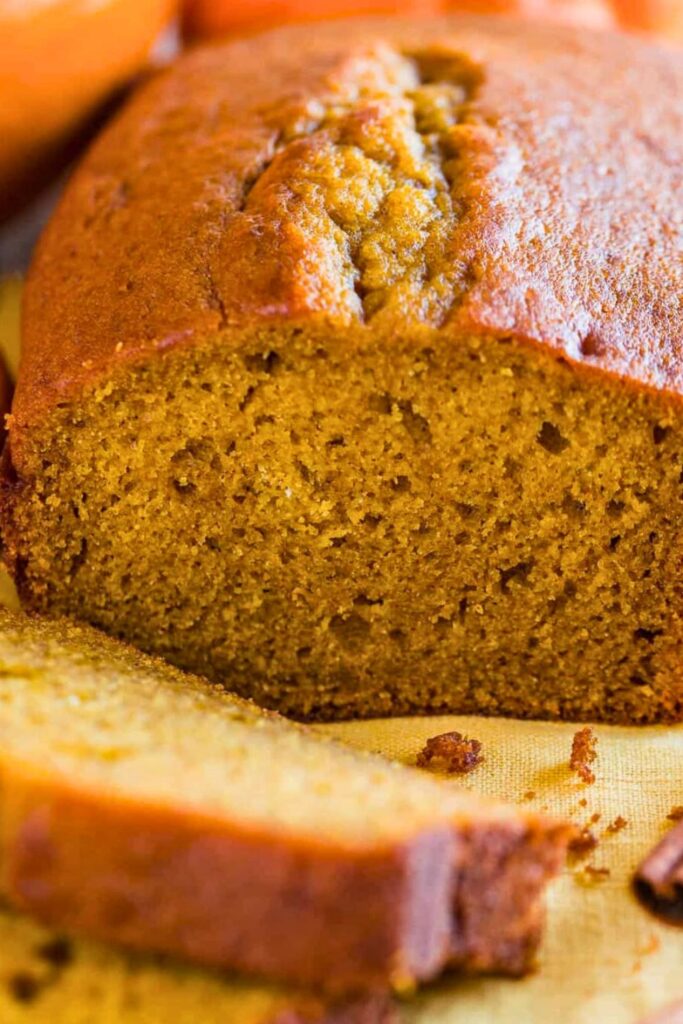
Because the batter is mixed by hand and goes straight into the oven, this loaf is practical for a relaxed weekend bake or an easy make-ahead breakfast.
Pumpkin supplies moisture and body, oil keeps the cooled slices soft, and cinnamon with nutmeg creates the familiar autumn-spice profile.
Here are the features that make it useful to keep in your recipe collection:
- A tender, moist crumb: pumpkin purée and oil help the bread stay soft when the batter is measured and baked carefully.
- Distinct pumpkin flavor: plain purée is part of the main batter rather than just a topping or spice label.
- Two bowls, no electric mixer: whisk the wet and dry ingredients separately, then fold them together.
- Optional mix-ins: add chocolate chips, nuts, or dried fruit, or leave the loaf plain.
- Easy to portion: serve slices now and wrap some for the freezer or a homemade gift.
There is no yeast or rising stage to manage. The key is to measure accurately, avoid prolonged mixing, and check the middle of the loaf before taking it out.
🧾 Ingredients You’ll Need
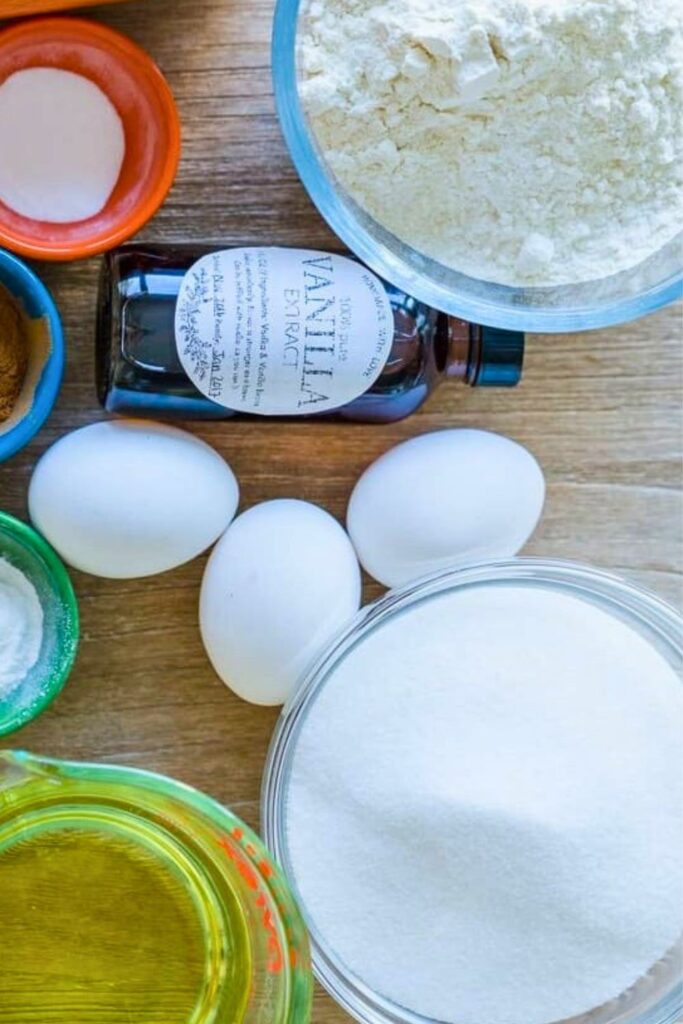
Measure the base ingredients first and keep any chocolate chips, nuts, fruit, or toppings aside until the final folds. This prevents accidental overmixing.
✅ Ingredients for the Pumpkin Loaf
| Ingredient | Measurement | Why It Matters |
|---|---|---|
| All-purpose flour | 1¾ cups (210g) | Weigh 210g or spoon and level the cups; excess flour can make the loaf dry. |
| Baking soda | 1 tsp | Helps raise the batter; whisk evenly into the flour before adding the wet ingredients. |
| Baking powder | ½ tsp | Provides additional lift alongside the baking soda. |
| Salt | ½ tsp | Balances the sweet and warmly spiced ingredients. |
| Ground cinnamon | 2 tsp | Supplies the main spice note in the batter. |
| Ground nutmeg | ¼ tsp | Adds a small, deeper spice accent. |
| Pumpkin puree | 300g (measure by weight) | Measure 300g of plain purée for pumpkin flavor and moisture. |
| Vegetable oil | ⅔ cup | Adds fat and keeps the cooled crumb soft. |
| Granulated sugar | 1¼ cups (250g) | Sweetens the batter; a half brown-sugar substitution changes the flavor. |
| Eggs | 2 large | Helps bind the batter and set its structure during baking. |
| Vanilla extract | 1 tsp | Adds a background vanilla note. |
Optional Extras
- Semisweet, dark, or mini chocolate chips
- Toasted walnuts or pecans, chopped and cooled
- Dried cranberries for a tart-sweet addition
- Pumpkin seeds scattered over the top
📝 Choose plain pumpkin purée, not pumpkin pie filling. Pie filling adds sugar and spices that change the intended balance.
🛠️ Tools to Have Ready
Basic baking equipment is enough. A scale is helpful for the flour and pumpkin, while a spatula makes gentle folding easier.
| Tool | Why You Need It |
|---|---|
| Kitchen scale | Measures flour and pumpkin accurately by weight. |
| 9×5 or 8.5×4.5 loaf pan | Use adequate headroom; a smaller pan may need different timing or a separate pan for excess batter. |
| Mixing bowls (2) | Keep the wet and dry mixtures separate until the folding stage. |
| Whisk + Spatula | Whisk each mixture, then fold and scrape with the spatula. |
| Parchment paper | Leave overhang to lift the loaf after its initial cooling. |
| Baking spray | Coats exposed pan areas to reduce sticking. |
| Toothpick/skewer | Tests the center for raw batter before you remove the loaf. |
| Cooling rack | Supports the loaf while air circulates around it. |
Finishing tip: a light scattering of cinnamon sugar or pumpkin seeds adds texture to the top before baking.
👩🍳 Step-by-Step: How to Make Pumpkin Bread from Scratch
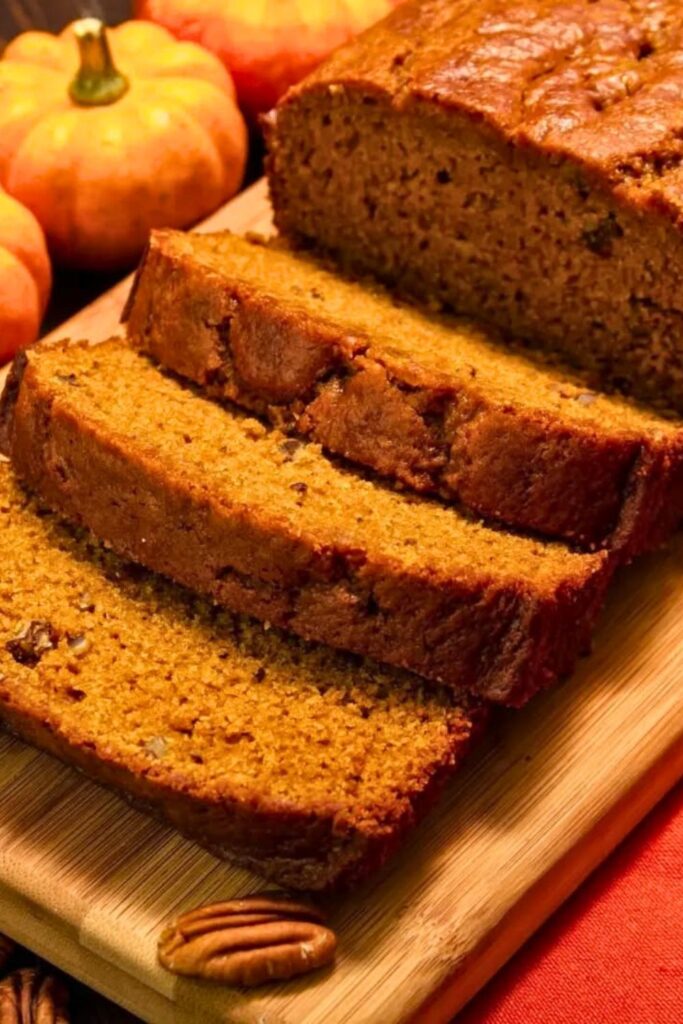
Whisk the dry ingredients and pumpkin mixture in separate bowls, then fold them together with a spatula only until the flour disappears.
Accurate flour measurement and a reliable center test matter most. Begin checking near the lower end of the baking range because pans and ovens vary.
Step 1: Preheat and Prep Like a Pro
Preheat the oven to 350°F (175°C) so it is ready when the batter goes into the pan.
Prepare the loaf pan before mixing the batter.
The listed options are:
- A 9-by-5-inch loaf pan, the roomier choice
- An 8½-by-4½-inch loaf pan, with less capacity
The smaller pan can produce a taller loaf, but pan capacity varies. Leave room for expansion and do not force excess batter into a smaller pan; bake any extra separately and check it earlier.
Line the bottom and long sides with parchment, leaving enough overhang to lift the bread after its initial cooling.
Lightly coat any exposed areas of the pan with baking spray to help the loaf release.
Step 2: Mix the Dry Ingredients
Measuring the flour carefully helps prevent a dry or dense loaf. A packed cup can contain considerably more flour than a lightly filled one.
Place the following flour amount in a large bowl:
- 1¾ cups (210g) all-purpose flour
Measuring tip: weighing is the simplest way to match 210g. If using cups, follow these steps:
- Stir or fluff the flour in its container first.
- Spoon it lightly into the measuring cup without pressing down.
- Sweep a straight edge across the top to level it.
Avoid packing the cup by pushing it directly into a dense bag of flour.
Add the remaining dry ingredients:
- 1 teaspoon baking soda
- ½ teaspoon baking powder
- ½ teaspoon salt
- 2 teaspoons ground cinnamon
- ¼ teaspoon ground nutmeg
Cinnamon and nutmeg form the base seasoning. For a slightly different spice profile, you can include:
- ¼ teaspoon cardamom
- A small pinch of cloves, ginger, or allspice
- Or 2–3 teaspoons pumpkin pie spice in place of the cinnamon and nutmeg, rather than in addition to them
Whisk until the spices and raising agents are evenly distributed, then set the bowl aside.
Step 3: Mix the Wet Ingredients
Pumpkin supplies both flavor and moisture to the wet mixture. Use thick plain purée rather than a watery homemade batch.
In a second bowl, combine:
- 300g plain pumpkin purée, measured by weight
- ⅔ cup vegetable oil, or the same volume of melted, cooled butter
- 1¼ cups (250g) granulated sugar
- 2 large eggs
- 1 teaspoon vanilla extract
Whisk until the eggs are fully incorporated and the mixture is smooth, without separate streaks of oil.
Choosing Oil or Butter
- Vegetable oil gives a neutral flavor and helps the crumb stay soft when cool.
- Melted butter adds a butter flavor but changes the texture and firms as it cools. Let it cool before combining with the eggs.
For a brown-sugar note, you can replace half the granulated sugar with brown sugar. Keep the base quantity consistent; larger substitutions can change moisture and texture.
If children are helping, let them stir under supervision. Keep raw batter containing flour and eggs for baking, not tasting.
Step 4: Combine Wet and Dry Mixtures (Gently!)
Once the wet ingredients meet the flour, use a gentle hand rather than beating the batter smooth.
Pour the pumpkin mixture into the bowl of dry ingredients.
Switch from a whisk to a spatula or wooden spoon.
Fold from the bottom of the bowl upward, turning the bowl as you go and scraping any flour from the sides.
Stop as soon as no dry flour pockets remain. A slightly uneven-looking batter is fine; it does not need extended mixing.
Mixing too long can toughen the crumb.
Use only enough folding to combine the ingredients, especially if you are about to add chips or nuts.
Step 5: Add Optional Mix-Ins (Totally Up to You)
The plain batter is complete as it stands, but a small addition can change the flavor of the loaf.
Choose an option such as:
- ¾ cup chocolate chips, using dark, semisweet, or mini chips
- ½ cup chopped toasted walnuts or pecans
- ¼ cup dried cranberries
- A scattering of pumpkin seeds reserved for the top
Fold mix-ins through during the last few turns of the spatula. Choosing one main addition helps avoid overloading the batter.
For a straightforward pumpkin-and-spice loaf, leave out the extras.
Step 6: Transfer Batter to the Pan
Scrape the batter into the prepared loaf pan, leaving enough room for it to rise.
Level the surface gently with a spatula so the center and ends start at a similar depth.
Give the pan a light tap on the counter to settle any larger air pockets; there is no need to bang it repeatedly.
If desired, add cinnamon sugar or pumpkin seeds now, keeping the topping in a light, even layer.
Step 7: Bake It Right
Bake at 350°F (175°C) for about 55–65 minutes.
Begin checking at 50 minutes. Pan size, pan material, and oven temperature can all change the time needed.
Use several signs together to judge whether the loaf is ready:
- The top has risen and taken on a browned color.
- The center feels set rather than wet or loose when gently checked.
- A toothpick or skewer inserted into the center comes out clean or with a few moist crumbs, not raw batter.
If the surface darkens too quickly, cover it loosely with foil and continue baking until the middle is cooked. A brown top alone does not mean the loaf is done.
Step 8: Cool Before Slicing
Remove the finished loaf from the oven and set the pan on a wire rack.
Let it rest in the pan for about 15–20 minutes so it becomes easier to handle.
Use the parchment overhang to lift it out carefully, then place the loaf directly on the rack.
Allow it to cool completely before slicing for a cleaner, more stable crumb.
If you prefer a warm serving, rewarm a slice after the loaf has cooled rather than cutting into a fragile, hot center.
🍞 Bonus: Storing & Serving Tips
Once cooled, wrap the bread or portion it into slices according to the storage guidance below.
| Storage Option | Shelf Life | Tip |
|---|---|---|
| Room Temperature | 2–3 days | For a plain loaf, cool fully and keep airtight in a cool, dry place; refrigerate in warm or humid conditions. |
| Fridge | 3–4 days | Wrap closely or use an airtight container; refrigerate any loaf with a perishable topping or filling. |
| Freezer | Up to 3 months | Wrap slices individually, seal in a freezer container, and thaw only what you need. |
To rewarm: microwave a slice briefly, starting with 10–15 seconds, and check before adding more time.
🎃 Fun Pumpkin Bread Variations to Try

Chocolate, toasted nuts, dried fruit, streusel, or pepitas can change the loaf without altering the basic method. Flour and egg substitutions need a tested approach because they affect structure.
Use this table as a guide to variations and their limitations:
| Variation | What to Add | Flavor Profile |
|---|---|---|
| Chocolate Chip Pumpkin Bread | ½–¾ cup semi-sweet or dark chocolate chips | Chocolate pockets complement the pumpkin and warm spice. |
| Pumpkin Nut Bread | ½ cup toasted walnuts or pecans | Adds toasted flavor and a crunchy contrast to the soft crumb. |
| Cranberry Pumpkin Bread | ⅓ cup dried cranberries or cherries | Brings tart-sweet pieces; choose ¼–⅓ cup rather than combining several heavy additions. |
| Pumpkin Cream Cheese Swirl | Swirl in sweetened cream cheese before baking | Adds a creamy contrast, but swirl quantity changes baking needs; use a tested swirl formula and refrigerate the finished loaf. |
| Pumpkin Streusel Bread | Top with cinnamon oat or brown sugar streusel | A prepared streusel adds a crumbly top; watch for early browning. |
| Gluten-Free Pumpkin Bread | Baking-style 1:1 gluten-free flour blend; follow the blend’s guidance | Use a baking-style 1:1 gluten-free blend if experimenting; results vary and all ingredients and cross-contact controls must suit the dietary need. |
| Vegan Pumpkin Bread | Use oil and an appropriate egg replacement in a tested vegan adaptation | An egg replacement changes structure; a tested vegan formula is more dependable than an unspecified flax-egg swap. |
| Pumpkin Seed Crust | Sprinkle raw pepitas on top before baking | A light scattering of pepitas adds a crisp, nutty finish. |
✨ Mixing reminder: fold additions in at the end and stop once they are distributed. Extra stirring will not improve the texture.
🎁 How to Turn This Pumpkin Bread into a Homemade Gift
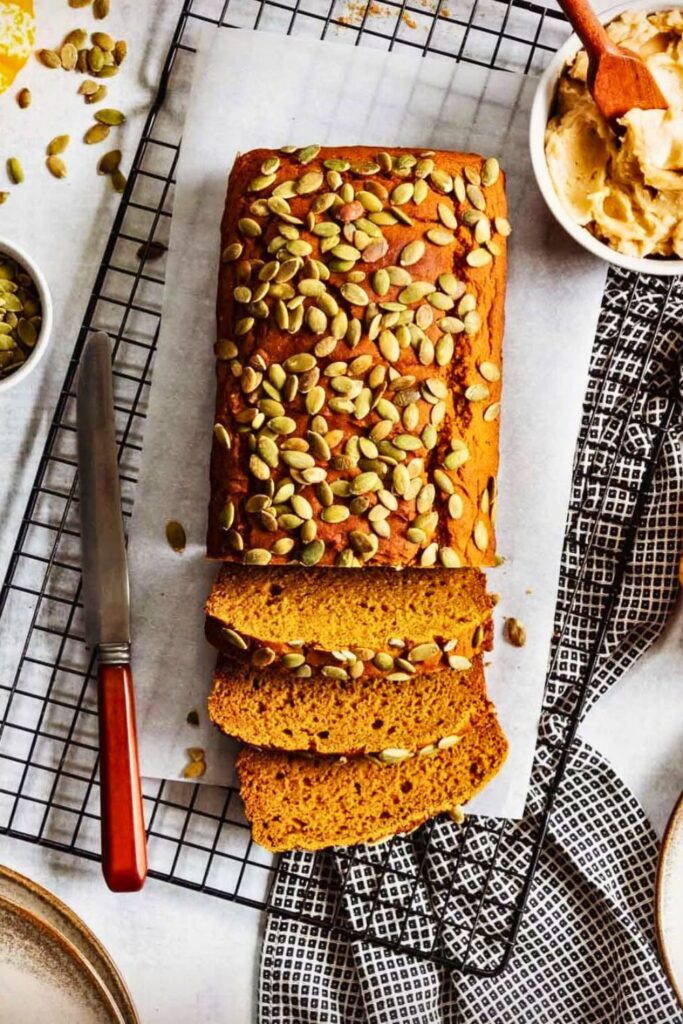
Fully cooled pumpkin bread is easy to wrap and share as a homemade gift. Use food-safe packaging and include the baking date, storage guidance, and relevant allergens.
🧡 Packaging a Gift Loaf
- Bake close to the day of gifting so the recipient has time to enjoy it within the storage window.
- Cool it completely before wrapping. Trapped steam can make the surface damp and soften the crumb.
- Choose food-safe wrapping:
- For a simple presentation, wrap in food-safe parchment and secure it with twine or ribbon; add an outer airtight layer for storage.
- For a boxed gift, use a food-safe bakery bag or box and include a handwritten label.
- Include a clear label with:
- The recipe name, including any additions such as chocolate chips or walnuts
- The baking date and relevant allergens, including wheat and eggs
- Storage guidance, such as refrigerate and use within 3–4 days, or freeze for longer keeping
- Small additions to the gift:
- A separately packed butter or cream spread, kept refrigerated as appropriate
- A small seasonal decoration kept separate from the food
- A copy of the recipe or a link so the recipient can bake it again
🎉 Occasions for a Homemade Loaf
- A thank-you for a teacher or neighbor
- A Thanksgiving or Friendsgiving host gift
- Fall shower favors when ingredients suit the guests
- A housewarming food basket
- A small gift for a friend or coworker
🎀 Mini-loaf option: smaller pans can make several gifts, but they need earlier doneness checks. Do not use the full-size loaf’s baking time unchanged.
🍂 Final Thoughts
This pumpkin bread stays approachable from start to finish: measure precisely, mix the two bowls separately, fold gently, and bake until the center is completely set.
Serve cooled slices with coffee or tea, and freeze individually wrapped portions when you want an easy breakfast or snack later.
With plain pumpkin purée and pantry baking staples, you can prepare a moist, warmly spiced loaf without complicated equipment.
Moist Pumpkin Bread
🍁 You May Also Love:
Continue your fall baking with these related pumpkin recipes:
- 👉 Tasty Fall Pumpkin Roll Recipe You Must Try
A rolled pumpkin dessert with a creamy filling for a fall celebration. - 👉 Cozy Pumpkin Cake Recipe Perfect for Fall
A pumpkin cake to consider when you want a dessert for sharing. - 👉 Best Pumpkin Pancakes Recipe for Fall Mornings
Pumpkin pancakes with warm spice for a change from your usual breakfast.

Dana Brooks is a home-cooking writer at Feastbears, where she shares easy family recipes, cozy dinners, quick desserts, and beginner-friendly kitchen tips. Her goal is to make everyday cooking feel simple, warm, and enjoyable for busy home cooks.


