Small pieces of chicken turn crisp at the edges before being coated in a shiny honey-garlic glaze.
Honey brings sweetness, fresh garlic adds depth, lemon keeps the sauce lively, and sriracha supplies adjustable warmth.
Searing the chicken in batches prevents steaming; returning it to the skillet finishes the centers while the sauce thickens around each piece.
Serve the bites as a rice-bowl dinner or a shareable appetizer, adjusting the chile to suit the people at the table.
The method below rewrites the original recipe clearly without changing its main ingredients or cooking sequence.
Why You’ll Love These Chicken Bites
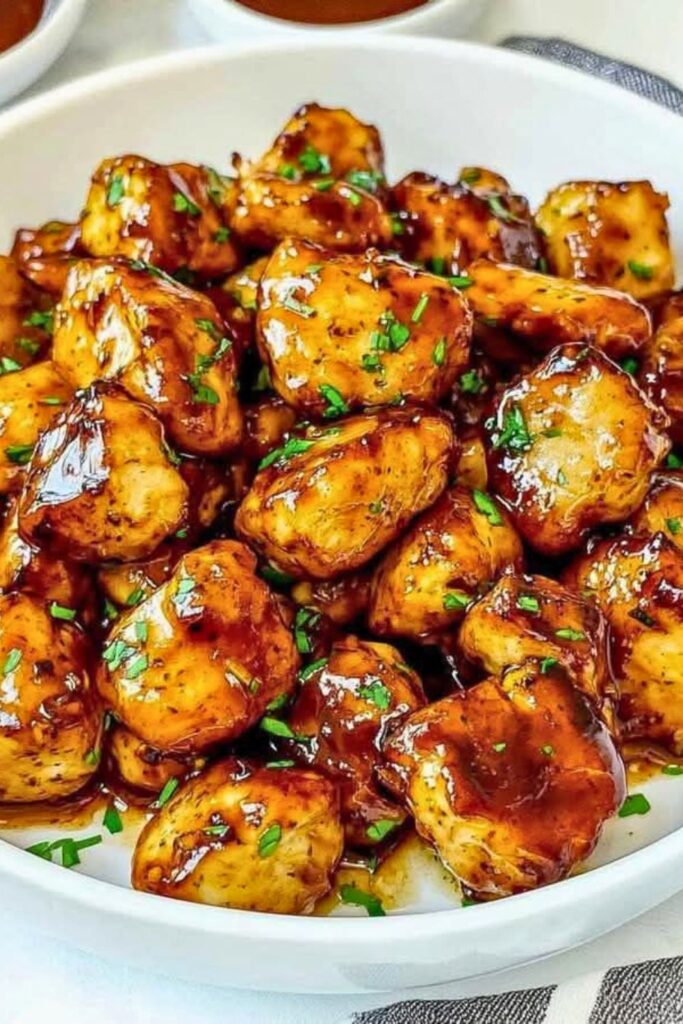
These honey garlic chicken bites combine fast skillet cooking with a balanced glaze that works for both dinner and entertaining.
1. Ready in about 30 minutes
Allow about 25 to 30 minutes for cubing, seasoning, coating, batch searing, sauce preparation, and the final toss.
2. Balanced sweet heat
The glaze stays balanced because honey, garlic, lemon, and sriracha contribute sweetness, savoriness, acidity, and heat in measured amounts.
3. Lightly crisp outside, tender inside
A fine cornstarch coating helps the exterior brown, while a brief finish in the sauce keeps the chicken tender.
4. Dinner or appetizer
Spoon the bites over rice for a complete meal or arrange them with picks and napkins for an easy appetizer.
5. Friendly for newer cooks
Cutting uniform pieces, maintaining moderate heat, and adding garlic only when the pan is ready are the most important techniques.
The recipe is easy to scale for a small meal or party platter, provided the chicken is still seared in uncrowded batches.
Ingredients You’ll Need
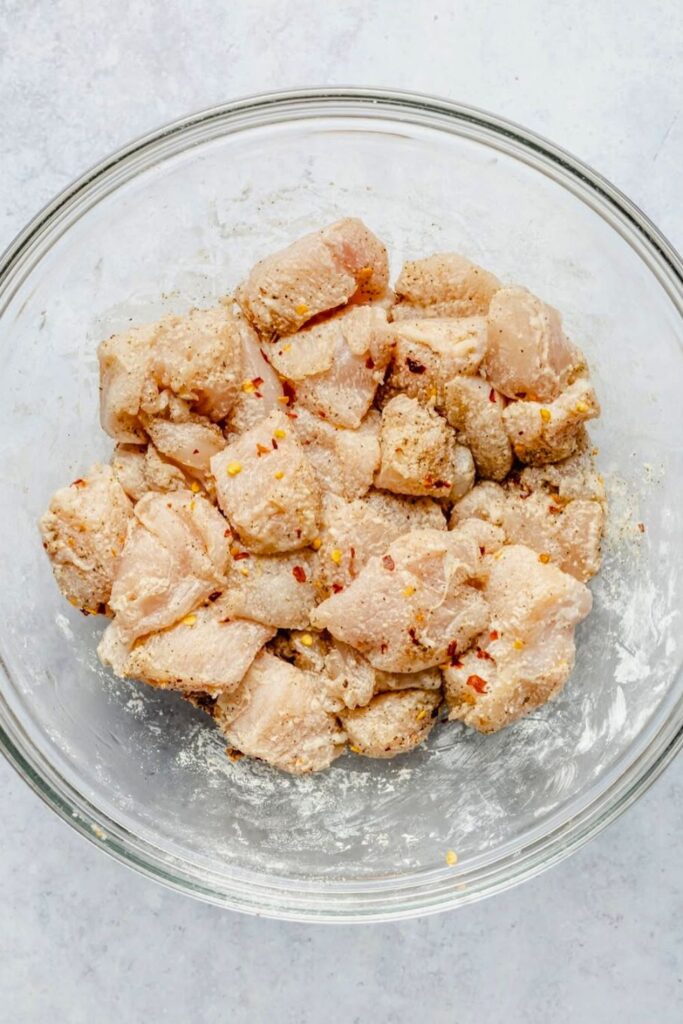
Every ingredient is familiar and easy to find. The table below explains the exact amount and purpose of each one.
| Ingredient | Measurement | Notes |
|---|---|---|
| Chicken breasts | 2 large | Boneless and skinless; cut into even 1-inch cubes. |
| Cornstarch | 2 tbsp | Creates a light coating that encourages browning. |
| Kosher salt | 1/2 tsp | Measure before handling the raw chicken. |
| Black pepper | 1 tsp | Freshly ground pepper gives the best aroma. |
| Olive oil | 1 tbsp | Distributes heat during searing. |
| Butter | 1 tbsp | Adds flavor; lower the heat if it browns too quickly. |
| Garlic, minced | 4 cloves | Add to the sauce and stir so it does not scorch. |
| Chicken broth or stock | 1/4 cup | Loosens the browned bits and forms the sauce base. |
| Lemon juice | 1 tbsp | Balances the honey with fresh acidity. |
| Honey | 1/4 cup | Supplies the glaze’s sweetness and body. |
| Sriracha | 1 tbsp | Adds gentle heat; adjust carefully to taste. |
| Red chili flakes | 1/2 tsp, for garnish | Optional; serve extra separately for more heat. |
| Fresh parsley | 1 tbsp, chopped | Optional garnish for fresh color and flavor. |
If sriracha is unavailable, use a similar chili sauce and adjust gradually because heat levels vary by brand.
Together, the ingredients create a glaze that is sweet, savory, tangy, garlicky, and lightly spicy without hiding the chicken.
🧑🍳 Step-by-Step Recipe: How to Make Honey Garlic Chicken Bites
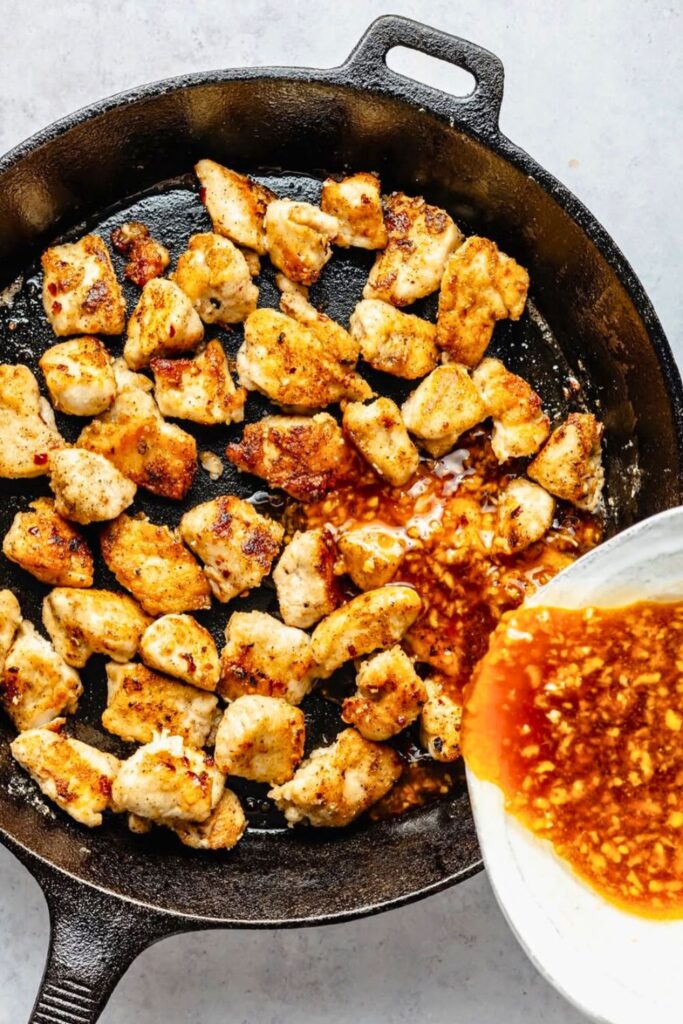
The goal is juicy, fully cooked chicken with a delicate crust and enough sauce to coat each piece.
Work through the process in order, from safe chicken prep to the final garnish.
🔪 Step 1: Clean, Prep, and Cube Your Chicken
Before heating the skillet, organize the cutting board, knife, bowl, and sauce ingredients.
Begin with clean hands and a clean work area
Raw chicken can spread bacteria to hands and surfaces, so keep its prep area separate from ready-to-eat food:
- Wash your hands with soap before and after handling the chicken, then dry them with a clean towel.
- Do not rinse raw chicken; splashing can spread bacteria around the sink and nearby surfaces.
- Use a dedicated board and wash the knife, board, bowl, and counter with hot soapy water after prep.
Keep the hand that touches raw chicken away from spice jars, handles, and phones until it has been washed.
Cut the chicken
Cut two large boneless, skinless chicken breasts into roughly 1-inch pieces:
- Lay each breast flat on a stable cutting board.
- Slice it lengthwise into strips of similar width.
- Cut across the strips to make bite-size cubes.
Consistent sizing helps the pieces finish at nearly the same time; trim especially thick cubes if necessary.
Pieces around 1 inch stay easy to eat while retaining enough thickness to remain juicy.
🧂 Step 2: Season and Coat the Chicken
Now season the chicken and create the recipe’s light exterior coating.
Follow this order:
- Place all of the chicken cubes in a mixing bowl.
- Add 1/2 teaspoon kosher salt and 1 teaspoon freshly ground black pepper.
- Sprinkle over 2 tablespoons cornstarch.
Cross-contamination tip:
Measure seasonings before touching the chicken, or use one clean hand for containers and one hand for mixing.
Toss with clean tongs or a gloved hand until each piece carries a thin, even coating.
The cornstarch should look like a light film rather than a thick breading.
🔥 Step 3: Sear the Chicken to Golden Perfection
This restrained coating helps the surface brown without turning the bites heavy.
Heat a wide skillet as follows:
- Choose a large nonstick or well-seasoned cast-iron skillet.
- Set it over medium-high heat, lowering the heat if the butter begins to brown too fast.
- Add 1 tablespoon olive oil and 1 tablespoon butter.
The oil helps distribute heat and the butter contributes flavor; oil does not prevent butter solids from burning, so control the temperature carefully.
When the butter has melted and the pan is hot but not smoking, begin searing.
Cook the chicken in batches:
- Arrange one layer of pieces with space between them.
- Leave the first side undisturbed for 3 to 4 minutes, until it develops golden color.
- Turn the pieces and cook the second side for another 2 to 3 minutes.
They do not need to reach their final temperature yet because they will return to the hot sauce.
Transfer the first batch to a clean plate and repeat with the remaining chicken.
Depending on the skillet’s width, expect two or three batches and about 10 to 12 minutes total.
🍯 Step 4: Build the Honey Garlic Sauce
With the chicken seared, use the same skillet to make the glaze.
Reduce the heat to medium.
Add these ingredients to the browned bits in the pan:
- 1/4 cup honey
- 1/4 cup chicken broth or stock
- 1 tablespoon lemon juice
- 4 freshly minced garlic cloves
- 1 tablespoon sriracha
Stir with a heat-safe spatula, scraping the bottom as the mixture comes to a gentle simmer.
Keep the sauce moving so the minced garlic softens and becomes fragrant without scorching.
Simmer for 2 to 3 minutes, until the liquid reduces slightly and begins to look glossy.
The sauce will thicken further when it coats the cornstarch-dusted chicken.
🔁 Step 5: Toss the Chicken Back In
Return all of the seared chicken and any collected juices to the skillet.
Finish the recipe by coating and cooking the pieces:
- Turn the chicken through the sauce with tongs or a spatula.
- Simmer for another 2 to 3 minutes, stirring often, until the glaze clings and the thickest pieces reach 165°F (74°C).
Take the skillet off the heat as soon as the chicken is safely cooked so the glaze does not burn.
At this stage, the sauce should be shiny and the chicken should be evenly coated.
🌶️ Step 6: Add Heat and Garnish
Add the optional garnishes after turning off the burner.
Sprinkle with:
- Up to 1/2 teaspoon red chili flakes, or less to taste
- 1 tablespoon chopped fresh parsley
These additions serve two purposes:
- Parsley adds fresh color and a mild herbal note.
- Chili flakes let you increase the heat without changing the entire sauce.
Scatter them evenly, keeping extra flakes on the side for diners who prefer more spice.
🍽️ Step 7: Plate It Like a Pro
A simple rice presentation makes the sticky chicken feel like a complete plated meal.
- Pack hot rice lightly into a small bowl.
- Invert the bowl onto the plate to form a neat mound.
- Spoon the glazed chicken beside or over the rice.
- Drizzle any remaining skillet sauce over the chicken.
- Finish with a little parsley or chili flakes, if using.
The method is straightforward, but the contrast between white rice and the amber glaze makes the plate inviting.
🕒 Timing Breakdown (For Reference)
| Step | Estimated time |
|---|---|
| Prepare and cut chicken | 5 minutes |
| Season and coat | 3 minutes |
| Sear in batches | 10–12 minutes |
| Prepare sauce | 5 minutes |
| Finish and glaze chicken | 3–5 minutes |
| Garnish and plate | 2 minutes |
| Estimated total | About 25–30 minutes |
🍽️ How to Serve Honey Garlic Chicken Bites

Once the chicken is cooked and glazed, choose a serving style that fits the occasion.
Presentation can stay simple
A tidy plate is worthwhile whether dinner is for family, guests, or one person.
For the molded-rice presentation:
- Spoon freshly cooked rice into a small bowl.
- Press only enough to help it hold its shape.
- Turn it onto the serving plate to make a compact mound.
- Arrange a generous portion of honey garlic chicken around or on top.
- Spoon over the extra glaze and add the optional parsley and chili flakes.
Serve immediately while the coating is glossy and the chicken is hot.
Serving ideas
Use these bites in any of the following ways:
- Main dish over:
- Serve over steamed jasmine rice.
- Pair with coconut rice.
- Add to fried rice.
- Serve alongside garlic noodles.
- Try with mashed potatoes for a sweet-savory comfort meal.
- Side dish or appetizer for:
- Set out as part of a potluck dinner.
- Offer on a game-day platter.
- Add to a holiday appetizer spread.
- Pack with suitable cold sides for lunch, keeping the chicken refrigerated until reheating or serving safely chilled.
- In creative ways:
- Tuck into wraps with lettuce and slaw.
- Fill bao buns with chicken and crisp vegetables.
- Build a rice bowl with sautéed vegetables.
- Make small sliders with brioche buns and crunchy slaw.
The bite-size shape and clingy glaze work equally well for a casual dinner and a shareable platter.
🧠 Tips for the Best Chicken Bites
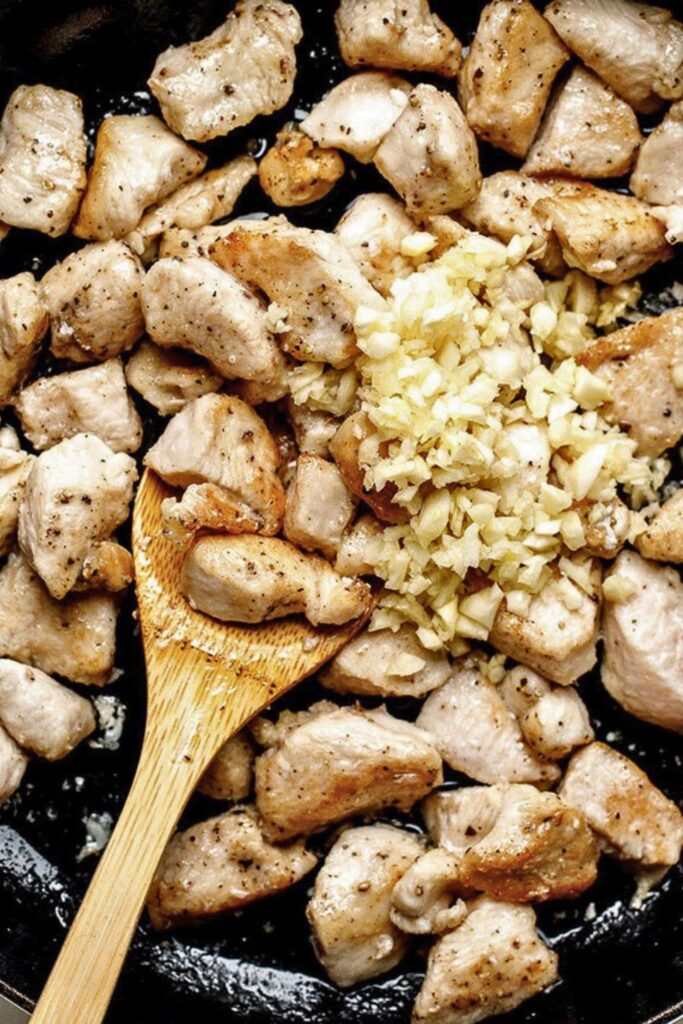
For consistent results, keep these practical points in mind:
- 1. Cut even pieces: Aim for 1-inch cubes so they cook at a similar rate and stay tender.
- 2. Season accurately: Use the listed salt and pepper, then adjust only after tasting the cooked sauce.
- 3. Leave room in the skillet: Batches prevent trapped steam and help each piece brown.
- 4. Watch the butter: Oil spreads heat and butter adds flavor, but the mixture can still burn if the skillet is too hot.
- 5. Measure first: Have the sauce ingredients ready before searing so the garlic never waits in an overheated pan.
🧪 Delicious Variations to Try

After mastering the original version, use the variation table for measured changes while keeping the same safe final temperature.
| Variation | What to change | Result |
|---|---|---|
| Spicier sriracha bites | Increase sriracha gradually and add extra chili flakes at serving. | A hotter glaze with the same sweet-tangy base. |
| Orange garlic chicken | Replace the lemon juice with fresh orange juice and a little zest. | Sweeter citrus aroma and a softer tang. |
| Teriyaki-style garlic bites | Use a tested teriyaki sauce in place of the honey, broth, lemon, and sriracha glaze. | Savory-sweet flavor; check the sauce label for salt. |
| Parmesan garlic bites | Sprinkle finely grated Parmesan over the hot cooked chicken just before serving. | A salty, cheesy finish. |
| Sesame soy bites | Add a measured splash of reduced-sodium soy sauce and a few drops of sesame oil; garnish with sesame seeds. | Nutty and more savory; reduce added salt as needed. |
| Gochujang bites | Replace sriracha with gochujang to taste and add a small splash of soy sauce. | Deeper fermented chili flavor. |
| Extra-crisp bites | Use a slightly heavier cornstarch coating and shallow-fry in controlled batches, following safe hot-oil practices. | A crunchier surface; chicken still must reach 165°F. |
| Lettuce-cup style | Serve the cooked bites in lettuce leaves with carrots, slaw, and optional peanuts. | Fresh crunch around the sticky filling. |
| BBQ bites | Replace the homemade glaze with enough prepared barbecue sauce to coat the cooked chicken. | Smoky and sweet with less chile heat. |
| Lemon pepper chicken | Omit sriracha, increase lemon carefully, and season with cracked pepper. | Bright, peppery, and tangy. |
🌟 Final Thoughts
The finished honey garlic chicken bites are useful whenever you need a flexible skillet recipe with familiar ingredients.
They are:
- Quick enough for a busy evening,
- Attractive enough for a small dinner gathering,
- And adaptable enough to serve in several different formats.
The cornstarch coating, honey-garlic glaze, and careful two-stage cooking create juicy chicken with a lightly crisp surface.
Serve the glazed chicken over rice, inside lettuce cups, or on an appetizer tray, confirming the thickest pieces reach 165°F (74°C).
Refrigerate in shallow containers within 2 hours, or within 1 hour above 90°F (32°C), and use the leftovers within 3 to 4 days.
Honey Garlic Chicken Bites

🍽️ You Might Also Like:
👉 Easy Lemon Pepper Chicken with Garlic Butter Sauce
Bright lemon, cracked pepper, garlic, and butter create a simple skillet chicken dinner.
👉 Cheesy Chicken Stuffed Peppers with Anaheim Peppers
Seasoned chicken and cheese fill colorful peppers for a satisfying make-ahead meal.
👉 P.F. Chang’s-Inspired Chicken Lettuce Wraps
Crisp lettuce cups hold a savory, restaurant-inspired chicken filling with plenty of texture.


Dana Brooks is a home-cooking writer at Feastbears, where she shares easy family recipes, cozy dinners, quick desserts, and beginner-friendly kitchen tips. Her goal is to make everyday cooking feel simple, warm, and enjoyable for busy home cooks.


