
Classic cutout sugar cookies are endlessly adaptable: change the cutter, icing, or color and the same dough fits a new occasion.
This cream-cheese version bakes with a tender center, lightly crisp rim, and smooth decorating surface.
The ingredients are familiar, but accurate measuring and temperature control make a noticeable difference.
Too much flour creates a dry cookie, while warm dough allows detailed shapes to spread.
The original method below preserves the cream-cheese dough and adds practical cues for clean, reliable cutouts.
Plan for both chilling stages before you begin rolling and baking.
Why You’ll Love These Sugar Cookies

These cookies are soft enough to enjoy plain but sturdy enough for detailed decoration.
Several qualities make this recipe especially useful for holiday and celebration baking:
- Soft but sturdy: Tender centers and crisp rims make the cookies pleasant to eat while helping cutouts stay intact.
- Gentle tang: A small amount of cream cheese adds depth and moisture without turning the crumb cakey.
- Bakery-style aroma: Vanilla is the base, and optional almond extract adds a recognizable pastry-shop note.
- Controlled spread: Two chilling stages help stars, hearts, snowflakes, and other shapes retain their outlines.
- Decoration-ready tops: The flat, firm surface works with royal icing, colored sugar, and sprinkles.
The dough can become stars, hearts, snowflakes, animals, letters, or any cutter that suits the event.
Ingredients You’ll Need
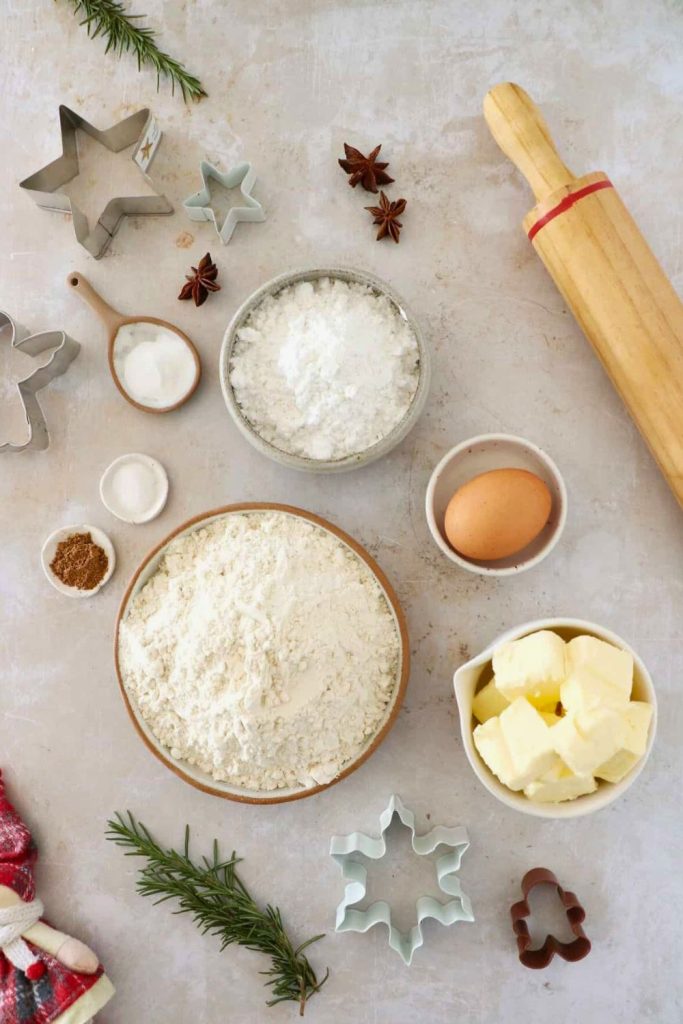
| Ingredient | Amount | Purpose |
|---|---|---|
| Unsalted butter, softened | 1 cup (2 sticks) | Richness and tender texture |
| Cream cheese, softened | 3 ounces | Mild tang and moisture |
| Granulated sugar | 1 cup | Sweetens the pale dough |
| Large egg | 1 | Provides structure |
| Egg yolks | 2 | Add richness and tenderness |
| Vanilla extract | 1 teaspoon | Primary flavoring |
| Almond extract, optional | ½ teaspoon | Adds bakery-style aroma |
| Kosher salt | ½ teaspoon | Balances sweetness |
| All-purpose flour | 2¾ cups | Forms the cookie structure |
| Baking powder | 1 teaspoon | Adds gentle lift |
| Cream of tartar | ½ teaspoon | Limits browning and adds mild tang |
| Optional Royal Icing | ||
| Sifted powdered sugar | 3 cups | Forms the icing base |
| Pasteurized egg whites or prepared meringue-powder mixture | 2 tablespoons equivalent | Allows the icing to dry firm |
| Vanilla or almond extract | ½ teaspoon | Flavors the icing |
| Salt | Pinch | Balances sweetness |
| Water | As needed | Adjusts piping consistency |
| Gel food color | As desired | Adds color with little extra liquid |
How to Make Sugar Cookies (Step-by-Step)
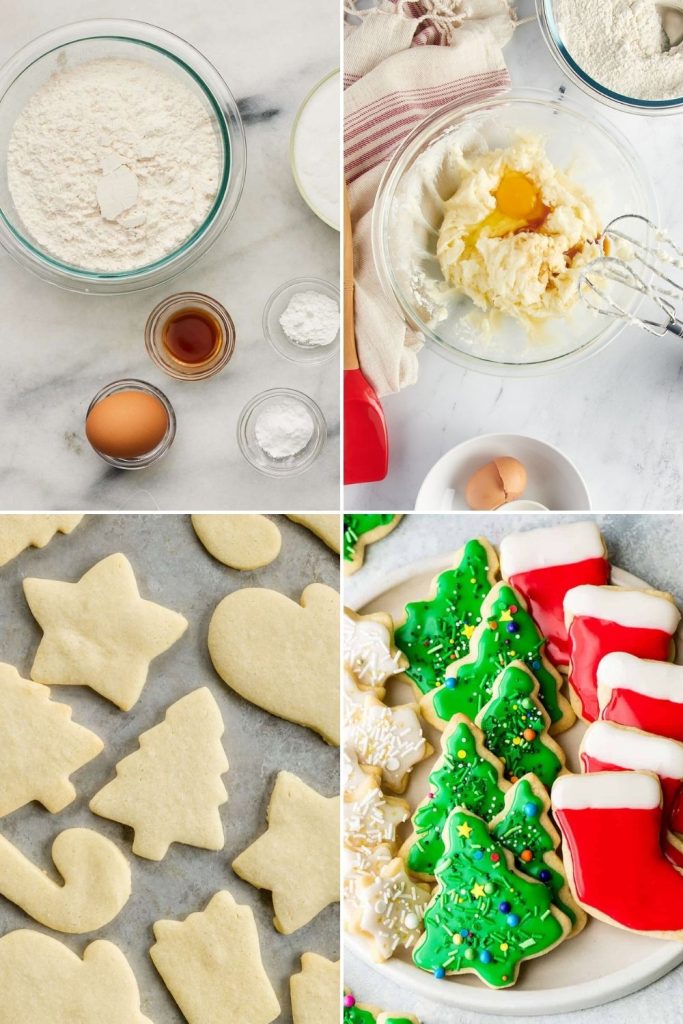
Use this step-by-step method whenever you need cutout cookies that remain tender and keep a clear outline.
Cream cheese adds moisture and subtle tang, while cold butter in the shaped dough controls spread.
Follow the two resting periods closely; they are as important as the mixing itself.
Step 1: Cream Butter, Sugar, and Cream Cheese
Start with butter and cream cheese that are soft enough to blend but not melted or oily.
Beat them with the granulated sugar for about 5 minutes, until visibly paler and lighter.
Thorough creaming disperses sugar and traps tiny air pockets that refine the cookie texture.
Add the whole egg and extra yolks after the butter mixture is fully aerated.
Step 2: Add Eggs and Extracts
The yolks enrich the dough, while vanilla and optional almond extract create its bakery-style aroma.
Because almond extract is concentrated, measure it instead of pouring directly from the bottle.
Whisk the flour, baking powder, salt, and cream of tartar in a separate bowl.
- 1 teaspoon vanilla extract
- ½ teaspoon almond extract, optional
Gradually combine the dry and wet mixtures, stopping as soon as no flour remains visible.
Overmixing develops gluten and can make the baked cutouts tough rather than tender.
Step 3: Combine Dry Ingredients
Flatten the slightly tacky dough into a disc, wrap it well, and refrigerate for at least 2 hours.
- All-purpose flour
- Baking powder
- Kosher salt
- Cream of tartar
Cold dough rolls more cleanly, lifts without stretching, and holds its design in the oven.
The wrapped disc can be made one or two days ahead or frozen for longer storage.
Work with half the chilled dough at a time so the unused portion stays firm.
Step 4: Chill the Dough (Your Future Self Will Thank You)
Lightly flour the counter and rolling pin, then roll to an even ¼-inch thickness.
Rotate the sheet as you work and add flour underneath only when sticking begins.
Cold dough is simpler to roll, cuts more cleanly, and spreads less during baking.
The wrapped dough may be made 1 to 2 days ahead or frozen for up to 2 months.
Step 5: Roll Out the Dough Like a Pro
Dust the cutter edge lightly and press straight down without twisting.
Move each shape carefully to a parchment-lined pan and chill any soft scraps before rerolling.
Refrigerate the filled tray for another 10 to 15 minutes.
This second chill re-firms the butter and protects sharp corners and narrow details.
Bake at 350°F (175°C) for 8 to 10 minutes.
Remove the cookies while the surface is set but still pale; they finish firming as they cool.
Step 6: Cut Out Shapes
Cool briefly on the sheet, then transfer to a rack before decorating.
Royal icing gives completely cooled cookies a smooth finish that dries firm enough for stacking.
Add water only a few drops at a time until the icing reaches the consistency you need.
Keep outline icing thick and thin a separate portion to a slow, honey-like flow for flooding.
Step 7: Chill Again Before Baking
Gel color changes the shade without adding enough liquid to weaken the icing.
Decorate by dipping the face or by piping an outline and filling the center.
Apply sprinkles while the icing is wet, but wait for a base layer to set before adding raised details.
Step 8: Bake to Perfection
Leave decorated cookies uncovered until every icing layer feels dry and firm.
Only then should they be packaged or stacked with parchment between layers.
Reliable cutouts come from cool dough, accurate flour, even rolling, and pale baking.
Use the checklist below to repeat the same soft-centered result from batch to batch.
Decoration can turn this neutral buttery cookie into a dessert for almost any celebration.
Step 9: Make Royal Icing (The Fun Begins)
Match the cutters and colors to the occasion, then keep the designs as simple or detailed as you like.
Combine the following:
- Sifted powdered sugar
- Pasteurized egg whites or a prepared meringue-powder mixture
- Vanilla or almond extract
- A small pinch of salt
- Water, added a few drops at a time
Start with the pasteurized whites or prepared meringue-powder liquid and extract, then incorporate the sifted sugar gradually to avoid lumps.
Beat until smooth. Correct stiff icing with drops of water, or thicken loose icing with additional sifted powdered sugar.
Step 10: Get the Perfect Icing Consistency
Two consistencies cover most decorating tasks:
1. Thick icing
Use this firmer texture for:
- Outlining the cookie
- Piping small details
- Writing and raised layers
Sugar cookies combine gentle buttery flavor with unlimited shapes, colors, and decorating styles.
The recipe works for family projects, gifts, parties, or a small weekend batch.
Keep the dough cold, roll evenly, and decorate only after the cookies are completely cool.
- Filling a piped outline
- Dipping the top for a smooth coat
A successful batch tastes rich, holds its design, and stays tender inside.
Tint with gel color, which adds strong color without much liquid, and cover every bowl or bag between uses because royal icing dries quickly.
Step 11: Decorate Like a Pro
Choose between two straightforward decorating methods:
Option 1: Dip
Lower the face of a completely cooled cookie into flood icing, let the excess drain, and place it on a rack to level and dry.
Option 2: Outline and flood
- Pipe a border with thick icing.
- Let the border stand for 10 to 15 minutes to create a firm boundary.
- Fill the center with flood icing using a bag or spoon.
- Guide the icing into corners with a toothpick.
Apply sprinkles or sugar crystals while the surface is wet. For layered piping, wait until the base is set enough not to smear.
Step 12: Let Them Set and Admire Your Work
Leave the decorated cookies uncovered until the icing is completely dry; humidity and thick layers can extend the process to several hours.
A dry surface should look smooth and feel firm. Wait at least 20 to 30 minutes between decorative stages, and longer for heavy piping.
Once set, the cookies are ready to display, package, or stack with protective parchment.
Tips for Perfect Sugar Cookies Every Time

Sugar-cookie success depends on a handful of repeatable details.
Use this checklist for clean shapes, good flavor, and soft centers:
- Soften, do not melt: Room-temperature butter and cream cheese cream smoothly and trap air; melted butter encourages flat, greasy cookies.
- Complete both chills: Cold dough rolls cleanly and retains the outline of every cutter.
- Measure flour correctly: Spoon it into the cup and level it, or weigh it, to avoid a dry, dense cookie.
- Limit mixing: Once the dry ingredients disappear, stop to keep gluten development low.
- Keep the dough cool: Refrigerate it for 10 minutes whenever it becomes sticky, shiny, or difficult to lift.
- Line the pans: Parchment or silicone promotes even baking and releases the cutouts cleanly.
- Watch for pale surfaces: Remove the cookies before the edges take on much color.
- Store airtight: After full cooling and drying, seal the cookies to preserve freshness.
Fun Decorating Ideas

Decoration turns the same neutral cookie into a dessert for nearly any occasion.
For winter holidays, cut snowflakes, trees, or gingerbread people, then use red, green, and white icing with a small amount of edible sparkle.
For Valentine’s Day, pipe pink and red hearts or short messages with a fine tip.
For birthdays, combine bright icing, confetti sprinkles, and playful stars, balloons, or cupcake shapes.
For a restrained design, use white icing with a small piece of gold leaf or a narrow chocolate drizzle.
At a gathering, set out bags of icing, sprinkles, small candies, and edible markers so guests can decorate their own cookies.
Perfect symmetry is unnecessary; varied lines and colors make a handmade batch feel personal.
Troubleshooting Common Mistakes
| Problem | Likely Cause | Fix |
|---|---|---|
| Cookies spread too much | Dough or shaped cookies were too warm | Complete both chilling stages and bake on a cool sheet |
| Cookies brown too deeply | Overbaking or an oven running hot | Remove them while pale and verify temperature with an oven thermometer |
| Cookies are dry or tough | Too much flour or excessive mixing | Weigh or spoon-and-level flour; stop mixing when combined |
| Dough sticks while rolling | The butter has softened or the dough needs more cold time | Chill for 10 minutes and flour the surface lightly |
| Icing will not set | Too much water or high humidity | Add sifted sugar and allow extra drying time in a cool room |
| Icing colors bleed | The base coat was still wet | Let each layer dry before applying another color |
| Cookies taste flat | Not enough extract or salt | Measure the flavoring and include the stated kosher salt |
| Shapes look uneven | Uneven rolling or warm dough | Roll to ¼ inch evenly and re-chill before cutting or baking |
Final Thoughts
Sugar cookies combine a simple buttery flavor with nearly unlimited shapes and decoration.
The recipe works for family baking, neighbor gifts, celebrations, or a small personal batch.
Keep the dough cold, roll it evenly, and enjoy the decorating after the cookies cool.
The most satisfying batch is one that tastes good, keeps its shape, and is shared while fresh.
Sugar Cookies

More Recipes You’ll Love
If you enjoyed these cutouts, continue with these related FeastBears recipes:
- 🧈 25-Min Garlic Mashed Potatoes Recipe for Busy Days — Make a fluffy, garlicky side for weeknights or holiday dinners.
- 🍪 Classic Gingerbread Cookies Recipe for Holidays — Bake warmly spiced molasses cutouts for decorating.
- ✨ Quick & Chewy Snickerdoodle Cookies Recipe — Try tender cookies with a crackled cinnamon-sugar coating.
Each linked recipe offers a different kind of comfort, from a savory side to two more classic cookies.

Dana Brooks is a home-cooking writer at Feastbears, where she shares easy family recipes, cozy dinners, quick desserts, and beginner-friendly kitchen tips. Her goal is to make everyday cooking feel simple, warm, and enjoyable for busy home cooks.


